Easy Texas Trash Dip: The Ultimate Crowd-Pleasing Party Appetizer
Imagine a bubbling, golden-brown dip so packed with flavor that it disappears within minutes at any gathering. This Easy Texas Trash Dip is precisely that legendary party starter. Furthermore, it combines creamy cheeses, hearty beans, zesty tomatoes, and savory ground beef into one irresistible dish. Consequently, it delivers a symphony of textures and tastes in every single scoop. Ultimately, this recipe earns its playful name from the “everything but the kitchen sink” approach, guaranteeing a memorable appetizer.
This dip masterfully balances richness with a satisfying kick. For instance, the melted cream cheese and sour cream create a luxurious, velvety base. Meanwhile, the taco seasoning and green chiles infuse a warm, southwestern zest. Additionally, the layers of beans and meat provide a substantial heartiness. As a result, this dip stands out as a complete snack that feels almost like a meal. Traditionally, it serves as the centerpiece for game day spreads, potlucks, and casual get-togethers.
Preparing this crowd favorite requires minimal effort for maximum reward. Essentially, you simply brown the meat, mix the ingredients, and bake until perfectly bubbly. Therefore, even novice cooks can achieve spectacular results. The beauty of this Easy Texas Trash Dip lies in its forgiving nature and flexibility. You can easily adapt it to suit different tastes or dietary needs. In the end, you will have a hot, comforting, and universally loved appetizer ready to delight your guests.
Quick Recipe Highlights
- Flavor Profile: This dip boasts a robust, savory flavor with creamy, cheesy notes and a subtle kick from taco seasoning and green chiles. The combination of ground beef and refried beans creates a deeply satisfying, meaty base that is perfectly balanced by the tang of sour cream and tomatoes.
- Texture: Expect a wonderfully complex texture that is both creamy and chunky. The melted cheeses and sour cream provide a smooth, luxurious mouthfeel, while the beans, meat, and diced tomatoes offer pleasant, substantial bites that make the dip hearty and scoopable.
- Aroma: While baking, the kitchen fills with an irresistible aroma of toasted spices, browning cheese, and savory beef. This fragrant bouquet is a classic signal of comforting, crowd-pleasing party food that builds anticipation before the first bite.
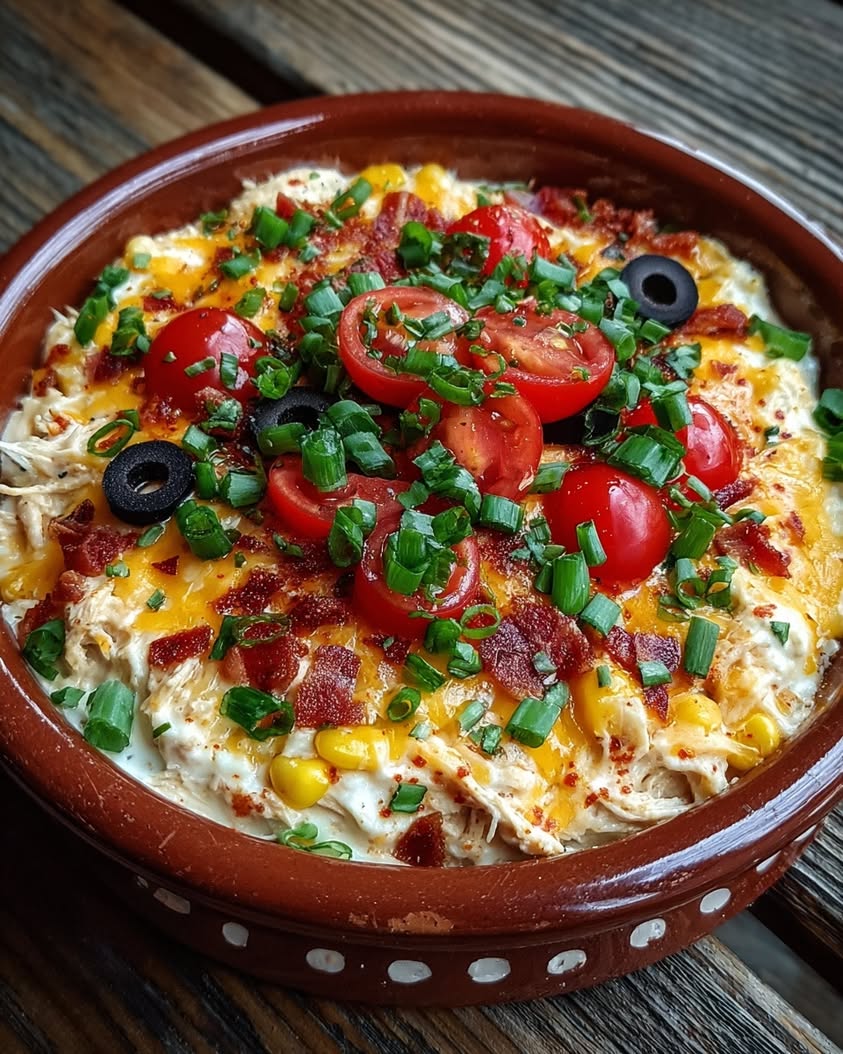
- Visual Appeal: The dip presents a gorgeous, golden-brown, bubbly surface flecked with vibrant red tomatoes and green chiles. Served in a colorful dish with a ring of tortilla chips, it creates a festive and inviting centerpiece for any snack table.
- Skill Level Needed: This recipe is designed for absolute beginners. It involves basic techniques like browning meat and mixing ingredients. No advanced culinary skills are required, making it an accessible and foolproof choice for anyone hosting a party.
- Special Equipment: You only need common kitchen tools: a skillet for browning meat, a mixing bowl, and a 9×13 inch baking dish. A hand mixer can help blend the cream cheese smoothly, but a sturdy spoon and some elbow grease work perfectly fine.
Recipe Overview
- Difficulty Level: We classify this Easy Texas Trash Dip as “Easy” because it uses straightforward, common ingredients and simple, sequential steps. There is no intricate knife work, precise tempering, or complex techniques. The process is essentially dump, mix, and bake, which is ideal for stressful party prep.
- Category: This dish firmly belongs in the appetizer and snack category, specifically designed for sharing. It can also function as a hearty game day food or a casual potluck contribution. Its substantial nature sometimes allows it to stand in as a light meal with a salad.
- Cuisine: The recipe draws strong inspiration from Tex-Mex and Southwestern American cuisine, evident in its use of taco seasoning, refried beans, and green chiles. However, it is a distinctly American party creation, evolving from community gatherings and tailgate culture rather than any single traditional cuisine.
- Cost: This is a very cost-effective recipe. It utilizes affordable pantry staples like canned beans and tomatoes, along with budget-friendly proteins like ground beef. The dairy ingredients are common and often on hand. Overall, it feeds a large crowd for a relatively small investment.
- Season: This dip is truly a year-round champion. It is especially popular in fall and winter for football season and holiday parties, offering warm, comforting flavors. Conversely, it also works for summer barbecues and picnics, as it can be served warm or at room temperature.
- Occasion: It is the quintessential party food for Super Bowl Sunday, playoff games, and any sports viewing event. Additionally, it excels at potlucks, birthday parties, book clubs, and casual family gatherings where a hearty, shareable snack is the main attraction.
Why You’ll Love This Recipe
First and foremost, the taste and texture of this Easy Texas Trash Dip are utterly addictive. Each bite delivers a perfect harmony of creamy, cheesy richness and hearty, savory depth. The subtle spice from the taco seasoning and green chiles lingers pleasantly without overwhelming the palate. Moreover, the contrast between the smooth base and the chunky beans and meat creates a satisfying mouthfeel. This complex flavor profile ensures that guests will keep coming back for just one more scoop, making it the star of any snack table.
From a practical standpoint, the convenience of this recipe is a major win. You can assemble the entire dip in about fifteen minutes of active prep time. Furthermore, the ingredients are simple, easy to find, and often already in your pantry. The baking step is largely hands-off, freeing you to attend to other party preparations or guests. This Easy Texas Trash Dip is famously forgiving, allowing for numerous substitutions without compromising the final product. Therefore, it reduces pre-party stress and guarantees a successful outcome every single time.
While not a health food, this appetizer does offer some nutritional advantages when enjoyed in moderation. For example, the beans provide a good source of plant-based protein and fiber, which aids in satiety. The tomatoes contribute vitamins A and C, along with lycopene. Using lean ground beef can help manage fat content. When served with whole-grain or baked tortilla chips, you add complex carbohydrates. Ultimately, it is a balanced snack option that fuels a fun gathering.
The social and entertaining value of this dip cannot be overstated. It naturally encourages gathering around the table, fostering conversation and a shared experience. A hot, bubbling dish of Easy Texas Trash Dip creates a warm, welcoming atmosphere. It is a universal crowd-pleaser that appeals to both kids and adults, eliminating the need to prepare multiple separate dishes. Serving this dip signals that a good, relaxed time is the priority, making you a legendary host.
Finally, this recipe is incredibly cost-effective and accessible. It feeds a large group for a fraction of the cost of store-bought party platters or restaurant appetizers. The ingredients are budget-friendly and have a long shelf life. You can easily scale the recipe up or down based on your guest count. This accessibility means that anyone, regardless of cooking experience or budget, can create a spectacular party centerpiece. This Easy Texas Trash Dip proves that impressive entertaining doesn’t require expensive or complicated cooking.
Historical Background and Cultural Significance
The origin story of Texas Trash Dip is wonderfully informal, mirroring the dish itself. It likely emerged in the mid-to-late 20th century within American home kitchens and community cookbooks, particularly in the Southwest. The name “Trash” or “Garbage” dip is a tongue-in-cheek reference to the “everything but the kitchen sink” method of preparation. Cooks would combine leftover beans, bits of meat, cheese, and canned goods into a hearty, economical dip. This resourcefulness transformed potential food waste into a beloved party staple, embodying a practical and communal spirit.
Culturally, this dip holds significant importance as a cornerstone of American party and tailgate food. It represents a specific era of casual entertaining centered around television sports, potlucks, and neighborhood gatherings. The recipe spread rapidly through word of mouth, church suppers, and family reunions, becoming a shared cultural touchstone. Its association with football, especially in Texas and across the South, cemented its status as essential game day food. The dish symbolizes hospitality, abundance, and the joy of sharing simple, satisfying food with friends and family.
The evolution of the recipe showcases American culinary adaptability. The earliest versions were likely simpler, perhaps just layered canned ingredients baked with cheese. Over time, additions like cream cheese for extra creaminess, specific spice blends like taco seasoning, and fresh garnishes became standard. The protein has evolved from strictly ground beef to include sausage, chicken, or even vegetarian crumbles. Each family or community added its own twist, leading to the numerous variations enjoyed today. This evolution reflects how home cooks continuously refine and personalize recipes to suit their tastes.
Regional variations of this dip are plentiful and reflect local tastes. In some areas, “Mexican Layer Dip” is a close cousin, served cold with distinct, unmixed layers. Other regions add a layer of guacamole or use black beans instead of refried beans. Some cooks incorporate a layer of seasoned rice for extra heft. In certain variations, the addition of chopped onions, bell peppers, or jalapeños directly into the mix adds more texture and heat. These adaptations prove the recipe’s incredible flexibility and its role as a canvas for regional and personal flavor preferences.
Ingredient Deep Dive
Cream Cheese: This ingredient is crucial for creating the dip’s signature rich, creamy, and velvety base. Culturally, cream cheese became a staple in American dips in the post-war era with the rise of convenient, packaged foods. Nutritionally, it provides fat and protein, contributing to the dip’s satisfying mouthfeel and helping it hold its structure when baked. For best results, ensure your cream cheese is fully softened to room temperature; this prevents lumpiness and allows for smooth blending with the sour cream and other ingredients.
Refried Beans: Refried beans are a cornerstone of Tex-Mex cuisine, traditionally made by mashing and frying pinto beans. They provide the hearty, earthy foundation and thick texture that makes this dip substantial. They are an excellent source of plant-based protein and fiber, which helps balance the richer dairy components. When selecting them, you can choose traditional, vegetarian, or fat-free varieties based on your dietary needs. For a smoother integration, give the can a good stir before adding to break up any dense clumps.
Ground Beef: Ground beef adds savory, meaty depth and makes the dip feel like a complete snack. In American cooking, it’s a symbol of affordability and heartiness. Using a leaner blend (90/10) can help manage excess grease, which you should drain thoroughly after browning. This step is essential to prevent a greasy final product. For added flavor, brown the beef well until it develops some crispy bits, and season it lightly even before adding the taco seasoning.
Taco Seasoning: This convenient blend is the flavor engine of the dip, providing chili powder, cumin, garlic, and onion powders in one shake. It represents the commercialization and popularization of Tex-Mex flavors across America. While store-bought packets work perfectly, you can make a homemade blend to control salt and spice levels. Toasting the seasoning with the drained beef for a minute before adding other ingredients helps “bloom” the spices, releasing their full aromatic potential.
Diced Tomatoes & Green Chiles (Rotel): This canned product is a Southern and Southwestern pantry hero. The tomatoes add acidity and brightness that cut through the richness, while the green chiles provide a mild, tangy heat. Draining them well is a critical step; excess liquid can make the dip runny. The vibrant red and green specks also contribute significantly to the dip’s festive visual appeal. For a different flavor, try the “Mexican” or “Hot” varieties of this product.
Common Mistakes to Avoid
- Not Draining Ingredients: Failing to drain the canned tomatoes and green chiles, or the cooked ground beef, is the top mistake. Excess moisture will steam in the oven instead of evaporating, resulting in a watery, separated dip that lacks the desired thick, scoopable consistency.
- Using Cold Cream Cheese: Adding cold, hard cream cheese directly from the fridge will lead to a lumpy, uneven base. It will not blend smoothly with the sour cream, leaving unpleasant chunks in your finished dip. Always plan ahead to let it soften on the counter.
- Overlooking Seasoning Layers: Forgetting to season the ground beef with a little salt and pepper while browning, and relying solely on the taco seasoning packet, can result in a bland meat layer. Building flavor in each component creates a more complex final taste.
- Skipping the Beef Browning Step: Simply crumbling raw beef into the mix is insufficient. Properly browning the meat creates fond (those tasty browned bits) in the pan and develops a deeper, richer, savory flavor that permeates the entire dish.
- Overbaking the Dip: The goal is a hot, bubbly dip with melted cheese, not a dried-out casserole. Baking for too long can cause the dairy to separate and the edges to become tough. Bake just until the center is hot and the cheese is melted and lightly golden.
- Undermixing the Cream Cheese Layer: If the cream cheese and sour cream are not thoroughly combined until completely smooth, you risk having pockets of thick, unmixed cream cheese in your baked dip. Take the time to achieve a homogeneous, creamy mixture.
- Using Pre-Shredded Cheese Exclusively: While convenient, pre-shredded cheese contains anti-caking agents that can prevent it from melting as smoothly and cohesively as cheese you shred yourself. For the creamiest top layer, shred your own cheese from a block.
- Forgetting to Taste Before Baking: Once everything is mixed, taste a small spoonful (remembering the beef is cooked). This is your last chance to adjust seasoning. You might find it needs a pinch more salt, a squeeze of lime, or an extra pinch of cumin.
Essential Techniques
Properly Browning Ground Beef: This technique is vital for developing deep, savory flavor, not just cooking the meat through. Start by heating your skillet over medium-high heat. Add the beef and break it into small crumbles with a spatula. Resist the urge to stir constantly; let it sit to develop a brown crust on one side before turning. Once fully browned and no pink remains, drain the fat thoroughly in a colander. This step removes excess grease that would otherwise make the dip oily.
Blooming Spices: After draining the beef, return it to the hot skillet and sprinkle the taco seasoning over it. Stir and cook for about 60 seconds. This process, called “blooming,” toasts the dried spices in the residual meat fat. Consequently, it unlocks their essential oils and intensifies their aroma and flavor. This simple minute of extra cooking distributes the seasoning more effectively throughout the meat, ensuring every bite is well-seasoned.
Achieving a Smooth Cream Cheese Base: The success of the creamy layer hinges on fully softened cream cheese. Leave the brick on the counter for at least an hour. In a mixing bowl, combine it with the sour cream. Use a hand mixer on medium speed or a sturdy wooden spoon to beat them together until no lumps remain and the mixture is perfectly smooth and homogeneous. A lumpy base will not integrate properly with the other layers during baking.
Layering for Optimal Texture: While you will mix most ingredients, the order of assembly matters. Spread the creamy base evenly in the baking dish first. This creates a barrier that can help prevent a soggy bottom. Next, carefully spread the bean layer, followed by the seasoned meat mixture. Finally, top with the drained tomatoes and cheese. This structured approach helps the ingredients heat evenly and maintain some textural distinction.
Pro Tips for Perfect Easy Texas Trash Dip
First, for the absolute creamiest texture, use full-fat cream cheese and sour cream. The higher fat content melts more smoothly and creates a richer, more luxurious mouthfeel that holds up better to the hearty mix-ins.
Second, consider browning a tablespoon of tomato paste with the drained beef and taco seasoning. This adds a concentrated umami depth and a slight sweetness that beautifully complements the other flavors.
Third, let the assembled dip sit at room temperature for 15-20 minutes before baking if your ingredients were cold. This prevents the center from being ice-cold when the top is already browned, ensuring even heating throughout.
Fourth, for a more complex flavor, use half ground beef and half spicy breakfast sausage. The sausage adds herbal notes and a different kind of savory spice that elevates the entire dish.
Fifth, add a hidden layer. Spread a thin layer of guacamole or mashed avocado between the bean and meat layers before baking. It adds creaminess and freshness, though it may darken slightly.
Sixth, finish with fresh garnishes after baking. A sprinkle of chopped fresh cilantro, sliced green onions, or a drizzle of crema adds color, freshness, and a professional touch that wows guests.
Seventh, if making ahead, assemble the dip completely, cover, and refrigerate. Add an extra 10-15 minutes to the baking time since you are starting with a cold dish straight from the fridge.
Eighth, for easy cleanup and serving, consider using a disposable foil baking pan. This is especially useful for tailgates or potlucks where you might not get your dish back immediately.
Variations and Adaptations
Regional Variations: Across different areas, this dip takes on local character. In some places, it’s made with a base of spicy chorizo instead of ground beef. Other regions add a distinct layer of seasoned ground turkey or shredded rotisserie chicken. A popular cold-layer variation omits the beef entirely, featuring refried beans, guacamole, sour cream, cheese, and tomatoes in neat, unmixed strata.
Seasonal Adaptations: For summer, incorporate fresh, sweet corn kernels or diced roasted poblano peppers. In the fall, a pinch of smoked paprika can add a cozy, autumnal warmth. For a holiday twist, use green and red diced tomatoes for a festive color scheme, or add a topping of crispy fried onions for texture.
Dietary Modifications: For a gluten-free version, ensure your taco seasoning and all canned ingredients are certified gluten-free. To make it vegetarian, replace the ground beef with a plant-based crumble or an extra can of black beans. A dairy-free version can use vegan cream cheese, sour cream, and shredded cheese alternatives.
Flavor Variations: Experiment with different seasoning blends. Use fajita seasoning, chili powder, or a homemade blend with extra cumin and chipotle powder for smoke. Incorporate a few tablespoons of pickled jalapeño juice into the cream cheese layer for tangy heat. Stir in a cup of cooked, crumbled bacon for a smoky, salty punch.
Texture Modifications: For a smoother dip, use an immersion blender to partially puree the bean and meat layer before adding the tomatoes. For more chunk, add a layer of whole black beans or pinto beans on top of the refried beans. Mix in a cup of crispy tortilla strip salad toppers just before serving for a surprising crunch.
Presentation Alternatives: Instead of one large dish, bake individual portions in small ramekins or oven-safe mason jars for a personalized touch. For a buffet, serve the dip in a hollowed-out bread bowl or a colorful ceramic skillet. Layer the ingredients in a clear trifle dish for a stunning visual effect before mixing at the table.
Serving and Presentation Guide
Plating Techniques: Serve the dip directly in the baking dish for a rustic, communal feel. Place the hot dish on a trivet or a larger platter to protect your table. Surround the dish generously with an assortment of dippers, creating a full and inviting presentation. For a more refined look, transfer the baked dip to a clean, pre-warmed serving bowl before bringing it to the table.
Garnishing Ideas: Fresh garnishes added post-bake are essential for visual pop and fresh flavor. A generous scattering of chopped fresh cilantro or thinly sliced green onions adds vibrant green color. A drizzle of Mexican crema, sour cream, or even a zigzag of sriracha creates attractive contrast. A final sprinkle of cotija cheese or a few reserved whole green chiles makes it look professionally finished.
Traditional Accompaniments: Sturdy, salty tortilla chips are the classic and non-negotiable vehicle for this dip. Offer a variety: thick restaurant-style chips for heavy scooping, thin yellow corn chips for a lighter bite, and hint-of-lime chips for extra zest. Warm, soft flour tortillas cut into wedges or small, crunchy Fritos Scoops are also excellent traditional choices.
Modern Serving Suggestions: Think beyond chips. Serve with crisp vegetable crudités like bell pepper strips, jicama sticks, and cucumber rounds for a lighter option. Thick, homemade pita chips or crispy baguette slices offer a different texture. For a fun twist, provide small spoons and let guests use the dip as a topping for baked potatoes or nacho plates they build themselves.
Temperature Considerations: This Easy Texas Trash Dip is best served piping hot from the oven, when the cheese is stretchy and the center is bubbling. However, it holds its heat well. If serving over a long period, consider using a slow cooker on the “warm” setting to keep it at the perfect temperature without continuing to cook it.
Portion Control Tips: While it’s tempting to dig in, provide a dedicated serving spoon or spatula to keep the presentation neat. For large parties, consider having two smaller dishes of dip in different locations to prevent a bottleneck around one table. Remind guests that it’s rich and hearty, so a little goes a long way, ensuring everyone gets a taste.
Wine and Beverage Pairing
Wine Pairings: The rich, savory, and slightly spicy profile of this dip calls for wines with good acidity to cut through the fat. A crisp, citrusy Sauvignon Blanc or a dry Riesling works beautifully. For red wine lovers, a fruity, low-tannin Zinfandel or a Spanish Garnacha complements the spices without overwhelming the palate. Avoid heavily oaked Chardonnays or bold, tannic Cabernets, as they can clash with the dip’s flavors.
Non-Alcoholic Alternatives: Sparkling water with a squeeze of lime or a splash of cranberry juice provides a refreshing, palate-cleansing effervescence. Iced hibiscus tea (agua de jamaica) offers a tart, fruity counterpoint. For a creamy option, a virgin lime margarita mocktail with a salted rim mimics the classic pairing without the alcohol.
Beer and Cider Pairings: Beer is a classic game day partner. A light, crisp Mexican lager like Corona or Modelo (with lime) is a perfect match. The dip also stands up well to amber ales or wheat beers. For something different, a dry, hard apple cider cuts through the richness with bright, sharp apple notes that contrast the savory elements delightfully.
Cocktail Suggestions: A classic margarita on the rocks, whether traditional or strawberry, is an iconic pairing. The citrus and tequila cut through the cheese and fat perfectly. A Paloma (grapefruit soda and tequila) is another excellent, refreshing choice. For a simpler option, a cold Mexican beer with a shot of lime juice and a pinch of salt dropped in (a Michelada) is a bold, savory companion.
Storage and Shelf Life
Storage Methods: Allow any leftover dip to cool completely to room temperature before storing. Transfer it to an airtight container. You can also leave it in the baking dish if you cover the surface directly with plastic wrap, then seal the entire dish with a lid or foil. This prevents the dip from absorbing other refrigerator odors and keeps it from drying out.
Temperature Requirements: Leftover dip must be refrigerated promptly and kept at or below 40°F (4°C). Do not leave the dip sitting out at room temperature for more than two hours, as the dairy and meat components can enter the “danger zone” where bacteria multiply rapidly. Always reheat leftovers to an internal temperature of 165°F (74°C).
Container Recommendations: Shallow, airtight containers are ideal, as they allow the dip to cool quickly and evenly. Glass containers with locking lids are excellent because they don’t retain odors and are microwave-safe for reheating. If using the original baking dish, ensure the plastic wrap makes direct contact with the surface of the dip to minimize air exposure.
Signs of Spoilage: Before consuming leftovers, inspect the dip carefully. Discard it if you notice an off or sour smell, significant discoloration (like dark gray or green mold spots), or an unusual, slimy texture. If the dip was left out too long or you have any doubt about its safety, it is always better to err on the side of caution and throw it away.
Reheating Instructions: For best results, reheat leftovers in the oven. Preheat to 350°F (175°C), place the dip in an oven-safe dish, cover with foil, and bake for 15-20 minutes until hot throughout. You can also reheat smaller portions in the microwave. Use a microwave-safe dish, cover loosely, and heat in 60-second intervals, stirring in between, until uniformly hot.
Freezing Guidelines: This dip can be frozen, though the texture of the dairy may become slightly grainy upon thawing. To freeze, place cooled dip in a freezer-safe, airtight container, leaving some space for expansion. It will keep for up to 2 months. Thaw overnight in the refrigerator before reheating thoroughly in the oven, stirring well to recombine any separated liquids.
Make Ahead Strategies
Prep Timeline: You can fully assemble this dip 1-2 days in advance. Simply follow all steps through layering the ingredients in the baking dish and topping with cheese. Do not bake it. Cover the dish tightly with plastic wrap and then foil, and refrigerate. This allows the flavors to meld beautifully, often resulting in an even tastier final product.
Storage Between Steps: If prepping components separately, store the cooked and seasoned ground beef in one container, the blended cream cheese mixture in another, and keep the canned ingredients drained and ready. This modular approach lets you assemble in minutes when needed. All components will keep well in the fridge for 2-3 days.
Quality Impact Assessment: Making this Easy Texas Trash Dip ahead has a positive impact on flavor, as the spices permeate the other ingredients. The texture may release a bit more liquid upon baking due to the tomatoes and beans settling, but this is minimal. The visual appeal remains unchanged once baked and garnished.
Assembly Tips for Make-Ahead: When assembling a cold dish for later baking, press the layers down gently to eliminate air pockets. Ensure the shredded cheese topping completely covers the tomato layer underneath; this creates a protective seal that helps prevent the tomatoes from making the top layer soggy during storage.
Reheating Guidelines for Pre-Assembled Dip: When baking a refrigerated, assembled dish, you must add extra time. Preheat your oven as usual. Remove the plastic wrap, recover with foil, and bake for about 30 minutes. Then, remove the foil and continue baking for an additional 15-20 minutes, or until the center is hot and bubbly and the top is golden brown.
Fresh Element Additions: If making ahead, always add fresh garnishes like cilantro, green onions, or a drizzle of crema after the dip comes out of the oven, just before serving. This ensures they retain their vibrant color, crisp texture, and fresh flavor, providing the perfect finishing touch to your pre-prepared masterpiece.
Scaling Instructions
Halving the Recipe: To make a smaller batch for a family snack, simply divide all ingredient quantities by two. Use an 8×8 inch square baking dish or a 9-inch pie plate. The prep time remains similar, but the cook time may decrease by 5-10 minutes. Check for doneness when the edges are bubbly and the center is hot. This is perfect for avoiding excessive leftovers.
Doubling or Tripling: For a massive crowd, you can confidently double or triple this recipe. Use multiple 9×13 inch dishes or one very large disposable roasting pan. Be mindful that browning the meat may need to be done in batches to avoid steaming. Mixing the cream cheese base in a stand mixer with a paddle attachment is helpful for large quantities. Baking time will increase; start checking at the original time, but it may need up to 50% longer.
Equipment Adjustments: When scaling up, ensure your mixing bowls are large enough. A giant stockpot can serve as a mixing vessel for a triple batch. For baking, if using a deeper, larger pan than specified, the dip will be thicker and will require a longer baking time at a slightly lower temperature (325°F) to heat through without burning the top.
Timing Modifications: The active prep time scales linearly: doubling the ingredients roughly doubles the prep time. However, baking time does not double. A double batch in a standard dish will be deeper, so it requires more time to heat the center. Add 10-15 minutes initially, then check every 5 minutes thereafter until done. The visual cues—bubbly edges, golden top—remain the same.
Storage Considerations for Large Batches: If making a huge batch, consider dividing it into two smaller dishes before baking. Bake one for immediate serving and freeze the other unbaked for a future event. This is more efficient than baking and reheating a giant quantity, and it preserves the fresh-baked quality for your next gathering.
Nutritional Deep Dive
Macro Breakdown: A typical serving of this Easy Texas Trash Dip is rich in fats and proteins, with moderate carbohydrates. The primary fats come from the cheese, sour cream, and ground beef, providing energy and satiety. Proteins are sourced from both the beef and the beans, supporting muscle maintenance. Carbohydrates are present in the beans, tomatoes, and any chips used for dipping, offering fiber and quick energy.
Micronutrient Analysis: This dip provides several key micronutrients. The tomatoes and green chiles are good sources of Vitamin C and lycopene, an antioxidant. Beans contribute iron, magnesium, and folate. Cheese and sour cream provide calcium and Vitamin A. Using lean beef adds zinc and Vitamin B12. While not a primary source of vitamins, it contributes meaningfully to daily intake when part of a balanced diet.
Health Benefits: When consumed in moderation as part of a varied diet, this dish offers benefits. The fiber from the beans promotes digestive health and helps regulate blood sugar. The protein supports fullness, potentially preventing overeating. The lycopene in cooked tomatoes is linked to heart health. Using lean meats and lower-fat dairy options can improve the overall fat profile of the recipe.
Dietary Considerations: This is a hearty, calorie-dense food. Individuals monitoring sodium intake should be cautious, as canned beans, tomatoes, taco seasoning, and cheese contribute significant sodium. Those with lactose intolerance may need dairy-free modifications. For heart-healthy adaptations, use extra-lean beef, low-fat dairy, and reduced-sodium canned goods to align with specific dietary guidelines.
Portion Analysis: A standard serving is about 1/2 cup of dip. This portion provides a satisfying snack without being excessive. Pairing it with vegetable dippers instead of only chips increases volume and nutrients while managing calorie intake. Being mindful of portion size allows you to enjoy this indulgent party food while maintaining balance.
Weight Management Tips: To enjoy this dip while managing weight, focus on portion control using a small plate or bowl. Fill half your plate with vegetable dippers like bell peppers and cucumbers before adding a sensible scoop of dip. Choose baked tortilla chips or whole-grain crackers. Opt for lean ground turkey and reduced-fat dairy products in the recipe to lower the overall calorie and fat content without sacrificing flavor.
Dietary Adaptations
Gluten-Free: This Easy Texas Trash Dip is naturally gluten-free when you verify your ingredients. Ensure the taco seasoning packet is certified gluten-free, as some contain wheat-based fillers. Check labels on refried beans and diced tomatoes for any gluten-containing additives. Serve with certified gluten-free tortilla chips or vegetable crudités for a completely safe option.
Dairy-Free: Create a dairy-free version by substituting equal amounts of vegan cream cheese, vegan sour cream, and dairy-free shredded cheese (such as those made from coconut or cashews). These products have improved dramatically in melt and flavor. Be sure to choose a taco seasoning without dairy derivatives like whey. The result will be similarly creamy and indulgent.
Vegan: For a fully plant-based dip, use a meat substitute like crumbled tofu, tempeh, or a store-bought plant-based ground “meat” seasoned with taco seasoning. Use the dairy-free substitutions mentioned above for the creamy layers. Ensure your refried beans are labeled “vegetarian,” as traditional ones are often made with lard. This creates a compassionate and inclusive party dish.
Low-Carb/Keto: To fit a keto lifestyle, omit the beans entirely, as they are higher in carbs. Increase
Print
Easy Texas Trash Dip
Description
A creamy, cheesy, and savory dip loaded with ground beef, beans, and spices, perfect for parties or game day snacking.
Ingredients
For the Crust:
- 1 lb ground beef
- 1 can (16 oz) refried beans
- 1 packet taco seasoning
- 1 cup sour cream
- 1 cup shredded cheddar cheese
- 1/2 cup salsa
- 1/4 cup chopped green onions
- Tortilla chips for serving
Instructions
1. Prepare the Crust:
- Brown the ground beef in a skillet over medium heat until fully cooked, then drain excess grease.
- Stir in the refried beans and taco seasoning, cooking for 3-4 minutes until heated through.
- Transfer the mixture to a baking dish, then layer with sour cream, salsa, and shredded cheese.
- Bake at 350°F (175°C) for 20-25 minutes until bubbly and cheese is melted.
- Garnish with chopped green onions and serve warm with tortilla chips.
Notes
You can customize the seasonings to taste.
I’m Shaykee—born in Morocco, seasoned across continents. From airplane galleys to home kitchens, I share the flavors and stories that shaped my journey.