Heavenly Raspberry Cheesecake Bars: A No-Bake Summer Sensation
Imagine the perfect summer treat that requires zero oven time yet delivers maximum flavor impact. These heavenly raspberry cheesecake bars achieve exactly that, combining a buttery graham cracker crust with a luxuriously creamy filling and a vibrant raspberry swirl. Each bite offers a symphony of textures and tastes, from the crumbly base to the smooth, rich cheesecake layer, all punctuated by the bright, tangy fruit sauce. This dessert not only looks stunning with its beautiful marbled top but also provides a refreshing coolness that makes it ideal for warm weather gatherings.
Furthermore, this recipe stands out as an incredibly accessible project for bakers of all skill levels. You will appreciate how these no-bake raspberry cheesecake bars come together with simple techniques and common ingredients. The process involves minimal active time, allowing you to create an impressive dessert without spending hours in the kitchen. Meanwhile, the chilling time does all the work, transforming the simple components into a cohesive, sliceable bar that holds its shape beautifully. Consequently, you get a professional-looking result with home kitchen ease.
Ultimately, these bars represent the ideal balance between indulgence and simplicity. The creamy cheesecake filling, made with cream cheese and whipped cream, provides a decadent mouthfeel without being overly heavy. Simultaneously, the homemade raspberry sauce introduces a natural fruitiness that cuts through the richness. This combination creates a dessert that feels special enough for celebrations yet easy enough for a casual weeknight treat. Moreover, the portability of bar desserts makes them perfect for picnics, potlucks, and parties where you want to bring something memorable.
Quick Recipe Highlights
- Flavor Profile: These raspberry cheesecake bars feature a perfect harmony of sweet and tart notes. The rich, creamy cheesecake layer beautifully complements the bright, fruity raspberry swirl. Additionally, the buttery graham cracker crust adds a warm, toasty flavor that grounds the entire dessert.
- Texture: You will experience a delightful textural journey with every bite. The crust provides a firm, crumbly base, while the cheesecake filling offers incredible smoothness and creaminess. Meanwhile, the raspberry swirl introduces slight variation, creating pockets of fruit-forward intensity throughout the bars.
- Aroma: As you prepare these no-bake bars, your kitchen will fill with inviting scents. The graham cracker crust emits a warm, honey-like fragrance when mixed with butter. Furthermore, the raspberry sauce releases a bright, jammy aroma as it cooks, and the cream cheese filling contributes a subtle tangy sweetness.
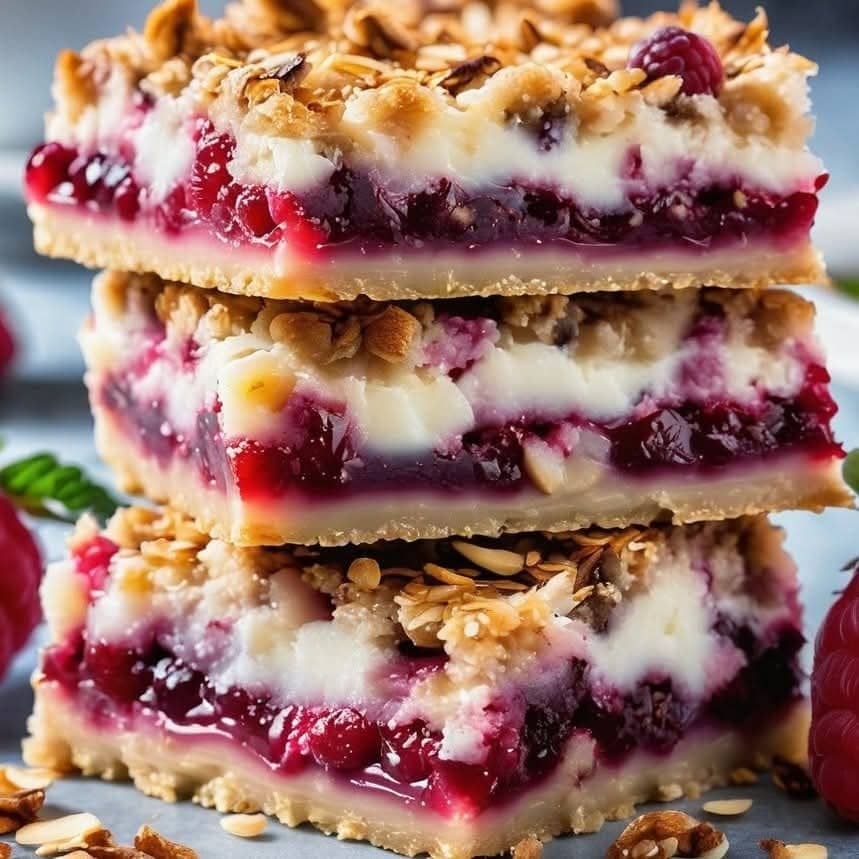
- Visual Appeal: These bars present a truly stunning dessert with impressive visual depth. The vibrant red raspberry swirl creates beautiful marbling patterns against the white cheesecake background. Moreover, the layered construction shows clearly when sliced, revealing the distinct crust, filling, and topping sections that promise complexity in every piece.
- Skill Level Needed: This recipe requires only basic kitchen skills and no specialized baking knowledge. You simply need to mix, spread, and swirl components before chilling. Therefore, even beginner cooks can achieve fantastic results, making these raspberry cheesecake bars an excellent confidence-building project.
- Special Equipment: You will need just a few standard kitchen tools to create these easy dessert bars. Essential items include a food processor or rolling pin for crushing graham crackers, a mixer for the filling, and an 8×8 baking pan for setting the bars. Additionally, a saucepan for the raspberry sauce completes your equipment list.
Recipe Overview
- Difficulty Level: We classify these raspberry cheesecake bars as easy because they require no baking and use straightforward techniques. The most complex step involves making the raspberry swirl, which simply requires cooking frozen berries with sugar and cornstarch. Meanwhile, the crust comes together with melted butter and crumbs, and the filling requires basic mixing. Consequently, even novice cooks can achieve impressive results with this approachable recipe.
- Category: These bars fit perfectly into the dessert category, specifically as a chilled, no-bake treat. They work wonderfully as a sweet ending to meals, as party desserts, or as portable snacks. Furthermore, their elegant appearance makes them suitable for special occasions, while their simplicity allows for regular enjoyment. This versatility ensures they will become a go-to recipe in your collection.
- Cuisine: This recipe draws inspiration from American dessert traditions while incorporating modern no-bake techniques. Cheesecake bars have become a staple of American potlucks and bake sales, representing a convenient twist on classic New York-style cheesecake. Additionally, the raspberry component adds a contemporary fruit-forward element that updates the traditional format. The result is a dessert that feels both familiar and fresh.
- Cost: Creating these raspberry cheesecake bars represents excellent value for money, particularly when considering their impressive presentation. The most significant expenses include cream cheese and frozen raspberries, both of which offer good quality at reasonable prices. Meanwhile, graham crackers, sugar, and butter constitute pantry staples for most home cooks. Therefore, you can create a dessert that serves twelve people for approximately the cost of a single restaurant dessert.
- Season: These no-bake bars shine particularly bright during spring and summer months when oven-free desserts become most appealing. The refreshing quality of chilled cheesecake provides welcome relief from heat, while the vibrant raspberry swirl echoes seasonal fruit abundance. Conversely, they also work well during holidays when kitchen space becomes premium real estate. Ultimately, their year-round appeal makes them a versatile addition to your recipe rotation.
- Occasion: These versatile bars adapt beautifully to numerous occasions, from casual family dinners to formal celebrations. They make perfect additions to holiday dessert tables, birthday parties, and potluck gatherings where transportability matters. Furthermore, their elegant appearance suits bridal showers, afternoon teas, and other special events. Meanwhile, their make-ahead nature reduces stress when entertaining, allowing you to prepare desserts days in advance.
Why You’ll Love This Recipe
First and foremost, the taste and texture experience will completely win you over. These raspberry cheesecake bars deliver that classic cheesecake satisfaction without the complexity of water baths or worrying about cracks. The creamy filling melts luxuriously on your tongue, while the graham cracker crust provides satisfying crunch. Meanwhile, the raspberry swirl introduces bursts of fruity brightness that cut through the richness. This combination creates a perfectly balanced dessert that feels indulgent yet refreshing, making it difficult to stop at just one piece.
From a practical perspective, the convenience factor cannot be overstated. These no-bake raspberry cheesecake bars require minimal active kitchen time, allowing you to create an impressive dessert with surprisingly little effort. You can prepare the entire recipe in about twenty-five minutes of hands-on work before letting the refrigerator do the rest. This approach makes them ideal for busy schedules, hot summer days when you want to avoid oven heat, or last-minute entertaining situations. Furthermore, the cleanup remains remarkably manageable since you use relatively few dishes and utensils.
Nutritionally speaking, these bars offer some advantages over many traditional desserts. Raspberries provide significant dietary fiber, vitamins, and antioxidants, while the protein in cream cheese contributes to satiety. By controlling the ingredients yourself, you can adjust sugar levels to your preference, unlike store-bought versions that often contain excessive sweeteners. Additionally, portion control becomes easier with pre-cut bars, helping you manage serving sizes more effectively than with a whole cheesecake. These factors make the dessert feel slightly more virtuous without sacrificing enjoyment.
Socially, these raspberry cheesecake bars become conversation starters at any gathering. Their beautiful marbled appearance immediately draws attention and compliments, making you look like a pastry pro. The bar format encourages sharing and casual enjoyment, eliminating the formality of plating individual slices. Moreover, they travel exceptionally well for picnics, potlucks, and parties where you want to contribute something special. The recipe easily doubles for larger crowds, ensuring you always have an impressive dessert option for entertaining.
Finally, the cost-effectiveness and accessibility make this recipe a true winner. You can create a dozen beautiful dessert bars for significantly less than purchasing similar items from a bakery. The ingredients remain readily available year-round in most grocery stores, with frozen raspberries working perfectly when fresh aren’t in season. Furthermore, the recipe accommodates various substitutions and adaptations based on what you have available. This flexibility ensures you can whip up these crowd-pleasing bars whenever the craving strikes, without special shopping trips or excessive expense.
Historical Background and Cultural Significance
The story of cheesecake stretches back thousands of years to ancient Greece, where athletes served a simple form of cheese and honey patties during the first Olympic Games. However, the modern cheesecake as we know it emerged in the late 19th century with the development of cream cheese in New York. The no-bake variation gained popularity in mid-20th America as refrigerator technology became commonplace in households. Meanwhile, the bar format evolved from the American tradition of sheet cakes and brownies, representing a convenient, portable approach to dessert serving.
Culturally, cheesecake holds significant importance in American dessert culture, particularly in New York where it became synonymous with Jewish delicatessens and diners. The no-bake version democratized this luxurious dessert, making it accessible to home cooks without specialized baking skills or equipment. Furthermore, the incorporation of fruit swirls reflects the mid-century fascination with gelatin desserts and molded salads, updated with contemporary techniques and ingredients. This evolution demonstrates how desserts transform across generations while maintaining their essential appeal.
The recipe continued evolving through the latter half of the 20th century as convenience foods gained popularity. Graham cracker crusts emerged as a time-saving alternative to traditional pastry crusts, while sweetened condensed milk offered simplified sweetening and setting properties. Meanwhile, the food processor revolution of the 1970s and 1980s made crumb crusts even easier to prepare. These technological and ingredient developments collectively created the foundation for the modern no-bake cheesecake bar we enjoy today.
Regional variations of cheesecake bars appear across the United States, reflecting local ingredients and preferences. In the Midwest, cherry cheesecake bars became popular using the region’s abundant fruit production. Southern versions often incorporate pecans or peaches, while coastal areas might feature key lime or cranberry variations. The raspberry version represents a more contemporary adaptation, capitalizing on the year-round availability of frozen berries and their vibrant color contrast. This regional diversity demonstrates how a basic formula adapts to local tastes and ingredients.
Ingredient Deep Dive
Graham crackers form the foundation of our crust, offering their distinctive honey-kissed flavor and sturdy texture. Originally created in the 19th century as part of a vegetarian diet movement, these crackers have become an American baking staple. Nutritionally, they provide carbohydrates for energy and small amounts of fiber. When selecting graham crackers, look for fresh boxes without broken pieces to ensure even crushing. For storage, keep them in airtight containers to maintain crispness. If you need substitutions, digestive biscuits, vanilla wafers, or shortbread cookies all work beautifully as alternatives.
Cream cheese serves as the star of our filling, providing the luxurious texture and tangy flavor characteristic of cheesecake. This fresh cheese originated in New York in the 1870s and has since become essential to American baking. It offers protein, vitamin A, and some calcium, though it’s also high in fat. Always use full-fat, brick-style cream cheese for best results, as low-fat versions can compromise texture. Store cream cheese refrigerated and use it at room temperature for smooth blending. While no direct substitute replicates its unique properties, mascarpone offers a richer alternative, and Greek yogurt provides a lighter option.
Heavy whipping cream contributes to the light, airy texture of our no-bake filling while adding richness. This high-fat dairy product has been used in desserts for centuries across various cultures. It provides energy-dense nutrition with significant fat content and some vitamin A. For optimal results, use cream with at least 35% milk fat and ensure it’s very cold before whipping. Store it consistently refrigerated and check expiration dates carefully. If unavailable, full-fat coconut cream can serve as a dairy-free alternative, though it will impart slight coconut flavor.
Frozen raspberries create our beautiful swirl, offering vibrant color and tangy fruit flavor. These berries have been cultivated since ancient times, with modern freezing techniques preserving their quality year-round. They deliver excellent nutritional value with high levels of vitamin C, fiber, and antioxidants. When selecting frozen raspberries, choose packages without added sugar or syrup for recipe control. Store them frozen until ready to use, and don’t thaw before making the sauce. Fresh raspberries work during peak season, though frozen often provide better value and consistent quality for cooked applications.
Common Mistakes to Avoid
- Using cold cream cheese: This represents the most common error in no-bake cheesecake preparation. Cold cream cheese won’t blend smoothly, creating lumps throughout your filling. Always ensure your cream cheese sits at room temperature for at least thirty minutes before beginning. This simple step guarantees a silky, homogeneous texture in your final bars.
- Overmixing the filling: While thorough mixing is important, excessive beating can incorporate too much air. This leads to a filling that expands during mixing then deflates during setting, creating density issues. Mix just until ingredients combine smoothly, then stop. This approach preserves the luxurious mouthfeel you want in cheesecake.
- Undercrushing the crust: Graham cracker crumbs that are too coarse won’t bind properly, causing a crumbly base that falls apart. Process the crackers until they resemble fine sand for optimal cohesion. The properly crushed crumbs create a firm foundation that supports the creamy layers above.
- Skipping the chill time: Impatience represents the enemy of perfect no-bake desserts. These raspberry cheesecake bars need adequate time to set properly, typically four hours minimum. Rushing this process results in messy, unsliceable bars. Planning ahead ensures beautiful, clean portions that hold their shape.
- Overcooking the raspberry sauce: While the sauce needs brief cooking to activate the cornstarch, prolonged boiling breaks down the fruit too much. Cook just until thickened, usually two to three minutes. This preserves some fruit texture and bright flavor in your final swirl.
- Spreading crust unevenly: An uneven crust base leads to inconsistent bar thickness and potential structural issues. Press the crumbs firmly and evenly across the pan bottom and slightly up the sides. This creates a uniform foundation for your filling layers.
- Using warm raspberry sauce: Adding hot sauce to the cheesecake filling can begin melting the delicate mixture. Always cool your raspberry sauce completely before swirling it in. This maintains filling integrity while allowing for beautiful marbling patterns.
- Over-swirling the layers: While creating patterns is fun, excessive swirling blends the components too thoroughly. Use a knife to make just a few figure-eight motions through the layers. This technique preserves distinct flavor pockets and visual appeal.
Essential Techniques
Creating the perfect crumb crust requires attention to texture and compression. You must process the graham crackers until they reach a fine, sandy consistency that will bind together properly. The melted butter should coat every crumb thoroughly, creating a mixture that holds together when pressed. Then, firmly press this mixture into your pan using a flat-bottomed cup or measuring cup to achieve even density. This technique ensures a crust that holds together when sliced but still offers pleasant crumbliness when eaten. Visual cues for success include a uniformly colored surface that appears compacted without visible loose crumbs.
Properly whipping the cream represents another crucial technique for achieving the ideal filling texture. Start with thoroughly chilled cream and a cold bowl for best volume development. Beat at medium-high speed until stiff peaks form, meaning the cream stands straight up when the beaters are lifted. However, take care not to overbeat, which can cause the cream to become grainy and eventually turn to butter. The perfectly whipped cream should appear smooth, glossy, and hold its shape firmly. This aerated cream lightens the cream cheese base while providing structural support for slicing.
The swirling technique creates the beautiful marbled effect that makes these bars visually spectacular. Begin by alternating dollops of cheesecake filling and cooled raspberry sauce across the crust. Then, using a thin knife or skewer, make slow, deliberate passes through the layers in a figure-eight pattern. Avoid overmixing, which would blend the components into a uniform pink color rather than maintaining distinct swirls. The goal is to integrate the elements just enough to create visual interest while preserving separate flavor experiences. Successful swirling shows clear definition between the white cheesecake and red raspberry components.
Pro Tips for Perfect Raspberry Cheesecake Bars
Line your baking pan with parchment paper extending over two opposite sides. This creates handles that allow easy removal of the entire block before slicing. Consequently, you achieve cleaner cuts and more professional-looking bars.
Chill your mixing bowl and beaters before whipping the cream. The cold environment helps the cream reach optimal volume and stability. Therefore, your filling becomes lighter and holds its shape better.
Press the crust mixture up the sides of the pan slightly. This creates a contained edge that supports the filling layers. Meanwhile, it provides better structural integrity for clean slicing.
Strain the raspberry sauce if you prefer completely smooth swirls. This removes the seeds while maintaining the vibrant color and flavor. Alternatively, leave them in for added texture and fiber.
Use a hot knife for cleaner slices when serving. Dip your knife in hot water and wipe it dry between each cut. This technique prevents dragging and creates beautifully defined bars.
Garnish with fresh raspberries and mint just before serving. The fresh fruit adds texture contrast and visual appeal. Furthermore, it signals the flavor within to your guests.
Experiment with different cookie bases for variety. Try chocolate graham crackers, gingersnaps, or shortbread cookies. Each alternative creates a unique flavor profile while maintaining the same technique.
Add lemon zest to the cheesecake filling for brightness. The citrus notes complement the raspberry beautifully. Moreover, it cuts through the richness of the cream cheese.
Variations and Adaptations
Regional variations allow you to explore different flavor profiles while maintaining the same basic technique. For a Northeastern approach, incorporate blueberry swirl instead of raspberry, echoing traditional Maine desserts. Southern versions might feature peach or pecan crust combinations, reflecting local agricultural products. Meanwhile, coastal interpretations could use key lime or coconut elements for tropical flair. These regional adaptations demonstrate the recipe’s flexibility while honoring local food traditions. Furthermore, they let you customize based on what grows in your area or what flavors you personally prefer.
Seasonal adaptations make this recipe relevant throughout the year by incorporating available produce. Spring versions might feature strawberry-rhubarb compote or lemon curd swirls. Summer obviously shines with berries, stone fruits, or cherry variations. Autumn adaptations could include spiced apple or pumpkin swirls with a gingersnap crust. Meanwhile, winter versions might use cranberry-orange combinations or chocolate-peppermint themes. These seasonal rotations keep the dessert feeling fresh and appropriate regardless of the calendar. Moreover, they encourage cooking with what’s currently at its peak flavor and affordability.
Dietary modifications ensure everyone can enjoy these bars regardless of restrictions. For gluten-free needs, use certified gluten-free graham crackers or almond flour crusts. Dairy-free versions can utilize vegan cream cheese and coconut cream with excellent results. Vegan adaptations might employ cashew-based fillings with agar-agar for setting. Low-sugar options can reduce sweetener amounts or use alternatives like monk fruit or stevia. These modifications maintain the spirit of the recipe while accommodating various dietary needs. Consequently, you can serve a dessert that welcomes all guests to your table.
Serving and Presentation Guide
Plating techniques significantly enhance the visual appeal of these already beautiful bars. For individual servings, place each bar slightly off-center on a neutral-colored plate to create visual interest. Add a dusting of powdered sugar using a fine-mesh sieve for professional-looking decoration. Alternatively, drizzle plates with extra raspberry sauce before placing the bars, creating a restaurant-worthy presentation. These simple techniques transform the bars from casual to elegant without additional recipe work. Meanwhile, they demonstrate care and attention that guests will appreciate.
Garnishing ideas provide the finishing touches that make your dessert memorable. Fresh raspberries and mint sprigs offer classic, natural decoration that reinforces the flavor profile. White chocolate shavings or curls add sophistication and complementary sweetness. For textural contrast, consider toasted sliced almonds or crushed pistachios sprinkled around the plate. Edible flowers provide stunning color and delicate beauty for special occasions. These garnishes should enhance rather than overwhelm the bars themselves. Furthermore, they allow for personal expression and seasonal adaptation based on what’s available.
Traditional accompaniments balance the richness of the cheesecake while complementing its flavors. Lightly sweetened whipped cream provides a classic pairing that adds airy texture. Fruit coulis or compote offers additional fruit intensity and sauciness. Meanwhile, a simple berry salad provides freshness and cuts through the dairy richness. For contrasting temperature, serve with a small scoop of vanilla or lemon sorbet. These accompaniments should support rather than compete with the bars’ established flavor profile. Consequently, they create a more complete dessert experience without complicating preparation.
Wine and Beverage Pairing
Wine pairings should complement rather than compete with the dessert’s balanced sweetness and acidity. A late-harvest Riesling offers honeyed notes that harmonize with the cheesecake’s creaminess while its acidity cuts through the richness. Moscato d’Asti provides gentle bubbles and stone fruit flavors that enhance the raspberry component. For red wine lovers, a Brachetto d’Acqui offers light effervescence and strawberry notes that complement without overwhelming. These selections share enough sweetness to stand up to the dessert without clashing. Meanwhile, they maintain balance that allows both the wine and dessert to shine.
Non-alcoholic alternatives provide sophisticated options for all guests. Sparkling grape juice mimics the celebratory quality of wine without alcohol. Iced herbal teas, particularly raspberry or peach varieties, echo the fruit elements naturally. Meanwhile, lemonade or limeade provides refreshing acidity that cleanses the palate between bites. For creamier options, vanilla chai or white hot chocolate offer comforting complements. These beverages should provide contrast to the dessert’s texture and flavor profile. Consequently, they create a complete tasting experience that satisfies without alcohol.
Coffee and tea pairings represent classic dessert companions that work beautifully with these bars. Medium-roast coffee offers robust flavor that stands up to the richness without bitterness. Espresso provides concentrated intensity that contrasts the dessert’s creaminess. For tea options, Earl Grey’s bergamot notes complement the citrus elements, while chamomile offers floral lightness. Chai tea’s spices provide warming counterpoints to the cool dessert. These beverages should be served at their optimal temperatures to maximize enjoyment. Furthermore, they offer familiar comfort that enhances the entire dessert experience.
Storage and Shelf Life
Proper storage methods ensure your raspberry cheesecake bars maintain their quality and food safety. Always store the bars in an airtight container in the refrigerator, separating layers with parchment paper if stacking. The optimal temperature range remains between 34°F and 38°F to preserve texture and prevent spoilage. Glass or plastic containers with tight-fitting lids work equally well, though glass prevents potential flavor transfer. Under these conditions, the bars maintain peak quality for approximately five days, though they remain safe to eat for up to seven days when properly stored.
Recognizing signs of spoilage protects against foodborne illness while ensuring enjoyable eating experiences. Visual indicators include excessive liquid separation, unusual discoloration, or visible mold growth. Olfactory warnings encompass sour, fermented, or otherwise off odors instead of the fresh, creamy scent you expect. Textural changes might include excessive softening, graininess, or slipperiness on the surface. Any of these signs indicate the bars should be discarded immediately. Meanwhile, normal slight firming over time represents expected texture evolution rather than spoilage.
Freezing guidelines allow you to extend enjoyment well beyond the refrigerator shelf life. To freeze, place completely set bars in a single layer on a parchment-lined baking sheet until firm, then transfer to airtight freezer containers. This initial “flash freezing” prevents them from sticking together. Properly packaged, the bars maintain quality for approximately two to three months in a standard freezer. When ready to enjoy, transfer them to the refrigerator for gradual thawing overnight. This method preserves texture far better than thawing at room temperature.
Make Ahead Strategies
Advanced preparation timelines allow you to manage dessert preparation around your schedule. The raspberry sauce can be made up to three days ahead and stored refrigerated in an airtight container. The graham cracker crust can be prepared one day in advance, covered, and kept at room temperature. The complete assembled bars require at least four hours to set but maintain excellent quality for up to two days when refrigerated. This staggered approach spreads the work across multiple days, reducing last-minute stress. Furthermore, it often improves flavor as components have time to meld.
Storage between steps maintains ingredient quality while ensuring final success. The prepared crust should be covered with plastic wrap at room temperature to prevent absorption of refrigerator odors. The raspberry sauce needs refrigeration in a sealed container, with a piece of plastic pressed directly on the surface to prevent skin formation. If preparing the filling components separately, store the whipped cream and cream cheese mixture separately, then recombine gently before assembly. These precautions preserve the individual qualities of each component until final construction.
Quality impact assessment helps determine the optimal make-ahead approach for your needs. The flavor actually improves slightly over the first twenty-four hours as the components meld together. Texture remains virtually identical for the first two days, then gradually firms slightly thereafter. Visual appeal remains consistent when properly stored, though the swirl pattern may become slightly less distinct over time. These minor changes mean planning one to two days ahead actually enhances the dessert. Consequently, you can confidently prepare for events without quality concerns.
Scaling Instructions
Halving the recipe works beautifully for smaller households or more intimate gatherings. Use an 8×8-inch pan instead of 9×13, and simply divide all ingredient quantities in half. The preparation method remains identical, though mixing times might decrease slightly with smaller volumes. The chilling time remains approximately the same, as setting depends more on temperature penetration than volume. This adaptation allows you to enjoy the dessert without excessive leftovers. Meanwhile, it provides perfect portions for four to six people rather than eight to twelve.
Doubling or tripling the recipe accommodates larger crowds while maintaining efficiency. For doubled recipes, use a 9×13-inch pan and exactly double all ingredients. Tripled versions might require multiple pans or a half-sheet pan with adjusted thickness. Mix in larger batches or multiple batches to avoid overfilling your mixer bowl. Expect slightly longer chilling times—add approximately one to two hours for doubled recipes. These scaled-up versions prove ideal for parties, potlucks, or holiday gatherings where demand exceeds standard yield.
Equipment adjustments become necessary when significantly scaling the recipe. Larger mixing bowls or working in batches prevents overflow and ensures proper incorporation. For crust pressing, larger flat-bottomed measures or even a small plate works more efficiently than a cup. When swirling, use multiple knife passes across the larger surface area to distribute the pattern evenly. These adaptations address the practical challenges of working with larger volumes. Consequently, they ensure consistent results regardless of batch size.
Nutritional Deep Dive
Macronutrient breakdown provides understanding of what these bars contribute nutritionally. Each serving contains significant carbohydrates from the crust and sweeteners, providing quick energy. The fat content derives primarily from cream cheese and heavy cream, offering satiety and carrying flavor. Protein appears modestly from the dairy components, contributing to tissue repair and maintenance. This balance creates a dessert that satisfies both sweet cravings and hunger. Meanwhile, it fits appropriately into an overall balanced diet when consumed in moderation.
Micronutrient analysis reveals valuable vitamins and minerals beyond basic nutrition. Raspberries contribute notable vitamin C, manganese, and antioxidant compounds that support immune function. Dairy components provide calcium, vitamin A, and riboflavin important for bone health and energy metabolism. Graham crackers offer small amounts of B vitamins and iron from enrichment. These micronutrients add nutritional value beyond mere calories. Consequently, the bars provide more than empty calories despite their dessert classification.
Health benefits emerge from specific ingredient contributions when consumed as part of a varied diet. The antioxidant content in raspberries helps combat oxidative stress and inflammation. Calcium from dairy supports bone density and nerve function. Meanwhile, the fiber from both crust and fruit aids digestive regularity. These benefits don’t negate the dessert’s indulgent nature but provide additional value. Furthermore, they represent improvements over many commercially produced desserts with fewer nutrient-dense ingredients.
Dietary Adaptations
Gluten-free adaptation requires simple substitution of the crust component. Use certified gluten-free graham crackers or gluten-free cookie alternatives crushed similarly. Alternatively, create a crust from gluten-free oats, nuts, or almond flour mixed with butter and sugar. The filling naturally contains no gluten, requiring no modification. This straightforward substitution makes the dessert accessible to those with celiac disease or gluten sensitivity. Meanwhile, it maintains the essential texture and flavor experience of the original recipe.
Dairy-free transformation involves replacing all dairy components with plant-based alternatives. For the crust, use vegan butter or coconut oil instead of regular butter. The filling can be made with vegan cream cheese and chilled coconut cream whipped to stiff peaks. These substitutions create a surprisingly similar texture and flavor profile. The raspberry sauce requires no modification as it contains no dairy. This adaptation allows those with dairy allergies or lactose intolerance to enjoy the dessert. Furthermore, it provides a vegan option when served to mixed-diet groups.
Low-carb and keto modifications focus on reducing sugar and carbohydrate content significantly. For the crust, use almond flour or crushed nuts mixed with melted butter and low-carb sweetener. The filling can be made with full-fat cream cheese, heavy cream, and keto-approved sweeteners like erythritol or stevia. The raspberry sauce should use minimal berries thickened with xanthan gum instead of cornstarch, plus low-carb sweetener. These changes create a dessert suitable for low-carb and ketogenic diets. Meanwhile, they maintain the luxurious mouthfeel and flavor balance of the original.
Troubleshooting Guide
Texture issues commonly arise from ingredient temperature or measurement inaccuracies. If your filling seems too soft, the cream may have been under-whipped or the cream cheese too warm. Solution: ensure proper whipping to stiff peaks and use adequately chilled ingredients. If the crust seems crumbly, you may have used insufficient butter or under-pressed the mixture. Solution: add slightly more melted butter and press more firmly into the pan. These adjustments address the most frequent texture concerns effectively.
Flavor balance problems might manifest as excessive sweetness or insufficient fruit presence. If the bars taste too sweet, reduce the sugar in both filling and sauce by 10-15% next time. If the raspberry flavor seems weak, consider adding lemon juice to brighten the sauce or using a higher fruit ratio. These tweaks customize the dessert to your personal preference. Meanwhile, they demonstrate the recipe’s flexibility regarding taste preferences.
Equipment challenges can impact results when substitutes don’t perform identically. If using a hand mixer instead of stand mixer, whipping time may increase slightly—continue until proper peaks form. When lacking a food processor for crust, place crackers in a sealed bag and crush with a rolling pin. These adaptations ensure success regardless of kitchen tool availability. Furthermore, they prove the recipe’s accessibility across various kitchen setups.
Recipe Success Stories
Community feedback consistently highlights the recipe’s reliability and impressive results. Many home cooks report receiving compliments that far exceed their actual effort investment. One baker mentioned bringing these bars to a potluck where guests assumed they came from a professional bakery. Another shared how the recipe built their confidence to try more complex desserts. These stories demonstrate how accessible yet impressive this dessert proves across various skill levels. Meanwhile, they reinforce the recipe’s position as a crowd-pleasing favorite.
Variation successes show the recipe’s adaptability to different tastes and ingredients. Several cooks have shared their successful experiments with blackberry, blueberry, and strawberry versions. One creative baker used a chocolate cookie crust with cherry swirl for a Black Forest interpretation. Another incorporated lemon curd along with the raspberry for dual swirl patterns. These innovations demonstrate the basic recipe’s robustness while encouraging personal expression. Furthermore, they provide inspiration for others to experiment with their own variations.
Adaptation stories highlight how the recipe accommodates various dietary needs successfully. Multiple readers have shared their gluten-free and dairy-free versions that pleased mixed-diet gatherings. One cook successfully created a lower-sugar version for a diabetic family member that everyone enjoyed. Another adapted the recipe for Passover using matzo meal in the crust. These stories illustrate the recipe’s incredible flexibility while maintaining its essential appeal. Consequently, they prove that dietary restrictions needn’t prevent dessert enjoyment.
Frequently Asked Questions
Can I use fresh raspberries instead of frozen? Absolutely, fresh raspberries work beautifully during their peak season. Use the same quantity by weight, though you may need slightly less cooking time since fresh berries contain more natural moisture. The flavor will be slightly brighter and more delicate than the frozen version. This substitution works perfectly when berries are at their seasonal best.
How can I make these bars firmer? Several techniques increase firmness if desired. Add one teaspoon of unflavored gelatin to the filling when mixing for extra structure. Alternatively, increase the chilling time to six to eight hours or even overnight. Using full-fat cream cheese rather than reduced-fat versions also contributes to a firmer set. These adjustments create bars that hold their shape even more firmly when sliced and served.
Can I make these without a mixer? Yes, though it requires more effort and attention. For the crust, simply crush crackers in a bag and mix with melted butter. The cream cheese must be very soft to blend smoothly with a whisk and spatula. Whip the cream vigorously in a chilled bowl with a whisk until stiff peaks form. This approach works effectively if you don’t mind the extra arm work.
Why did my raspberry sauce turn out too thin? This usually occurs from insufficient cooking time for the cornstarch to activate. Cook the sauce for the full two minutes after it comes to a boil, stirring constantly. Also ensure you’ve used the correct cornstarch to liquid ratio. If needed, create a fresh cornstarch slurry and add it to the simmering sauce to thicken further.
Can I freeze these cheesecake bars? Freezing works excellently for longer storage. Place cooled, set bars on a parchment-lined baking
Print
Heavenly Raspberry Cheesecake Bars
Description
A delightful dessert featuring a buttery graham cracker crust, creamy cheesecake filling, and a sweet-tart raspberry swirl.
Ingredients
For the Crust:
- 1 1/2 cups graham cracker crumbs
- 1/4 cup granulated sugar
- 6 tablespoons unsalted butter, melted
- 16 ounces cream cheese, softened
- 1/2 cup granulated sugar
- 2 large eggs
- 1 teaspoon vanilla extract
- 1/2 cup raspberry preserves
- 1 tablespoon lemon juice
Instructions
1. Prepare the Crust:
- Preheat oven to 350°F (175°C). Line an 8×8-inch baking pan with parchment paper.
- In a bowl, mix graham cracker crumbs, 1/4 cup sugar, and melted butter until combined. Press firmly into the bottom of the prepared pan.
- In another bowl, beat cream cheese and 1/2 cup sugar until smooth. Add eggs one at a time, then mix in vanilla. Pour over crust.
- Warm raspberry preserves with lemon juice until smooth. Drop spoonfuls over cheesecake layer and swirl with a knife.
- Bake for 25-30 minutes until set. Cool completely, then refrigerate for at least 2 hours before cutting into bars.
Notes
You can customize the seasonings to taste.
I’m Shaykee—born in Morocco, seasoned across continents. From airplane galleys to home kitchens, I share the flavors and stories that shaped my journey.