No-Bake Millionaire’s Shortbread Bars: The Ultimate Decadent Treat
Indulge in easy no-bake Millionaire’s Shortbread Bars! A buttery shortbread base, rich caramel, and a smooth chocolate topping. The ultimate decadent treat. These bars offer a symphony of textures and flavors that will satisfy even the most intense sweet tooth. Furthermore, they require absolutely no oven time, making them a perfect project for a warm day or for anyone looking for a simple yet impressive dessert.
Imagine biting through a layer of velvety dark chocolate into a soft, chewy caramel center, all resting on a crumbly, melt-in-your-mouth biscuit base. This is the magic of no-bake Millionaire’s Shortbread Bars. They are the luxurious, homemade answer to your candy bar cravings. Best of all, this recipe simplifies the classic version, eliminating the need for baking and candy thermometers.
Consequently, these bars are incredibly accessible for bakers of all skill levels. You can create a dessert that looks and tastes like it came from a professional patisserie with minimal effort and basic kitchen tools. The process is relaxing and the result is profoundly rewarding. Get ready to impress your family and friends with this stunning no-bake confection.
Quick Recipe Highlights
- Flavor Profile: These bars deliver a perfect balance of sweet and salty. The rich, buttery base contrasts beautifully with the deep sweetness of the caramel. Finally, the semi-sweet chocolate topping adds a slight bitterness that rounds out the entire experience.
- Texture: Experience a fantastic textural journey from the firm yet crumbly base to the wonderfully chewy and soft caramel layer. The snap of the chocolate shell on top provides the final, satisfying contrast that makes these bars so addictive.
- Aroma: The scent of melted butter and brown sugar will fill your kitchen with a warm, comforting fragrance. Notes of vanilla and the rich aroma of chocolate create an irresistible olfactory preview of the deliciousness to come.
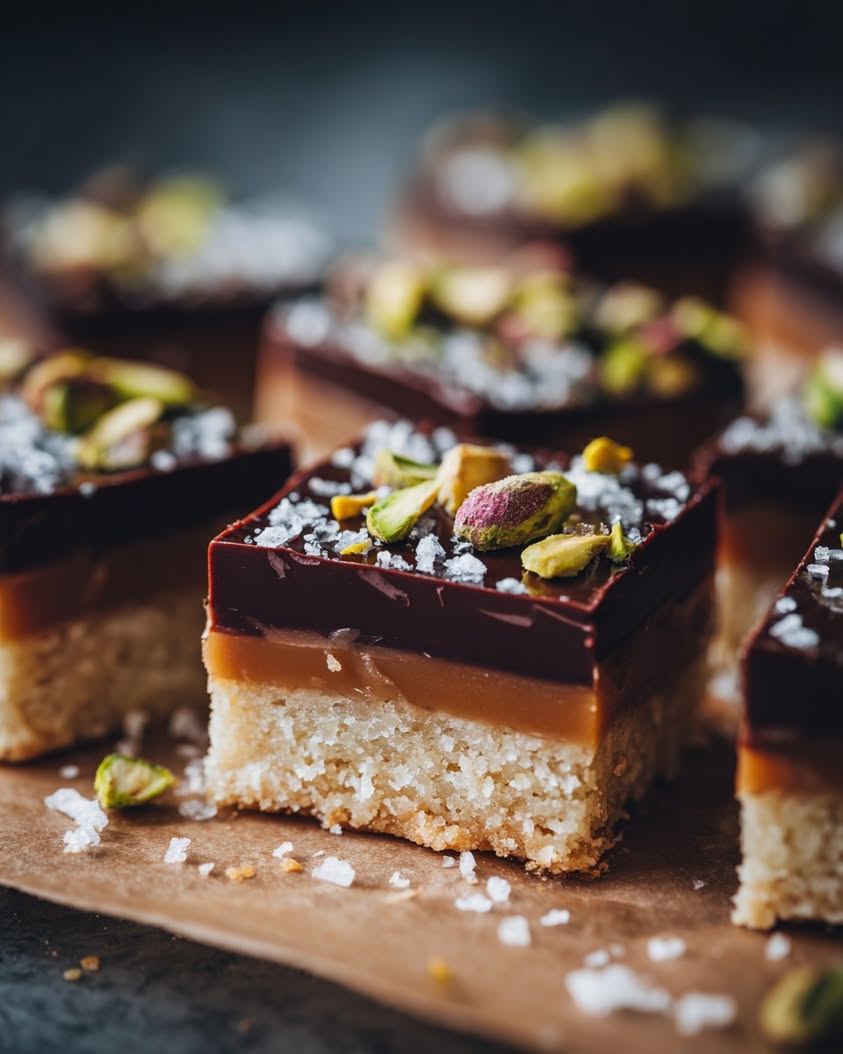
- Visual Appeal: These bars are a true feast for the eyes with their distinct, neat layers. The glossy chocolate top, the golden caramel middle, and the sandy-colored base create a stunning striped effect when sliced. They are perfect for gifting or serving at a party.
- Skill Level Needed: This is a beginner-friendly recipe that requires no advanced techniques. The most important skill is patience, as you must allow each layer to set properly in the refrigerator. Otherwise, the steps are straightforward and simple to follow.
- Special Equipment: You will need an 8×8 inch square baking pan, parchment paper for easy removal, and a medium saucepan. A food processor can expedite the base, but it is not essential. A sturdy spoon and a bit of elbow grease will work perfectly.
Recipe Overview
- Difficulty Level: This recipe is decidedly easy and perfect for beginners. The steps involve mixing, melting, and chilling, with no complex baking techniques required. The key to success is allowing adequate time for each layer to set firmly before adding the next. This ensures clean, beautiful layers when you slice the finished product.
- Category: This dessert falls squarely into the category of no-bake desserts and bar cookies. It is an ideal treat for picnics, potlucks, and holiday cookie trays. Moreover, it serves as a fantastic make-ahead dessert for dinner parties, as its flavor improves after a day in the fridge.
- Cuisine: Millionaire’s Shortbread has its roots in Scottish culinary tradition, where it is a beloved teatime treat. This no-bake version is a modern adaptation that maintains the classic flavor profile while simplifying the preparation method. It is a celebrated part of British and Irish baking culture.
- Cost: This is a relatively inexpensive dessert to make, especially when compared to buying gourmet chocolate bars. The main costs are butter, condensed milk, and chocolate. You can expect to spend roughly the same as you would on a quality store-bought dessert, but yield a much larger quantity.
- Season: These no-bake bars are truly a year-round delight. They are particularly wonderful in the summer when you want to avoid turning on the oven. Conversely, their rich, comforting nature makes them a hit during the fall and winter holiday season as well.
- Occasion: These bars are versatile enough for any event. They are perfect for birthday parties, bake sales, holiday gatherings, or as a special weekend treat. Their elegant appearance makes them suitable for formal occasions, while their familiar flavors appeal to everyone.
Why You’ll Love This Recipe
You will adore these No-Bake Millionaire’s Shortbread Bars for their incredible taste and texture. Each bite delivers a perfect harmony of crumbly base, chewy caramel, and smooth chocolate. This combination is universally loved and provides a deeply satisfying sensory experience. The bars are intensely rich, meaning a small piece is incredibly fulfilling. They truly taste like a gourmet candy bar you spent a fortune on, but you made them in your own kitchen.
The convenience factor of this recipe is a massive win. Without any baking required, you eliminate the risk of over-baking or burning. This makes the process virtually foolproof. You can easily prepare the bars while attending to other tasks, as the refrigerator does most of the work. This is an ideal recipe for involving children in the kitchen, as the steps are simple and safe.
While this is an indulgent treat, you control the ingredients. You can choose high-quality chocolate, organic butter, and a good vanilla extract to elevate the flavor. You also avoid the preservatives and additives found in many store-bought versions. The simplicity of the ingredient list is a huge advantage for those who prefer to know exactly what is in their food.
The social and entertaining value of these bars cannot be overstated. They are always a massive hit at parties and gatherings. Bringing a tray of homemade Millionaire’s Shortbread Bars will make you an instant hero. They are a fantastic edible gift, especially when packaged neatly in a cellophane bag or a nice box. People are always impressed by the professional appearance of this dessert.
Finally, this recipe is incredibly cost-effective. The ingredients are basic and affordable, yet the final product looks and tastes luxurious. You can create a large batch of impressive desserts for a fraction of the cost of buying them from a bakery. This accessibility means you can enjoy a taste of luxury anytime the craving strikes.
Historical Background and Cultural Significance
The original Millionaire’s Shortbread is a classic treat from Scotland, where it is also known as caramel shortbread. Its name is believed to reflect its decadently rich nature, a dessert so luxurious that only a millionaire could afford to indulge in it regularly. Traditionally, it consists of a baked shortbread base, a soft caramel middle, and a chocolate topping. It became a staple in British and Irish bakeries throughout the 20th century.
This dessert holds significant cultural importance as a beloved item for afternoon tea, coffee breaks, and special occasions. It is a fixture at church fetes, school bake sales, and family gatherings across the UK. The combination of shortbread, caramel, and chocolate represents a pinnacle of comfort food for many. Its popularity has endured for generations because of its timeless flavor combination and satisfying texture.
The recipe has evolved considerably since its inception. Early versions involved making a firm shortbread and a hard caramel, which could be challenging to bite into. Modern interpretations, including this no-bake version, favor a crumblier base and a softer, chewier caramel. The evolution towards no-bake methods reflects a desire for simplicity and convenience in modern home baking without sacrificing the iconic taste.
Regional variations of this treat abound. In some areas, a layer of jam is spread over the shortbread before the caramel is added. Others incorporate nuts like pecans or walnuts into the caramel layer for added crunch. Some gourmet versions use salted caramel or drizzle white chocolate on top of the dark chocolate. This no-bake version is itself a popular modern adaptation that makes the classic accessible to everyone.
Ingredient Deep Dive
Digestive biscuits form the foundation of the no-bake base. These British biscuits are not overly sweet and have a distinctive, slightly malty flavor and a crumbly texture that mimics traditional shortbread perfectly. If you cannot find them, graham crackers are the best substitute, though they will impart a hint of honey and cinnamon. For a gluten-free version, simply use gluten-free digestive biscuits or graham crackers.
Butter is the essential fat that brings richness and binds the base together while also forming the foundation of the caramel sauce. Using a good-quality unsalted butter allows you to control the salt level in your recipe. The butter’s milk solids caramelize during the cooking process, contributing deep, nutty flavors to the caramel layer. Ensure your butter is fresh for the best flavor profile.
Sweetened condensed milk is the magic ingredient that creates the lush, creamy caramel without any fuss. This canned product is made by removing water from milk and adding sugar, resulting in a thick, sweet, and shelf-stable product. When cooked with butter and sugar, it transforms into a rich, dulce de leche-like caramel. It is the key to achieving a smooth, non-grainy caramel layer that sets perfectly.
Dark brown sugar is preferred for the caramel layer because of its high molasses content. This molasses adds a deep, almost toffee-like flavor and contributes to the caramel’s soft, chewy texture. The moisture in the brown sugar also helps keep the caramel layer from becoming too hard when chilled. You can use light brown sugar for a milder flavor, but the dark variety provides a superior depth.
Chocolate for the topping should be of good quality, as it is a dominant flavor. Semi-sweet chocolate (around 50-60% cocoa) offers a nice balance between sweetness and bitterness that cuts through the rich caramel. You can use chocolate chips for convenience, but a bar of baking chocolate chopped finely will melt more smoothly. For a different twist, milk chocolate can be used for a sweeter finish.
Common Mistakes to Avoid
- Not lining the pan with parchment paper. This is the single biggest mistake, as it makes removing and slicing the bars nearly impossible. Always leave an overhang of paper on two sides to act as handles.
- Rushing the chilling process. Each layer must be completely firm and cold before adding the next. If the caramel is added to a warm base, it will seep down and make the base soggy. Similarly, adding chocolate to warm caramel will cause the layers to mix.
- Overheating the chocolate. Chocolate can seize and become grainy if heated too quickly or if steam gets into it. Melt it gently using a double boiler or in short bursts in the microwave, stirring frequently until just smooth.
- Undercooking the caramel. The caramel mixture must come to a full boil for one minute to ensure it thickens properly upon cooling. If you don’t boil it, the caramel layer may remain too soft and sticky.
- Overcooking the caramel. Conversely, boiling the caramel for too long can make it too hard and chewy once chilled. Stick to the recommended one-minute boil for the perfect fudgy texture.
- Not pressing the base firmly enough. The biscuit base needs to be compacted very firmly into the pan. This creates a solid foundation that won’t crumble when you slice the bars. Use the flat bottom of a glass or measuring cup to press it down hard.
- Slicing the bars before they are fully set. Although it requires patience, you must allow the entire assembled dessert to chill for at least 4 hours, preferably overnight. Slicing too early will result messy, squished layers.
- Using a serrated knife to slice. A sharp chef’s knife is best for cutting clean lines through the chocolate topping. Warm the blade under hot water and wipe it dry between cuts for the cleanest, most professional-looking slices.
Essential Techniques
Creating a firm base is the first critical technique. The digestive biscuits must be crushed into fine crumbs, almost like sand, to ensure they compact properly. You can do this in a food processor or by placing them in a zip-top bag and rolling them with a rolling pin. Combining the crumbs with melted butter is simple, but you must press the mixture into the pan with significant force. Use the flat bottom of a heavy glass or a measuring cup to press down evenly and firmly across the entire surface. This creates a dense, stable foundation that will hold its shape when sliced.
Mastering the no-cook caramel is easier than you think. The key is to melt the butter, sugar, and condensed milk together slowly over medium heat, stirring constantly to prevent the bottom from scorching. Once the butter has melted and the sugar has dissolved, bring the mixture to a gentle boil. It is crucial to let it boil for a full minute while stirring; this step allows the mixture to thicken sufficiently. You will know it’s ready when it darkens slightly in color and pulls away from the sides of the pan as you stir. Pour it immediately over your chilled base to stop the cooking process.
Tempering the chocolate for the topping ensures a glossy finish and a clean snap. While you can simply melt chocolate, for the best results, chop it finely and place it in a heatproof bowl over a pan of simmering water, ensuring the bowl doesn’t touch the water. Stir gently until just melted. Alternatively, microwave it in 20-second bursts, stirring after each interval. Pour the melted chocolate over the chilled caramel layer and tilt the pan to spread it into an even layer. Tap the pan gently on the counter to release any air bubbles for a perfectly smooth surface.
Pro Tips for Perfect No-Bake Millionaire’s Shortbread Bars
Weigh your biscuits for the base instead of counting them. Different brands can vary in size, so using a kitchen scale to measure 300 grams ensures consistency every time. This guarantees your base will have the perfect texture and will hold together properly.
Add a generous pinch of sea salt to the caramel layer. This enhances all the flavors and creates a delightful sweet-and-salty contrast that elevates the entire dessert. You can even sprinkle a little flaky sea salt on top of the chocolate after you pour it for a gourmet touch.
Allow each layer to chill thoroughly. Do not be tempted to speed up the process by putting the pan in the freezer. While the freezer will set the layers faster, it can cause the chocolate to bloom (develop a white, streaky appearance) when it comes back to room temperature. The refrigerator provides a steady, gentle chill that sets the layers perfectly.
Use a hot knife for pristine cuts. Dip a sharp chef’s knife in hot water and wipe it dry immediately before making each cut. The heat will glide through the firm chocolate topping without cracking it, resulting in beautifully clean edges. Wipe the blade clean between each cut.
For ultra-neat squares, score the chocolate layer lightly after it has set for about 30 minutes. This creates guide lines that you can follow with your knife once the bars are fully set, preventing the chocolate from shattering when you slice all the way through.
Let the sliced bars come to room temperature for about 10 minutes before serving. This allows the caramel to soften slightly from its fridge-hard state, giving you that perfect, chewy texture that is the hallmark of a great Millionaire’s Shortbread bar.
Variations and Adaptations
Explore regional variations by adding a thin layer of raspberry or apricot jam over the chilled biscuit base before adding the caramel. This fruitiness provides a tangy contrast to the sweet layers and is a popular twist in some parts of Scotland and England. Alternatively, stir a handful of desiccated coconut into the biscuit base for a tropical note.
Create seasonal adaptations by incorporating different mix-ins. For autumn, add a teaspoon of pumpkin pie spice to the biscuit base. During the winter holidays, sprinkle crushed candy canes over the melted chocolate topping. In spring, a drizzle of white chocolate over the dark chocolate adds an elegant touch. For summer, use a mixture of milk and white chocolate for a lighter flavor.
Accommodate dietary modifications with simple swaps. For a gluten-free version, use certified gluten-free digestives or graham crackers. To make it dairy-free, use plant-based butter and a can of vegan condensed coconut milk. Ensure your chocolate is also dairy-free. For a vegan caramel, you can find recipes using coconut cream and sugar, though the texture may vary slightly.
Experiment with flavor variations by infusing the caramel. Steep a couple of chai tea bags in the warm caramel mixture for five minutes after cooking, then remove them before pouring. Add a tablespoon of instant espresso powder to the caramel for a mocha flavor. You could also stir in a tablespoon of bourbon or rum for an adult-only version.
Modify the texture by adding crunch. Press chopped toasted pecans or walnuts into the caramel layer before it sets. Alternatively, mix crushed pretzels into the biscuit base for a salty crunch. For a fun twist, sprinkle a layer of crushed toffee bits or honeycomb candy over the set caramel before adding the chocolate.
Consider presentation alternatives by cutting the set slab into different shapes. Use small cookie cutters to create circles, hearts, or stars for a party. Instead of a slab, you can press the base into individual silicone muffin cups, add the caramel and chocolate, and create perfect individual portions that are easy to serve.
Serving and Presentation Guide
Master simple plating techniques to elevate your dessert. Place a single bar on a small, white plate to let its beautiful layers stand out. You can drizzle a zigzag of extra melted chocolate or caramel sauce on the plate first for a restaurant-style presentation. A dusting of cocoa powder or powdered sugar around the bar adds a touch of elegance.
Explore garnishing ideas that complement the rich flavors. A few fresh raspberries or a twist of orange zest on the side provide a fresh, fruity contrast. A small dollop of lightly sweetened whipped cream or a scoop of vanilla bean ice cream turns the bar into a decadent plated dessert. A single mint leaf adds a pop of color and a hint of freshness.
Traditional accompaniments are simple and focus on balancing the richness. In the UK, these bars are most commonly served with a hot cup of tea or coffee. The bitterness of the drink cuts through the sweetness of the bar perfectly. A glass of cold milk is also a classic and comforting pairing, especially for children.
Modern serving suggestions might include turning the bar into a deconstructed dessert. Crumble the base into a glass, layer it with scoops of caramel ice cream and chocolate shavings, and top with whipped cream. Alternatively, warm a bar very slightly in the microwave for 5-10 seconds to make the caramel soft and gooey before serving.
Temperature considerations are important for the ideal eating experience. Serve these bars straight from the refrigerator for a firm texture where you can taste each distinct layer. However, if you prefer a softer, chewier caramel, let the bars sit at room temperature for 15-20 minutes before serving. This allows the caramel to soften up beautifully.
Practice portion control tips because these bars are incredibly rich. Cutting them into 16 smaller squares is recommended, as most people will be satisfied with a smaller piece. If serving at a party with other desserts, you can even cut them into 32 bite-sized pieces. This allows guests to sample a variety of treats without overindulging.
Wine and Beverage Pairing
Select wine pairings that can stand up to the sweetness and richness of the bars. A sweet dessert wine like a Ruby Port is an excellent choice, as its berry flavors complement the chocolate and its sweetness matches the caramel. A rich, creamy Pedro Ximénez sherry has intense raisin and molasses notes that harmonize beautifully with the dessert. For a non-fortified option, a late-harvest Zinfandel with its jammy fruit profile works wonderfully.
Offer non-alcoholic alternatives that provide a refreshing contrast. A glass of cold, whole milk is a timeless pairing that mellows the sweetness. Sparkling water with a squeeze of lime or a twist of orange helps cleanse the palate between bites. For a more sophisticated option, a chicory-based coffee substitute provides a bitter counterpoint without the caffeine.
Consider coffee and tea pairings, which are traditional for a reason. A strong espresso or black coffee cuts through the richness with its bitterness. A cup of Earl Grey tea, with its bergamot citrus notes, provides a lovely aromatic contrast to the chocolate and caramel. Chai tea, with its warm spices, also complements the buttery, sweet flavors exceptionally well.
Pay attention to temperature considerations for your beverages. Iced coffee or a cold brew coffee can be a refreshing choice, especially in warmer weather. However, a hot drink generally provides a better contrast to the cold, firm texture of the chilled bars. Experiment to see which temperature combination you prefer.
Remember serving suggestions for your chosen beverages. Serve coffee and tea in elegant cups to make the experience feel special. For wine, a smaller dessert wine glass is appropriate. For non-alcoholic options, a tall, chilled glass makes even sparking water feel like a treat. The right vessel enhances the entire tasting experience.
Storage and Shelf Life
Follow proper storage methods to maintain freshness. Always store the bars in an airtight container in the refrigerator. This prevents them from absorbing any odors from the fridge and keeps the chocolate topping from developing condensation, which can lead to sugar bloom. Layering them between sheets of parchment paper will prevent them from sticking together.
Understand the temperature requirements for optimal texture. The refrigerator is essential for keeping the bars firm and intact. They will become too soft and messy if left at room temperature for more than an hour. For longer storage, the freezer is your best option, as detailed below.
Choose container recommendations based on your needs. A shallow, rectangular glass container with a tight-sealing lid is ideal. If you need to transport them, a sturdy plastic container works well. Avoid storing them in a container that is too large, as the excess air can dry out the bars slightly.
Recognize the signs of spoilage, which are rare due to the high sugar content. The main issue you might encounter is the chocolate developing a white, powdery coating called bloom. This is caused by temperature changes and is not harmful, but it affects the appearance. If you see any mold, which is extremely unlikely, discard the entire batch immediately.
Note that reheating instructions are generally not needed, as these bars are meant to be served cold or cool. If your bars have been in the freezer, the best method is to transfer them to the refrigerator to thaw overnight. Do not try to microwave them, as the chocolate will melt and the layers will separate.
Utilize freezing guidelines for long-term storage. These bars freeze exceptionally well for up to 3 months. Freeze them first on a parchment-lined baking sheet until solid, then transfer the individual bars to a freezer-safe bag or container. This prevents them from freezing into one solid block. Thaw in the refrigerator overnight before serving.
Make Ahead Strategies
Plan your prep timeline for stress-free entertaining. You can make the entire recipe up to 3 days in advance. In fact, the flavor improves after a day in the fridge as the layers have more time to meld together. Simply store the uncut slab in the pan, tightly covered with plastic wrap, until you are ready to slice and serve.
Manage storage between steps if you need to break up the work. The biscuit base can be made and chilled for up to 24 hours before you add the caramel layer. Similarly, you can make the caramel layer and let it set for a day before adding the chocolate. This flexibility makes the recipe very manageable.
Assess the quality impact of making ahead. There is no negative impact on flavor or texture; in fact, it often improves both. The base may become slightly more firm, which actually makes it easier to slice cleanly. The caramel layer also sets more thoroughly, preventing any potential stickiness.
Follow assembly tips for the best results when working ahead. If storing the base for more than a few hours, ensure it is tightly covered to prevent it from absorbing any refrigerator odors. When you are ready to add the caramel, make sure it is warm and fluid so it spreads easily over the cold base.
There are no reheating guidelines for this dessert, as it is served cold. The only consideration is to allow the bars to sit at room temperature for about 10 minutes before serving if you prefer a slightly softer caramel. This is a simple step that enhances the eating experience.
Consider fresh element additions if you are making the bars well in advance. For instance, if you are garnishing with whipped cream or fresh berries, add those just before serving to maintain their texture and appearance. The base bars themselves will keep perfectly without any last-minute work.
Scaling Instructions
Halving the recipe is straightforward if you want a smaller batch. Use an 8×4 inch loaf pan instead of a square pan. Simply divide all the ingredients by two. The cooking time for the caramel may be slightly less, so watch for it to come to a boil and thicken. The chilling times will remain the same.
Doubling or tripling the recipe is easy for a crowd. Use a 9×13 inch pan for a double batch. You may need to cook the caramel in a larger, heavier-bottomed saucepan to prevent boiling over. It might also take a minute or two longer for the larger quantity of caramel to come to a full boil. Ensure you press the base evenly across the larger pan.
Consider equipment adjustments when scaling. A very large batch of the biscuit base might be easier to mix in a stand mixer fitted with a paddle attachment. For the caramel, use a saucepan that is large enough to hold the increased volume with plenty of room to prevent bubbling over. A bigger pan is essential for success.
Note that timing modifications for chilling are minimal. A larger, thicker slab will require the same, if not slightly longer, chilling time to set completely through the center. Test the center of the caramel layer with your finger; it should feel completely firm before you add the chocolate layer.
Plan for storage considerations with a larger batch. You will need a larger airtight container or several smaller ones. If giving them as gifts, have your boxes or bags ready. A large batch is perfect for holiday gifting or for a big party where you know they will be a hit.
Nutritional Deep Dive
Understand the macro breakdown of this indulgent treat. These bars are high in carbohydrates and fats, which provide the energy and richness. The carbs come primarily from the biscuits, sugar, and condensed milk. The fats are from the butter and the chocolate. There is a small amount of protein from the milk solids in the condensed milk and butter.
Consider the micronutrient analysis. While this is a dessert, it does provide small amounts of calcium from the dairy products and iron from the dark chocolate. However, it is not a significant source of vitamins or minerals. Enjoy it as a treat within a balanced diet that includes plenty of nutrient-dense foods.
Acknowledge the health benefits of enjoying treats in moderation. Allowing yourself to enjoy decadent desserts like this can prevent feelings of deprivation, which is important for long-term dietary balance. The pleasure and satisfaction derived from eating food you love is a legitimate part of overall well-being.
Be mindful of dietary considerations. This standard recipe contains gluten, dairy, and refined sugars. It is not suitable for those with celiac disease, lactose intolerance, or individuals managing diabetes without significant modification. However, as outlined in the adaptations section, there are ways to modify the recipe for various needs.
Analyze portion control. The recipe yields 16 bars, and one bar is a satisfying serving due to the richness. Cutting the bars into even smaller pieces, as suggested, can help manage calorie intake. Being aware of the portion size allows you to enjoy the dessert without overindulging.
Incorporate weight management tips by balancing your day. If you plan to enjoy one of these bars, you might choose to have a lighter lunch or engage in some physical activity. It is all about balance and moderation, not restriction. Depriving yourself often leads to overeating later, so plan for treats you truly enjoy.
Dietary Adaptations
Create a gluten-free version by using certified gluten-free digestive biscuits or graham crackers. Check that the oats in the biscuits are certified GF if that is a concern. The rest of the ingredients are naturally gluten-free, but always double-check labels on condensed milk and chocolate to ensure no cross-contamination.
Make it dairy-free by using plant-based butter sticks and a can of vegan condensed coconut milk. Brands like Nature’s Charm and Borden now offer dairy-free condensed milk alternatives. Choose a high-quality dairy-free dark chocolate for the topping. The result will be equally rich and delicious, with a slight coconut undertone from the milk.
Adapt the recipe for a vegan diet by combining the dairy-free modifications above. Ensure your sugar is vegan, as some refined white sugars are processed with bone char. Most brown sugars are vegan, but it’s best to check specific brands. This vegan version will be a hit with everyone, not just those avoiding animal products.
While a low-carb or keto version is challenging due to the core ingredients, you can experiment with alternatives. Use a mixture of almond flour and powdered erythritol for the base. For the caramel, try a sugar-free condensed milk alternative or a homemade version using erythritol, butter, and cream. Use a sugar-free chocolate bar for the topping. The texture will be different, but it can satisfy a craving.
A paleo adaptation would require similar swaps to the keto version, using almond flour, coconut sugar, and dairy-free ingredients. Note that strict paleo diets avoid refined sugars, so this would be a “paleo-inspired” treat rather than a strictly compliant one. The focus would be on using natural, whole-food ingredients where possible.
For a low-FODMAP version, you would need to use gluten-free biscuits and ensure they are also low in other high-FODMAP ingredients. The condensed milk and brown sugar are high in lactose and fructose, making this dessert difficult to adapt for a strict low-FODMAP diet. It might be best to enjoy a very small portion of the regular version if tolerated, or choose a different dessert altogether.
Troubleshooting Guide
Solve texture issues with the base. If your base is too crumbly, you likely did not use enough butter or did not press it firmly enough. Next time, add an extra tablespoon of melted butter and press with more force. If it’s too hard, you may have over-processed the biscuits; aim for a sandy texture, not a fine powder.
Address flavor balance problems. If the bars are too sweet for your taste, use a darker chocolate (70% cocoa) for the topping to provide more bitterness. You can also reduce the brown sugar in the caramel by a tablespoon or two, or add an extra pinch of salt to cut the sweetness.
Fix temperature problems during assembly. If you added the caramel to the base and it seems runny, place the pan back in the refrigerator immediately. It will likely set up given more time. If the chocolate seizes and becomes grainy, stir in a teaspoon of vegetable oil or coconut oil to smooth it out.
Overcome equipment challenges. If you don’t have a food processor, place the biscuits in a sturdy zip-top bag and crush them with a rolling pin. If you don’t have a saucepan heavy enough to prevent scorching, use a double boiler for the caramel, though it will take longer to cook.
Manage ingredient substitution concerns. If you had to substitute graham crackers for digestives, note that the base will be sweeter and have a different flavor. This is not a failure, just a variation. If you used milk chocolate instead of dark, the topping will be sweeter. Understand that substitutions will alter the final product.
Rectify timing concerns. If you are short on time, you can place the pan in the freezer to set the layers faster. However, be aware that the chocolate may bloom when it returns to fridge temperature. For the best results, always plan for the full chilling time. Good things come to those who wait.
Recipe Success Stories
The community feedback for this no-bake Millionaire’s Shortbread recipe has been overwhelmingly positive. Many home bakers have expressed relief at finding a version that doesn’t require baking or a candy thermometer. One reader commented that it was the first time her caramel layer turned out perfectly, and she attributed it to the clear instructions for boiling the mixture for exactly one minute.
Variation successes are frequently shared. A common success story involves adding a sprinkle of flaky sea salt on top of the chocolate, which readers say takes the bars to a whole new level. Others have joyfully reported successfully making the recipe gluten-free or vegan for family members with dietary restrictions, often surprising everyone with how delicious the alternatives turn out.
Adaptation stories often come from parents who have made this with their children. They love that it’s a no-bake recipe, making it safe and easy for little hands to help. Many say that pressing the base into the pan is a favorite job for kids. These bars have become a cherished family baking project for many, creating happy memories in the kitchen.
Reader suggestions have also improved the recipe over time. One savvy baker suggested scoring the chocolate layer after 30 minutes of chilling to make slicing easier later. Another recommended warming the knife under hot water for cleaner cuts. These community-driven tips have been incorporated into the pro tips section, making the recipe even more foolproof for everyone.
Photography tips from successful bakers often highlight the importance of natural light. Shooting the sliced bars in daylight showcases the beautiful layers. A common trick is to place a bar on a rustic wooden cutting board for a homely, appealing photo. Many also suggest taking a picture immediately after slicing, before the chocolate has a chance to lose its gloss from handling.
Frequently Asked Questions
Can I use milk chocolate instead of dark chocolate?
Absolutely. Using milk chocolate will result in a sweeter, less bitter topping. It is a matter of personal preference. Ensure you use good quality chocolate for the best flavor and melting properties. The bars will still be delicious with milk chocolate, especially if you
Print
No-Bake Millionaire’s Shortbread Bars
Description
A rich, indulgent dessert with a buttery biscuit base, creamy caramel center, and smooth chocolate topping—all without turning on the oven.
Ingredients
For the Crust:
- 200g digestive biscuits, crushed
- 100g unsalted butter, melted
- 1 can (397g) sweetened condensed milk
- 100g light brown sugar
- 100g unsalted butter
- 2 tbsp golden syrup
- 200g milk chocolate, chopped
- 50g dark chocolate, chopped
- 1 tbsp vegetable oil
Instructions
1. Prepare the Crust:
- Line an 8×8 inch baking pan with parchment paper. Mix crushed biscuits with melted butter until combined, then press firmly into the pan. Chill for 15 minutes.
- In a saucepan, combine condensed milk, brown sugar, butter, and golden syrup. Cook over medium heat, stirring constantly, for 5-7 minutes until thickened and golden. Pour over the biscuit base and chill for 30 minutes.
- Melt milk and dark chocolate with vegetable oil in a double boiler or microwave, stirring until smooth. Pour over the caramel layer, spread evenly, and chill for at least 2 hours before slicing into bars.
Notes
You can customize the seasonings to taste.
I’m Shaykee—born in Morocco, seasoned across continents. From airplane galleys to home kitchens, I share the flavors and stories that shaped my journey.