Peachy Pretzel Dream Bars: The Ultimate Sweet and Salty No-Bake Dessert
Imagine biting into a dessert that perfectly balances sweet and salty flavors with every single mouthful. These Peachy Pretzel Dream Bars deliver exactly that experience with a crunchy pretzel crust, a luscious creamy peach filling, and a fluffy whipped topping. This no-bake dessert comes together with minimal effort, making it the ideal treat for hot summer days when you want something delicious without turning on the oven. Furthermore, the combination of textures and flavors creates a truly unforgettable dessert that will have everyone asking for the recipe.
The beauty of this dessert lies in its simplicity and incredible flavor profile. You get the satisfying salty crunch from the pretzel base, followed by the smooth, fruity sweetness of the peach layer. Additionally, the light whipped topping adds a cool, creamy finish that ties everything together. This dessert is not only a dream to eat but also a dream to make, requiring just a few simple steps and common ingredients. Consequently, it is perfect for both beginner bakers and experienced chefs looking for a quick, impressive treat.
Whether you are hosting a summer barbecue, need a potluck contribution, or simply crave a delightful sweet and salty treat, these bars are the answer. They are refreshing, satisfying, and incredibly versatile. Moreover, they can be made ahead of time, allowing the flavors to meld together in the refrigerator. Ultimately, this recipe for Peachy Pretzel Dream Bars is a guaranteed crowd-pleaser that celebrates the best of summer flavors.
Quick Recipe Highlights
- Flavor Profile: These bars masterfully combine the sweet, juicy flavor of peaches with the unmistakable salty crunch of pretzels. The creamy filling adds a rich, smooth contrast that makes each bite complex and satisfying. Ultimately, the flavor is both nostalgic and excitingly modern.
- Texture: The texture journey begins with a firm, crunchy pretzel crust that gives way to a soft, creamy peach center. Finally, the pillowy whipped topping on top provides a light and airy finish. This combination ensures a delightful sensory experience in every single layer.
- Aroma: As you prepare these bars, the kitchen will fill with the sweet, buttery scent of the pressed pretzel crust. The peach layer contributes a bright, fruity fragrance that is quintessentially summer. Overall, the aroma is inviting and promises a delicious treat.
- Visual Appeal: These bars are stunning with their visible layers of golden brown crust, soft peach filling, and white whipped topping. They look professionally made yet have a rustic, homemade charm. Consequently, they are as beautiful on a dessert table as they are tasty.
- Skill Level Needed: This is an entry-level recipe that requires absolutely no baking skills or special pastry techniques. The most complicated step is mixing and pressing the crust. Therefore, it is a fantastic recipe for beginners or for cooking with children.
- Special Equipment: You will need a standard 9×13 inch baking dish and an electric mixer to achieve the best consistency for the creamy layers. However, a sturdy spoon and some muscle can work for mixing in a pinch. No other unusual tools are required.
Recipe Overview
- Difficulty Level: We classify this recipe as easy because it involves simple mixing and pressing techniques with no baking required. The steps are straightforward and sequential, with little room for error. Anyone can achieve fantastic results by following the instructions carefully.
- Category: This dish falls squarely into the dessert category, perfect for finishing a meal on a sweet note. It can also serve as a decadent snack or a sweet treat for a party. Its no-bake nature makes it a standout summer dessert option.
- Cuisine: While not tied to a specific traditional cuisine, this recipe embodies modern American potluck and picnic food. It draws inspiration from classic icebox cakes and layered bar desserts. The use of pretzels reflects a popular sweet and salty trend in American baking.
- Cost: This is a very cost-effective dessert to prepare, using affordable ingredients like pretzels, cream cheese, and canned peaches. The entire pan costs less than most store-bought desserts to make. You get a high-yield, impressive dessert for a very low price per serving.
- Season: These Peachy Pretzel Dream Bars are the ultimate summer dessert, perfect for when peaches are in season and the weather is too hot for baking. They are cool, refreshing, and highlight seasonal fruit flavors. However, you can enjoy them year-round using high-quality canned peaches.
- Occasion: This dessert is incredibly versatile for any occasion, from casual family dinners to formal holiday gatherings. It is a perfect potluck contribution, a great Fourth of July treat, or a simple weekend indulgence. Its make-ahead nature makes it ideal for entertaining.
Why You’ll Love This Peachy Pretzel Dream Bars Recipe
You will adore these Peachy Pretzel Dream Bars first and foremost for their incredible taste and texture contrast. The salty, buttery pretzel crust provides a sturdy base that complements the sweet, creamy peach filling perfectly. Each bite delivers a symphony of flavors and textures that is both satisfying and refreshing. Furthermore, the visual appeal of the distinct layers makes this dessert look like it came from a professional bakery. Ultimately, it is a treat that delights all the senses.
The convenience of this no-bake dessert cannot be overstated, especially during the warm summer months. You can prepare the entire recipe without ever turning on your oven, which keeps your kitchen cool. Additionally, the bars need several hours to set in the refrigerator, which means you can make them well in advance of your event. This make-ahead aspect reduces stress and allows you to enjoy your own party. Consequently, you get an impressive dessert with minimal active effort.
From a nutritional perspective, while this is certainly a dessert, it offers some benefits over more traditional options. Peaches provide vitamin C and fiber, and using lighter versions of cream cheese and whipped topping can reduce the calorie count. You can control the ingredients and avoid the preservatives found in many store-bought desserts. Therefore, you can feel slightly better about indulging in a serving of these delicious bars.
The social and entertaining value of this dessert is tremendous. It is a guaranteed conversation starter at any gathering due to its unique sweet and salty profile. The recipe yields a full 9×13 pan, making it perfect for feeding a crowd at picnics, potlucks, or family reunions. People are always intrigued by the combination of pretzels and peaches. As a result, this dessert often becomes the most talked-about dish at any event.
Finally, the cost-effectiveness and accessibility of the ingredients make this recipe a winner. You likely have many of the components already in your pantry, and the rest are inexpensive and easy to find at any grocery store. It is a budget-friendly way to create a dessert that tastes luxurious and looks elaborate. You get maximum flavor and visual impact for a minimal financial investment. For all these reasons, this recipe for Peachy Pretzel Dream Bars deserves a permanent spot in your dessert rotation.
Historical Background and Cultural Significance
The concept of layered no-bake desserts has deep roots in American culinary history, often referred to as “icebox cakes.” These desserts became particularly popular in the mid-20th century with the widespread adoption of refrigerators, allowing home cooks to create chilled treats without an oven. The Peachy Pretzel Dream Bars are a modern evolution of this tradition, combining the convenience of icebox cakes with the contemporary love for sweet and salty flavor combinations. This recipe represents a fusion of practicality and modern taste preferences.
Culturally, this dessert embodies the American spirit of potluck and community gatherings. It is a dish designed to be shared, traveling well and serving a crowd with ease. The use of pretzels, a classic American snack, in a dessert context showcases a playful and innovative approach to baking. This recipe fits perfectly into celebrations like Independence Day, summer picnics, and family reunions where portable, crowd-pleasing food is essential. It is a dessert that feels both nostalgic and new.
The evolution of this specific recipe likely stems from the famous “Strawberry Pretzel Salad,” a beloved dessert that emerged in the Southern and Midwestern United States in the latter half of the 20th century. By swapping strawberries for peaches, this variation introduces a different seasonal fruit profile while maintaining the same brilliant structural concept. This adaptation demonstrates how classic recipes can be creatively modified to highlight different flavors while preserving their core appeal. It is a testament to the versatility of the original concept.
Regional variations of this dessert might include different types of fruit preserves, nuts in the crust, or flavored whipped toppings. Some versions in areas with strong German heritage might incorporate spices like cinnamon or nutmeg into the peach layer. The basic framework is incredibly adaptable, allowing cooks to personalize it based on local ingredients and family traditions. This ability to evolve and incorporate regional influences ensures the recipe’s continued popularity and relevance. The Peachy Pretzel Dream Bars are a delicious example of American culinary innovation.
Ingredient Deep Dive
Pretzels form the foundation of the crust and are the key ingredient that defines this dessert’s unique character. Historically, pretzels have European origins, dating back to the early Middle Ages, and were brought to America by German immigrants. They provide not only a salty flavor but also a sturdy, crunchy texture that contrasts beautifully with the creamy layers. For the best results, use standard salted pretzel twists and crush them finely for a uniform base. You can use a food processor or place them in a zip-top bag and crush them with a rolling pin.
Butter acts as the binding agent for the pretzel crust, transforming the crumbs into a solid, pressable base that holds its shape when sliced. It contributes a rich, savory flavor that enhances the salty notes of the pretzels. Use unsalted butter to control the overall saltiness of the dessert, especially since the pretzels already provide salt. Melt the butter completely before mixing it with the pretzel crumbs to ensure even distribution. This combination creates a crust that is both flavorful and structurally sound.
Cream cheese is the primary component of the creamy peach layer, providing a tangy richness that balances the sweetness of the peaches and sugar. This dairy product became popular in the United States in the late 19th century and is a staple in many no-bake desserts. For the smoothest filling, ensure your cream cheese is fully softened to room temperature before mixing. This will prevent lumps and create a silky, homogeneous mixture. Using full-fat cream cheese will yield the richest flavor and creamiest texture.
Peach pie filling is the star of the show, delivering the vibrant fruit flavor that gives these bars their name. While fresh peaches can be used with additional preparation, canned peach pie filling offers convenience and consistent texture and sweetness. It typically contains sliced peaches in a thick, spiced syrup, which integrates perfectly into the cream cheese layer. Look for a high-quality brand with large peach pieces for the best result. This ingredient brings the essential fruity sweetness that makes the dessert so refreshing.
Whipped topping provides the final cloud-like layer that makes these bars so visually appealing and light. While homemade whipped cream can be used, a stabilized whipped topping holds up better over time, especially if the dessert needs to be stored for more than a day. It adds a cool, creamy element without being overly heavy. Spread it gently over the set peach layer to avoid mixing the two. This finishing touch completes the dessert both in flavor and presentation.
Common Mistakes to Avoid
- Not crushing the pretzels finely enough can result in a crust that is too crumbly and difficult to slice. Aim for a mixture that resembles coarse sand with some small pieces for texture. Conversely, processing them into a complete powder can make the crust too dense.
- Using cold cream cheese is a critical error that will lead to a lumpy filling instead of a smooth, creamy layer. Always plan ahead and allow the cream cheese to sit at room temperature for at least 30 minutes before you begin mixing. This step is non-negotiable for a perfect texture.
- Spreading the whipped topping too aggressively can cause the peach layer to mix with the white topping, creating a messy marbled effect instead of clean layers. Use a gentle hand and an offset spatula to carefully dollop and spread the topping over the set filling.
- Skimping on the chilling time will result in bars that are too soft to cut cleanly. The crust needs time to set firmly, and the peach layer needs time to solidify. Rushing this process will lead to a dessert that falls apart when served. Patience is key.
- Forgetting to grease the pan will make it nearly impossible to remove the bars cleanly for serving. Always use the recommended butter or non-stick spray on your baking dish. Lining the pan with parchment paper with overhanging edges is an even better insurance policy for easy removal.
- Overmixing the cream cheese and peach filling can incorporate too much air, leading to a bubbly or porous texture instead of a smooth, dense one. Mix just until the ingredients are fully combined and no streaks remain. This ensures a professional-looking final product.
- Using a different pan size will alter the thickness of each layer and the required setting time. A 9×13 inch pan is ideal for achieving the perfect bar ratio. Using a smaller pan will make the layers too thick and require longer setting time, while a larger pan will make them too thin.
- Adding the whipped topping before the peach layer is fully set is a common mistake that compromises the structure of the dessert. The middle layer must be completely firm to the touch before you add the final topping. Otherwise, the weight will cause it to sink and merge.
Essential Techniques
Creating a perfect pretzel crust is the first essential technique for mastering these Peachy Pretzel Dream Bars. The goal is a crust that is firm enough to hold its shape when sliced but still tender to bite into. Combine the finely crushed pretzels with melted butter and sugar until the mixture resembles wet sand. Then, press it firmly and evenly into the bottom of your prepared pan. Using the flat bottom of a measuring cup helps to compact the crust, which is crucial for preventing crumbling later.
Achieving a lump-free creamy filling is the next critical technique that defines the quality of your dessert. Ensure your cream cheese is completely softened at room temperature before you begin. Beat the cream cheese and sugar together first until the mixture is completely smooth and creamy. This initial step is vital for eliminating any lumps before you add other ingredients. Only after this base is smooth should you gently fold in the peach pie filling to maintain some texture from the fruit pieces.
Layering is the final technique that ensures your bars have beautiful, distinct strata. After pressing the crust, spread the peach and cream cheese mixture over it carefully, aiming for an even layer that reaches all corners. Chill this until it is completely firm—this prevents the layers from blending when you add the whipped topping. For the top layer, dollop the whipped topping over the set peach layer and then gently spread it with an offset spatula or the back of a spoon. A gentle touch here preserves the clean separation between layers.
Pro Tips for Perfect Peachy Pretzel Dream Bars
For an extra flavor dimension, toast your crushed pretzels in the melted butter for a few minutes before pressing them into the pan. This simple step deepens the nutty, savory notes of the crust and provides a sturdier base. Allow the toasted mixture to cool slightly before pressing it into the pan to avoid melting the plastic wrap if you use it.
Line your baking pan with parchment paper, leaving an overhang on two opposite sides. This creates a sling that allows you to lift the entire dessert out of the pan once it is set. Consequently, you can cut perfectly clean bars on a cutting board without damaging your pan.
If you prefer to use fresh peaches, you will need to cook them down with sugar and a thickener to mimic the consistency of canned pie filling. Peel and slice about 3 cups of fresh peaches and cook them with 1/4 cup sugar and 2 tablespoons of cornstarch until thickened. Let this mixture cool completely before incorporating it into the cream cheese.
For a decorative finish, garnish the top of the bars with a sprinkle of additional finely crushed pretzels or a few thin peach slices just before serving. This not only adds a visual hint to the flavors inside but also provides a little extra textural contrast on the top layer.
Use a sharp, thin-bladed knife to cut the bars, and wipe the blade clean between each cut. Dip the knife in warm water before slicing to help it glide through the layers smoothly. This method ensures each bar has neat, clean edges and clearly defined layers.
If you are making this dessert for adults, consider adding a tablespoon of peach schnapps or bourbon to the cream cheese and peach filling mixture. This will enhance the peach flavor and add a sophisticated kick that elevates the entire dessert to a new level.
Variations and Adaptations
Regional variations of this dessert often reflect local fruit preferences and ingredient availability. In the American South, you might find a version using pecans in the pretzel crust for added richness and texture. Northeastern adaptations could incorporate maple syrup into the filling for a distinct autumnal flavor. West Coast versions might highlight fresh, local stone fruits like nectarines or apricots instead of peaches. These regional twists keep the core concept fresh and exciting while celebrating local produce.
Seasonal adaptations allow you to enjoy this dessert year-round with different fruit profiles. In the fall, try using apple pie filling and a dash of cinnamon in the creamy layer. For a winter holiday version, use cherry pie filling and add a hint of almond extract. Spring welcomes a version with strawberry or raspberry filling. The basic structure of the crust and creamy layers remains constant, making it a versatile template for any season. This adaptability ensures the recipe never gets boring.
Dietary modifications can make this dessert accessible to almost everyone. For a gluten-free version, use certified gluten-free pretzels and ensure all other ingredients are gluten-free. A dairy-free adaptation is possible using plant-based cream cheese and butter alternatives, along with coconut whipped topping. To reduce sugar, use a sugar substitute in the crust and choose a no-sugar-added peach pie filling. These modifications allow you to cater to various dietary needs without sacrificing flavor.
Flavor variations can transform this dessert into a completely new experience. Incorporate lemon zest into the cream cheese layer for a bright, citrusy note that cuts through the richness. Add a layer of sweetened cream cheese between the crust and the peach layer for an even creamier texture. Swirl caramel sauce into the peach layer before chilling for a decadent peaches-and-cream effect. The possibilities for customization are nearly endless, allowing you to create a signature version.
Texture modifications can cater to different preferences. For a crunchier crust, add chopped nuts to the pretzel mixture. For a smoother filling, puree the peach pie filling before mixing it with the cream cheese. If you prefer a lighter dessert, use whipped cream cheese or Greek yogurt in place of some of the regular cream cheese. You can also layer fresh peach slices on top of the whipped topping for a fresh fruit garnish. These small changes can significantly alter the eating experience.
Presentation alternatives can make the same dessert feel entirely different. Instead of bars, you can layer the components in individual parfait glasses for an elegant plated dessert. For a fun twist, press the crust into a muffin tin to create individual portion-sized desserts that are easy to serve. You can also use a round springform pan and present the dessert as a cake, slicing it into wedges. Changing the presentation style can make the dessert suitable for everything from a casual picnic to a formal dinner party.
Serving and Presentation Guide
Plating techniques for these bars should highlight their beautiful layered structure. Serve them on a plain white or light-colored plate to make the colors of the dessert pop. Use a thin, offset spatula to transfer each bar from the pan to the plate without disturbing its shape. If you have lifted the entire dessert out of the pan, you can use a sharp chef’s knife to trim the edges for a perfectly neat presentation before slicing. Clean edges showcase the layers most effectively.
Garnishing ideas should be simple and should complement the flavors without overwhelming them. A light dusting of crushed pretzel salt or a single twist of pretzel on top of each bar adds a decorative touch that hints at the crust below. A thin, fresh peach slice or a small mint leaf provides a fresh, colorful accent. For a special occasion, a tiny drizzle of caramel sauce on the plate around the bar adds elegance and an extra flavor dimension. The garnish should enhance, not hide, the dessert.
Traditional accompaniments for this dessert are minimal, as it is quite rich and satisfying on its own. A cup of coffee, either hot or iced, pairs wonderfully, as the bitterness balances the sweetness of the bars. For a summer gathering, serve them with a glass of iced tea or lemonade. The dessert is typically served cold directly from the refrigerator, which makes it particularly refreshing on a hot day. It stands well on its own without needing additional sauces or sides.
Modern serving suggestions might include deconstructing the elements for a more contemporary presentation. You could crumble the pretzel crust as a base in a bowl, add a scoop of the peach cream, and top with whipped cream and a fresh peach slice. Another idea is to create bite-sized versions by cutting the bars into small squares and serving them on a platter as finger food. For an adult gathering, pair the dessert with a glass of dessert wine or a peach-infused cocktail. These modern twists can make the dessert feel new and exciting.
Temperature considerations are crucial for the perfect serving experience. These bars must be served chilled straight from the refrigerator to maintain their structure and refreshing quality. If left at room temperature for too long, the layers can soften and become messy to eat. However, taking them out of the refrigerator about 5-10 minutes before serving can slightly soften the crust, making it easier to bite into. Finding the right balance between too cold and too soft is key to the ideal texture.
Portion control tips are helpful given the richness of this dessert. Cutting the pan into 16 smaller bars rather than 12 larger ones makes for a more appropriate single serving size. For a buffet or potluck, consider cutting them into even smaller, two-bite pieces so guests can sample other desserts as well. The rich, sweet nature of the bars means that a little goes a long way. Smaller portions ensure everyone can enjoy a taste without feeling overwhelmed by sweetness.
Wine and Beverage Pairing
Wine pairings for these Peachy Pretzel Dream Bars should complement the sweet, creamy, and salty elements without overpowering them. A late-harvest Riesling with its honeyed peach notes and balancing acidity is an excellent choice that echoes the fruit flavors in the dessert. Moscato d’Asti, with its light effervescence and sweet peach and apricot flavors, provides a refreshing counterpoint to the richness. For a more sophisticated pairing, a glass of Sauternes offers intense honey and stone fruit flavors that stand up to the dessert’s sweetness. The key is to choose a wine that is as sweet as or slightly sweeter than the dessert itself.
Non-alcoholic alternatives should provide a refreshing contrast to the sweet richness of the bars. Sparkling water with a squeeze of fresh lemon or lime cleanses the palate between bites. Iced peach tea subtly reinforces the peach flavor without adding more sweetness. A creamy vanilla chai latte offers warm spices that complement the dessert’s flavor profile. For a special treat, a peach smoothie made with yogurt mirrors the creamy peach elements of the bars. These beverages provide satisfying pairings for those avoiding alcohol.
Coffee and tea pairings work wonderfully with this dessert, as their bitterness can balance the sweetness. A medium-roast coffee with low acidity won’t compete with the dessert’s flavors but will provide a pleasant bitter contrast. For tea, consider a black tea like Earl Grey, whose bergamot notes complement the peach flavor, or a chai tea with warming spices. Iced coffee or cold brew is particularly refreshing with this summer dessert. The key is to serve these beverages without too much added sugar to maintain the contrast.
Temperature considerations for beverages are important for the overall experience. Iced or cold beverages are generally preferable, as the dessert is served chilled and you want to maintain that refreshing quality. However, a warm cup of coffee or tea can provide a pleasing temperature contrast if that is your preference. For wine, dessert wines are typically served chilled, which aligns perfectly with the cold dessert. Ultimately, the beverage temperature should enhance your enjoyment rather than create a jarring contrast.
Serving suggestions for beverages should consider the setting and presentation. For a casual outdoor gathering, serve beverages in large dispensers or pitchers for easy self-service. For a more formal dinner party, consider pre-pouring wine or iced tea into appropriate glassware before serving dessert. Always offer a choice of beverages to accommodate different preferences, as not everyone may want the same pairing. Providing options ensures all your guests can find a drink they enjoy with their Peachy Pretzel Dream Bars.
Storage and Shelf Life
Storage methods for these bars are straightforward but important for maintaining quality. Always keep them covered in the refrigerator, as the creamy layers are perishable. For best results, cover the pan tightly with plastic wrap or transfer cut bars to an airtight container. If layering bars in a container, place parchment paper between layers to prevent them from sticking together. Proper storage prevents the dessert from absorbing other refrigerator odors and maintains its fresh taste.
Temperature requirements are non-negotiable for food safety and texture preservation. These bars must be stored in the refrigerator at all times and should not be left at room temperature for more than two hours. The ideal refrigerator temperature is below 40°F (4°C) to keep the dairy components safe. Freezing is possible but may affect the texture of the creamy layers upon thawing. For the best eating experience, serve the bars chilled directly from refrigeration.
Container recommendations depend on whether you are storing the whole dessert or individual portions. For the uncut dessert, storing it in the original baking pan covered with plastic wrap is convenient. For cut bars, an airtight plastic container with a snap-on lid works best. Glass containers are also suitable but may be heavier. Whatever container you choose, ensure it has a tight-sealing lid to prevent the bars from drying out or absorbing odors.
Signs of spoilage are important to recognize for food safety. If the bars develop an off smell, unusual sliminess, or visible mold, discard them immediately. Normally, the bars should smell sweet and creamy with a hint of peach. Any sour or unpleasant odor indicates spoilage. Although the bars have a relatively short shelf life, proper refrigeration should keep them fresh for the recommended time. When in doubt, it is always safer to throw them out.
Reheating instructions are not applicable for this dessert, as it is meant to be served cold. If the bars have become too firm in the refrigerator, let them stand at room temperature for 5-10 minutes before serving to slightly soften the crust. However, they should not be warmed significantly, as this would cause the layers to separate and become messy. The chilling is essential to the structure and eating experience of this particular dessert.
Freezing guidelines can extend the shelf life but may slightly alter the texture. To freeze, place uncut bars or individual portions on a parchment-lined baking sheet and freeze until solid. Then transfer the frozen bars to an airtight freezer container or heavy-duty freezer bags. They can be frozen for up to 2 months. Thaw overnight in the refrigerator before serving. Note that the whipped topping layer may become slightly watery upon thawing, so you may want to add fresh topping after thawing.
Make Ahead Strategies
Prep timeline for these bars is very accommodating for make-ahead preparation. You can prepare the entire dessert up to 2 days in advance of when you plan to serve it. The crust can be made and pressed into the pan up to a day ahead, covered, and stored at room temperature. The peach and cream cheese layer can be prepared and spread over the crust up to two days ahead. Add the whipped topping layer no more than a few hours before serving for the best texture and appearance.
Storage between steps is simple and does not compromise quality. If making the crust ahead, cover the pan tightly with plastic wrap and store at room temperature. Do not refrigerate the crust alone, as the moisture can make it soggy. If you have added the peach layer, the dessert must be refrigerated. You can keep the dessert at this stage for up to two days before adding the final whipped topping layer. This staggered approach breaks the work into manageable steps.
Quality impact assessment of make-ahead preparation is generally positive. The flavors actually improve as they have time to meld together in the refrigerator. The crust may soften slightly over time but will maintain its structural integrity. The peach layer sets firmer when given adequate time to chill. The only component that suffers with extended storage is the whipped topping, which is why it should be added closer to serving time. Overall, making the dessert ahead enhances rather than diminishes its quality.
Assembly tips for make-ahead preparation ensure the best results. When adding the peach layer over the crust, spread it evenly right to the edges to create a seal that helps prevent the crust from becoming soggy. Chill until completely firm before covering with plastic wrap to prevent condensation from forming on the surface. When adding the whipped topping later, ensure the peach layer is very cold so the topping spreads easily without tearing the surface. These small details preserve the quality of each component.
Reheating guidelines are not applicable since this dessert is served cold. However, if you need to soften the dessert slightly for easier slicing, let it stand at room temperature for no more than 10-15 minutes. Do not let it warm up significantly, as this can cause the layers to separate and become messy. The dessert is intended to be enjoyed cold, so extended time at room temperature is not recommended for food safety reasons as well.
Fresh element additions can refresh a make-ahead dessert right before serving. If you made the dessert completely ahead, consider adding a garnish of fresh peach slices or a sprinkle of pretzel crumbs just before serving. This adds a textural contrast and visual appeal that makes the dessert seem freshly made. You can also add a light drizzle of caramel sauce or a dusting of cinnamon at the last minute. These final touches elevate a make-ahead dessert to something special.
Scaling Instructions
Halving the recipe is straightforward and perfect for smaller households or occasions. Use an 8×8 inch square pan instead of the 9×13 inch pan. Precisely halve all the ingredients using measuring cups and spoons for accuracy, as eyeballing can throw off the balance. The preparation method remains exactly the same, but the chilling time may be slightly less due to the thinner layers. This scaled-down version is ideal when you want the dessert but don’t need 16 servings.
Doubling or tripling the recipe works well for very large gatherings. Use multiple 9×13 inch pans rather than one enormous pan, as very thick layers will not set properly and will be difficult to serve. Double or triple each ingredient precisely, mixing each component in separate batches to ensure proper incorporation. You may need to work in batches if your mixer bowl isn’t large enough. The chilling time may need to be extended by an hour or two for the larger volume to set completely.
Equipment adjustments are necessary when scaling the recipe. For a halved recipe, your standard mixer bowl and attachments will work fine. For doubled or tripled recipes, you may need a larger mixing bowl or to mix in batches. Ensure you have enough refrigerator space for the pans, especially when making multiple batches. If oven space is needed for toasting the crust, consider that when planning your workflow. Proper equipment planning prevents last-minute struggles during preparation.
Timing modifications when scaling mostly affect the chilling rather than the active preparation time. The active prep time will increase somewhat when making larger batches, but not proportionally—it doesn’t take twice as long to make a double batch. The significant difference is in the chilling time; thicker layers or more pans may require additional time to set completely. Plan for at least 4-6 hours of chilling time for a single batch, and add an extra 1-2 hours for each additional batch or for significantly thicker layers.
Storage considerations change when scaling the recipe. Multiple pans will require more refrigerator space, so clear space in advance. For halved recipes, the smaller pan may fit in spots a standard 9×13 pan won’t. If making ahead, ensure you have enough containers for any leftovers. For large events, you might need to transport multiple pans, so plan for appropriate carriers that will keep the desserts cold and level. These practical considerations are important for success when scaling.
Nutritional Deep Dive
Macro breakdown of these bars reflects their status as a dessert meant for occasional enjoyment. A typical serving provides carbohydrates from the pretzels, sugar, and fruit filling; fats from the butter, cream cheese, and whipped topping; and a small amount of protein from the dairy components. The exact numbers will vary based on specific brands and any modifications, but expect a balance skewed toward carbohydrates and fats. This is consistent with most desserts and should be considered when planning your overall dietary intake.
Micronutrient analysis reveals some beneficial nutrients amid the indulgence. Peaches provide vitamin C, vitamin A, and potassium, along with dietary fiber, especially if you use filling with real fruit pieces. Dairy ingredients contribute calcium and vitamin D. The pretzels offer sodium and some B vitamins from the enriched flour. While not a health food, the dessert does provide more nutritional value than many other sweets that rely solely on sugar and fat for flavor.
Health benefits are modest but present when considering the whole dessert. The peach component provides antioxidants and fiber, which support digestive health. Dairy ingredients offer calcium for bone health. The satisfaction derived from enjoying a well-made dessert also has psychological benefits, contributing to a balanced approach to eating. When consumed in moderation as part of an overall healthy diet, such treats can enhance quality of life without significantly compromising health goals.
Dietary considerations are important for those with specific health concerns. The dessert is high in sugar and saturated fat, which should be limited by those managing diabetes, heart health, or weight. The pretzel crust contains gluten, making it unsuitable for those with celiac disease or gluten sensitivity. Lactose intolerance may also be a concern due to the dairy content. Being aware of these factors allows individuals to make informed choices about consumption or seek appropriate modifications.
Portion analysis suggests that a small serving provides sufficient satisfaction due to the rich, sweet nature of the dessert. The standard serving size of one bar from a 16-bar pan is designed to be satisfying without being excessive. The
Print
Peachy Pretzel Dream Bars
Description
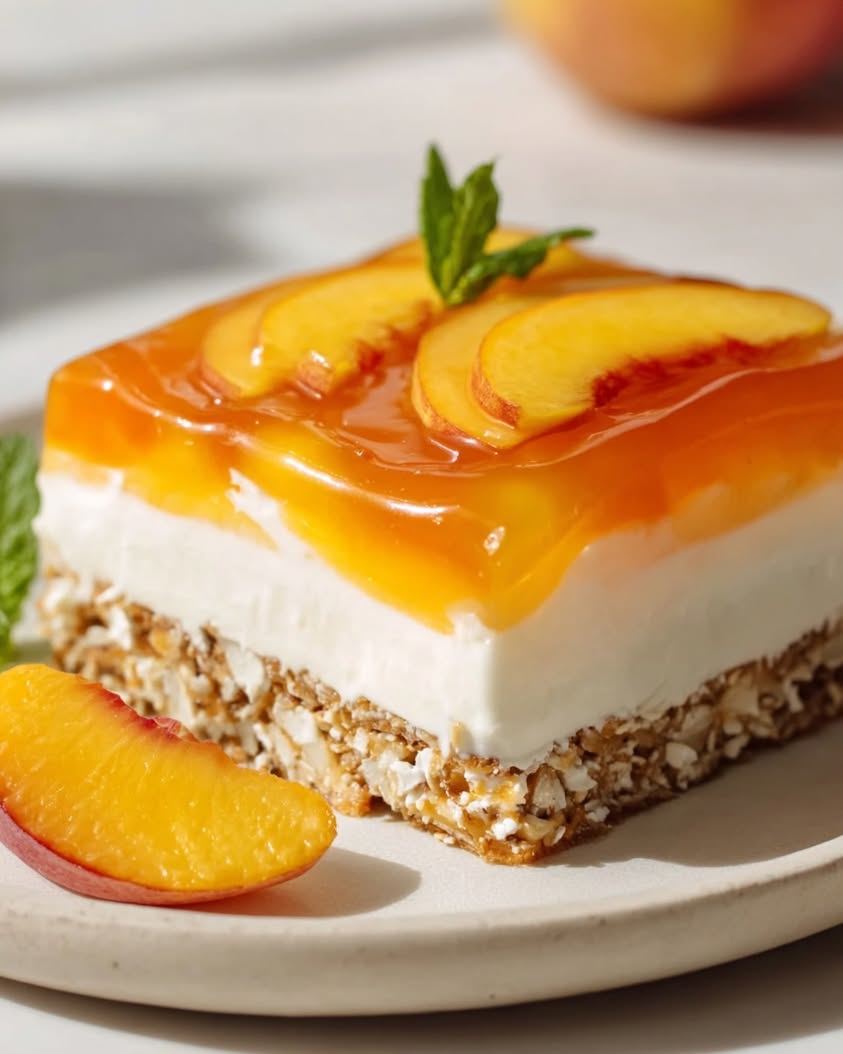
A delightful sweet and salty dessert with a crunchy pretzel crust, creamy filling, and juicy peach topping.
Ingredients
For the Crust:
- 2 cups crushed pretzels
- 3/4 cup melted butter
- 1/4 cup granulated sugar
- 8 oz cream cheese, softened
- 1 cup powdered sugar
- 1 cup whipped topping
- 21 oz can peach pie filling
Instructions
1. Prepare the Crust:
- Preheat oven to 350°F. Mix crushed pretzels, melted butter, and granulated sugar. Press into a 9×13 inch baking dish and bake for 10 minutes. Cool completely.
- Beat cream cheese and powdered sugar until smooth. Fold in whipped topping. Spread over cooled crust.
- Spoon peach pie filling evenly over cream cheese layer. Chill for at least 2 hours before serving.
Notes
You can customize the seasonings to taste.
I’m Shaykee—born in Morocco, seasoned across continents. From airplane galleys to home kitchens, I share the flavors and stories that shaped my journey.