Rustic No Knead Rosemary Garlic Bread: The Effortless Artisan Loaf
Imagine pulling a loaf of bread from your oven that looks and smells like it came from a professional bakery. This rustic no knead rosemary garlic bread delivers exactly that experience with minimal effort. The crust crackles audibly as it cools, giving way to a soft, holey interior bursting with the savory fragrance of roasted garlic and earthy rosemary. Ultimately, this recipe proves that incredible homemade bread requires more patience than skill.
This particular loaf transforms simple pantry staples into something truly spectacular. The long, slow fermentation not only develops incredible flavor but also creates that coveted open crumb structure. Meanwhile, the roasted garlic melts into the dough, and the rosemary infuses every bite with its piney aroma. Consequently, you get a bread that is impressive enough for a dinner party yet simple enough for a weeknight soup companion.
The magic of no knead bread lies in its forgiving nature. You simply mix the ingredients, let time do the work, and bake. There is no need for a stand mixer or any complicated techniques. This rustic no knead rosemary garlic bread is the perfect gateway into the world of artisan baking. It will build your confidence and fill your kitchen with an irresistible, comforting scent that promises a delicious reward.
Quick Recipe Highlights
- Flavor Profile: This bread features a robust, savory taste. The sweet, mellow notes of roasted garlic perfectly complement the sharp, pine-like flavor of fresh rosemary. Additionally, the natural tang from the long fermentation adds a delightful complexity that store-bought bread simply cannot match.
- Texture: Expect a textbook artisan texture with this loaf. You get a shatteringly crisp, blistered crust that gives way to a tender, moist, and irregularly open crumb. Each slice has a wonderful chew without being dense, making it ideal for soaking up sauces or olive oil.
- Aroma: The baking fragrance is absolutely intoxicating. As the bread bakes, the scent of toasting wheat, caramelizing garlic, and warming rosemary fills your entire home. This aromatic promise builds anticipation for the first warm, buttered slice straight from the oven.
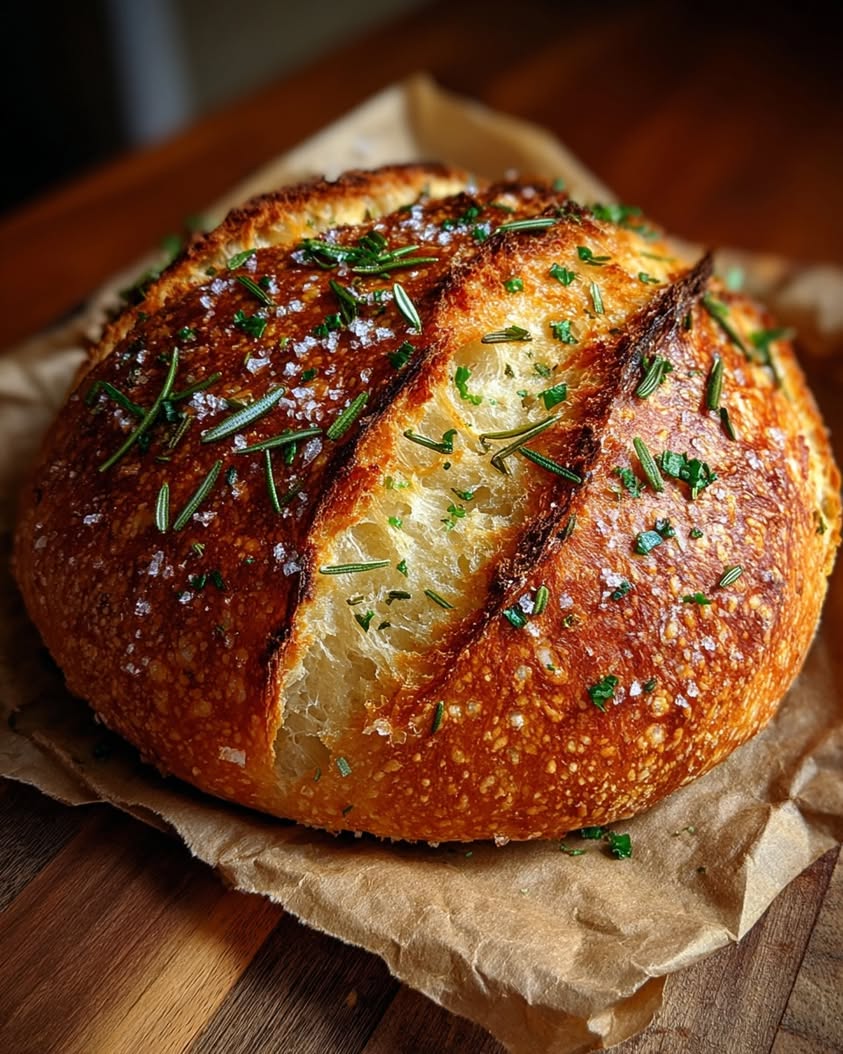
- Visual Appeal: This loaf boasts a beautifully rustic, flour-dusted exterior with deep, dramatic cracks from oven spring. When you slice it open, the contrast between the golden crust and the soft, cream-colored interior studded with green rosemary and specks of garlic is stunningly photogenic.
- Skill Level Needed: This recipe is perfect for absolute beginners. You need only basic mixing skills and the ability to follow a timeline. There is no kneading, no complicated shaping, and the Dutch oven technique guarantees a great result every single time.
- Special Equipment: The only special tool required is a heavy, oven-safe pot with a lid, like a Dutch oven. This pot creates the perfect steamy environment for the crust to develop. Otherwise, you just need a large bowl for mixing and a kitchen scale for best results.
Recipe Overview
- Difficulty Level: We rate this recipe as easy because it eliminates the most intimidating steps of traditional bread baking. There is no kneading, no windowpane test, and no precise shaping. The hands-on work totals about 15 minutes, while the rest is passive waiting. Even a first-time baker can achieve a professional-looking loaf with this forgiving method.
- Category: This bread falls squarely into the artisan bread category. It is a yeast-leavened, crusty loaf perfect for everyday meals and special occasions alike. You can serve it as a side dish, use it for sandwiches, or simply enjoy it toasted with a generous spread of good butter.
- Cuisine: While no knead bread has modern roots, its inspiration is deeply European, echoing the simple, crusty peasant loaves of France and Italy. The addition of rosemary and garlic nods to Mediterranean flavors, making it a versatile companion to pastas, soups, and roasted meats from various culinary traditions.
- Cost: This is an incredibly cost-effective recipe. A single loaf costs just a fraction of what you would pay at a bakery. The main ingredients—flour, water, yeast, and salt—are pantry staples. Fresh rosemary and a head of garlic are the only fresh additions, making this a budget-friendly way to enjoy gourmet bread at home.
- Season: This rustic no knead rosemary garlic bread is truly a year-round staple. However, it feels particularly comforting in the cooler fall and winter months alongside stews and roasts. Conversely, it is also fantastic in summer for sopping up the juices from ripe tomatoes or serving with grilled vegetables.
- Occasion: This loaf is versatile enough for any event. It elevates a simple weeknight dinner, acts as the star of a casual gathering with dips and cheeses, and is impressive enough for holiday meals. Baking it is also a wonderfully satisfying weekend project that yields delicious results.
Why You’ll Love This Recipe
First and foremost, the taste and texture of this bread are utterly transcendent. The slow fermentation develops a subtle tang that enhances the savory garlic and aromatic rosemary. You will adore the contrast between the crackling, salty crust and the soft, yielding interior. Each bite offers a complex flavor profile that evolves, making it impossible to stop at just one slice. This rustic no knead rosemary garlic bread becomes the centerpiece of any meal, often upstaging the main course with its homemade charm and incredible depth of flavor.
Furthermore, the convenience factor is a massive win. This recipe demands very little active time from you. You simply mix the dough before bed or in the morning, let it rise all day or overnight, and then bake. There is no need to plan your day around kneading and multiple rises. This hands-off approach fits seamlessly into a busy schedule, proving that you can have fresh, artisan-quality bread without spending hours in the kitchen. The method is remarkably forgiving, which builds baking confidence quickly.
From a nutritional standpoint, homemade bread like this offers clear advantages. You control every ingredient that goes into the loaf, avoiding the preservatives and additives common in commercial breads. The long fermentation process also helps to pre-digest some of the gluten and phytic acid, making the nutrients more bioavailable and the bread easier to digest for many people. It is a wholesome, satisfying source of carbohydrates that fuels your body with simple, recognizable ingredients.
Moreover, the social and entertaining value of this bread is immense. There is something magical about presenting a warm, homemade loaf to family or guests. The act of breaking bread together fosters connection, and the impressive appearance sparks conversation. Serving this rustic no knead rosemary garlic bread at a dinner party instantly elevates the meal, showing care and effort. It also makes a thoughtful, heartfelt gift that is always appreciated far more than something store-bought.
Finally, the cost-effectiveness and accessibility seal the deal. For the price of one artisan loaf from a boutique bakery, you can bake several of these at home. The ingredients are basic and easy to find. You do not need any fancy equipment beyond a heavy pot. This recipe democratizes gourmet bread, making it an accessible luxury for any home cook. It turns the simple act of baking bread into a rewarding ritual that nourishes both body and soul without straining your wallet.
Historical Background and Cultural Significance
The story of no knead bread is surprisingly modern, yet its principles are ancient. Food journalist Mark Bittman famously published Jim Lahey’s no-knead method in the New York Times in 2006, sparking a home baking revolution. This technique, however, echoes the oldest forms of bread making where wild yeasts and long, slow fermentation were the norm. The innovation was recognizing that time, not muscle, develops gluten. This rustic no knead rosemary garlic bread is a direct descendant of that revelation, applying age-old flavor combinations to a groundbreaking, accessible method.
Culturally, bread is a universal symbol of sustenance and community. Adding rosemary and garlic connects this loaf to the culinary traditions of the Mediterranean, where these herbs grow abundantly and are used to impart deep flavor to simple foods. In many cultures, sharing bread is a sacred act of hospitality. Baking this loaf at home taps into that deep-seated tradition, creating a sense of accomplishment and connection to generations of bakers who came before, all while using a brilliantly simplified technique.
The evolution of this recipe showcases how home cooking adapts. The original no-knead formula was a plain white loaf. Creative bakers immediately began experimenting with add-ins. Rosemary and garlic were natural, beloved choices because they are classic, robust flavors that can stand up to and enhance the wheaty taste of the bread. This adaptation represents the beautiful evolution of a recipe as it passes through kitchens worldwide, constantly being refined and personalized while staying true to its effortless core principle.
Regional variations of this concept are endless. In Provence, you might find herbs de Provence instead of just rosemary. In Southern Italy, sun-dried tomatoes and olives might be added. The basic no-knead framework is a canvas. This particular rustic no knead rosemary garlic bread is a beloved standard because the flavors are so universally appealing. It serves as a perfect base recipe, encouraging bakers to then explore their own cultural or personal preferences, perhaps adding nuts, cheeses, or different herbs in subsequent bakes.
Ingredient Deep Dive
Let us start with bread flour, the foundation. Bread flour has a higher protein content (typically 12-14%) than all-purpose flour. This protein is crucial because it develops into gluten strands during the long fermentation, creating the strong, elastic network that traps gas and gives the bread its lofty rise and open crumb. Without this structure, your loaf would be dense. For best results, weigh your flour for accuracy. If you must substitute, all-purpose flour will work but may yield a slightly less chewy crumb.
Next, consider the instant yeast. This modern, reliable leavening agent is the engine of your bread. Unlike active dry yeast, instant yeast can be mixed directly into the dry ingredients without proofing. It works slowly and steadily over the long rise, producing gas and flavor compounds. The extended fermentation time is key to the deep flavor of this rustic no knead rosemary garlic bread. Store yeast in the freezer to maximize its shelf life and ensure consistent results batch after batch.
Now, for the star flavors: rosemary and garlic. Fresh rosemary is non-negotiable for its potent, piney aroma. Dried rosemary becomes woody and sharp; fresh leaves release their oils beautifully into the dough. For the garlic, roasting is the transformative step. Roasting caramelizes the natural sugars, mellowing the sharp, pungent raw bite into a sweet, nutty, spreadable paste. This sweet garlic paste distributes evenly throughout the dough, ensuring every bite is infused with its rich flavor without any harsh, bitter notes.
Finally, do not underestimate the importance of salt and water. Salt does more than just season; it tightens the gluten structure and regulates yeast activity. Using fine sea salt ensures it dissolves evenly. The water should be lukewarm, not hot, to gently wake the yeast without killing it. Some bakers swear by using filtered water if their tap water is heavily chlorinated, as chlorine can inhibit yeast. These small details ensure your dough environment is perfect for a successful, flavorful rise.
Common Mistakes to Avoid
- Using a glass or thin metal bowl for the rise. The dough needs a stable temperature. A glass bowl can be too cold, slowing fermentation. Always use a ceramic or thick plastic bowl.
- Skimping on the salt. Salt controls yeast activity and strengthens gluten. Without enough salt, your bread can over-rise and then collapse, resulting in a coarse, weak crumb.
- Adding raw garlic instead of roasted. Raw garlic will not mellow during baking and can create harsh, bitter pockets in your finished loaf. Always roast or sauté the garlic first.
- Using dried rosemary. Dried rosemary does not rehydrate properly in the dough and can feel like sharp little sticks in the final bread. Fresh rosemary is essential for texture and flavor release.
- Not preheating the Dutch oven long enough. The pot and lid need a full 30 minutes in a hot oven to become thoroughly heated. This thermal mass is what creates the initial oven spring and proper crust.
- Peeking during the first half of baking. When you lift the lid too early, you release the crucial steam that keeps the dough surface soft and allows for maximum expansion. Trust the process and wait.
- Cutting the bread while it is hot. The interior is still setting as it cools. Slicing too soon releases steam and can make the crumb gummy. Let it cool completely on a wire rack for the perfect texture.
- Not measuring flour by weight. Cup measurements are notoriously inconsistent. A few extra tablespoons of flour can make the dough too stiff, resulting in a dense loaf. A kitchen scale is your best friend.
Essential Techniques
The autolyse period, which is the initial rest after mixing just flour and water, is a game-changer. This technique allows the flour to fully hydrate before salt and yeast are introduced. Consequently, gluten begins to form naturally with minimal effort. This short rest makes the dough easier to handle and improves its final texture and extensibility. You will notice the dough becomes smoother and more cohesive even before the long fermentation begins. Mastering this simple wait is a key step toward professional-quality bread at home.
Stretching and folding is the no-knead alternative to building strength. Instead of kneading, you periodically grab one side of the dough, stretch it upward, and fold it over the top. You do this a few times around the bowl. This gentle action aligns the gluten strands without tearing them, creating a strong network to trap gas. It is a crucial step for developing an open crumb. The visual cue for success is seeing the dough become noticeably smoother, more elastic, and less shaggy after a few sets of folds.
Shaping the loaf is about creating surface tension. After the long rise, you gently fold the dough onto itself to form a loose ball. The goal is not to degas it completely but to create a smooth, taut outer skin. This skin will help the loaf hold its shape and rise upward in the oven. The technique involves using a bench scraper or your hands to drag the dough across a lightly floured surface, letting friction create that tension. A well-shaped loaf will look smooth and round, ready for its final proof.
Finally, baking in a preheated Dutch oven is the technique that creates the artisan crust. The sealed, hot pot mimics a professional steam-injected oven. The dough initially bakes in a humid environment, allowing the crust to stay elastic so the loaf can expand maximally. Then, you remove the lid, allowing the moisture to escape so the crust can dry, harden, and achieve its signature deep, golden-brown color and crackly texture. This two-stage bake is the secret to that bakery-quality finish on your rustic no knead rosemary garlic bread.
Pro Tips for Perfect Rustic No Knead Rosemary Garlic Bread
First, roast a whole head of garlic at once. Wrap it in foil with a drizzle of oil and bake until soft and golden. You will use some for the bread, and the rest makes a fantastic spread for the finished loaf. This maximizes your oven use and flavor potential.
For the most even distribution, chop the fresh rosemary finely. You can also bruise the leaves slightly with the back of your knife to release more of their aromatic oils directly into the dough.
If your kitchen is cold, find a warm spot for the dough to rise. The top of the refrigerator, inside an oven with just the light on, or near a radiator are all good options. Consistent warmth ensures a predictable rise time.
Use rice flour or semolina to dust your proofing basket or towel. These flours have larger grains and are less likely to be absorbed into the dough’s surface, preventing sticking and giving a beautiful, professional-looking finish to the crust.
Score the dough right before baking. Use a very sharp razor blade or lame to make one confident, deep slash about half an inch deep. This controls where the bread expands in the oven, preventing random bursting and creating an attractive pattern.
Listen to your bread as it bakes. After you remove the lid, you should hear a faint crackling sound as the crust hardens. This is a good auditory cue that the Maillard reaction is happening and your crust is developing perfectly.
For an extra glossy, blistered crust, brush the loaf lightly with water just before scoring and placing it in the Dutch oven. The added surface moisture turns to steam immediately, enhancing oven spring and crust texture.
Keep a notebook. Record your bake times, oven temperature, and any modifications. Baking is a science, and small notes will help you perfect your technique and adjust for your specific kitchen environment over time.
Variations and Adaptations
For regional twists, consider adding chopped Kalamata olives and a teaspoon of lemon zest for a Greek-inspired version. Alternatively, fold in a half cup of grated Pecorino Romano cheese and cracked black pepper for an Italian Romano bread variation. A French Herbes de Provence blend can replace the rosemary for a taste of the French countryside. These additions should be incorporated during the final mixing stage, ensuring they are evenly distributed without overworking the dough.
Seasonal adaptations are simple and rewarding. In spring, add lightly sautéed asparagus tips and lemon thyme. For summer, mix in sun-dried tomatoes and fresh basil. Autumn begs for toasted walnuts and a hint of chopped sage. In winter, try a combination of caramelized onions and a touch of chopped rosemary. Always ensure add-ins are not too wet, as excess moisture can weigh down the dough and affect the final texture of your rustic no knead bread.
Dietary modifications are straightforward. For a vegan loaf, ensure no dairy-based additions are used. To make it gluten-free, substitute a high-quality gluten-free bread flour blend in a 1:1 ratio by weight, though you may need to add a teaspoon of xanthan gum if the blend does not contain it. The hydration and handling will differ, so expect a slightly denser but still delicious result. Always check that your yeast is certified gluten-free if necessary.
Flavor variations are endless. For a richer loaf, replace a quarter cup of water with whole milk. Add a tablespoon of honey to the water for a hint of sweetness that complements the garlic. For a spicy kick, incorporate a teaspoon of crushed red pepper flakes. A tablespoon of finely grated Parmesan cheese mixed into the dry ingredients adds a savory, umami depth. Experiment with different fats, like using olive oil instead of neutral oil, for a fruitier note.
Serving and Presentation Guide
Plating this bread is all about embracing its rustic beauty. Place the whole loaf directly on a wooden cutting board, not a plate. Let its cracked, flour-dusted crust be the centerpiece. Provide a sharp serrated bread knife for guests to slice their own pieces, which adds to the interactive, communal feel of the meal. For a more composed presentation, pre-slice the loaf and fan the pieces out slightly on the board, showcasing the beautiful open crumb and herb studding.
Garnishing is simple but effective. Place a few fresh sprigs of rosemary and a whole roasted head of garlic next to the loaf on the board. This visually reinforces the flavors inside. A small bowl of flaky sea salt and a dish of high-quality extra virgin olive oil for dipping are essential accompaniments. For color, add a handful of cherry tomatoes or a bunch of grapes to the board to create a visually appealing and abundant spread.
Traditional accompaniments highlight the bread’s Mediterranean roots. Serve it with a bowl of rich, herb-infused olive oil for dipping. A small plate of aged balsamic vinegar alongside the oil allows for custom blends. A selection of cheeses, particularly a soft goat cheese or a hard Pecorino, pairs beautifully. For a classic pairing, offer a bowl of tomato basil soup or a hearty minestrone for dipping.
Modern serving suggestions focus on its versatility. Use thick slices for gourmet avocado toast topped with chili flakes. Cube and toast it for the best croutons in a Caesar salad. Create an epic sandwich with roasted vegetables, pesto, and fresh mozzarella. Serve it alongside a cheese and charcuterie board as the carbohydrate anchor. For brunch, use it for a luxurious eggs Benedict base or simply toast and slather with ricotta and honey.
Wine and Beverage Pairing
Wine pairings for this savory bread are delightful. A medium-bodied red like a Sangiovese or a Chianti Classico complements the herbal rosemary and the sweetness of the roasted garlic without overpowering the bread. The wine’s acidity cuts through the richness. For white wine lovers, a crisp, herbal Sauvignon Blanc mirrors the rosemary notes beautifully. An oaked Chardonnay with buttery notes also pairs wonderfully with the toasted, bready flavors and the creamy texture of the crumb.
Non-alcoholic alternatives should offer cleansing contrast or flavor harmony. A sparkling water with a squeeze of lemon provides a palate-cleansing effervescence. For something more complex, a chilled herbal iced tea, like rosemary-lemon or mint, echoes the bread’s botanical notes. A tart cherry juice or a non-alcoholic sparkling cider can also work, offering a sweet counterpoint to the savory, garlicky flavors of the rustic no knead rosemary garlic bread.
Coffee and tea pairings are excellent for breakfast or brunch service. A medium-roast coffee with low acidity and notes of nut or chocolate complements the toasty crust. A creamy cappuccino is a classic pairing. For tea, a robust English Breakfast or an Earl Grey with its citrusy bergamot note stands up well. An herbal tea, specifically a rosemary or lemon verbena blend, can create a harmonious flavor echo that is quite sophisticated.
Temperature considerations are key. Serve red wines slightly below room temperature, around 60-65°F. White wines and sparkling waters should be well-chilled. For non-alcoholic options like iced tea, ensure they are cold but not watered down from too much ice. The bread itself is best served warm or at room temperature to appreciate its full texture and aroma. Avoid serving it piping hot, as that can mute both the bread’s flavor and the accompanying beverage.
Storage and Shelf Life
Storage methods depend on your timeline. For same-day serving, simply keep the whole, uncut loaf on a cutting board under a clean tea towel. The crust will stay crisp for several hours. For longer storage, the approach changes completely. Never store crusty bread like this in a plastic bag at room temperature, as it will turn the crust soft and chewy, and promote mold. The goal is to preserve the crust’s integrity for as long as possible.
For storage beyond one day, the best method is to wrap the cooled loaf tightly in aluminum foil and then place it in a large zip-top bag, squeezing out excess air. Store this at room temperature for up to 2 days. The foil helps retain moisture in the crumb, while the bag offers an extra barrier. To restore the crust, unwrap the loaf and place it directly on the oven rack in a 350°F oven for 5-10 minutes until crisp and warm throughout.
Freezing is an excellent option for long-term storage. Wrap the completely cooled loaf tightly in plastic wrap, then in aluminum foil, and finally place it in a freezer bag. It will keep for up to 3 months. Thaw overnight at room temperature while still wrapped to prevent condensation from making the crust soggy. Then, re-crisp in the oven as described above. You can also freeze pre-sliced portions for easy toast-ready bread.
Recognizing spoilage is important. Visible mold, usually blue or green fuzzy spots, means the entire loaf should be discarded. A sour or off smell is another clear indicator. If the bread just becomes very hard, it is stale, not spoiled. Stale bread can be revived by sprinkling with water and reheating, or it can be repurposed into breadcrumbs, croutons, or strata. Always store in a cool, dry place away from direct sunlight.
Make Ahead Strategies
The entire beauty of this recipe is its make-ahead nature. The primary fermentation is an 8-18 hour make-ahead step. You can mix the dough in the evening, let it rise overnight at room temperature, and bake it fresh in the morning. Alternatively, mix it in the morning for baking in the evening. This flexibility allows you to schedule baking around your life, not the other way around. The dough is very forgiving within that time window.
For even more advanced prep, you can retard the dough in the refrigerator. After the initial mix and a 1-hour room temperature rest, place the covered bowl in the refrigerator for up to 3 days. The cold dramatically slows the yeast, developing even more complex sourdough-like flavors. When ready to bake, remove the dough from the fridge, let it come to room temperature for about 2 hours, then proceed with shaping, proofing, and baking. This is the secret to the deepest flavor.
You can also par-bake the loaf. Bake it with the lid on for the full 30 minutes, then remove the lid and bake for only 10 minutes of the uncovered time. The loaf will be set but pale. Let it cool completely, wrap well, and freeze. To finish, place the frozen par-baked loaf directly into a preheated 450°F Dutch oven (no need to thaw) and bake uncovered for 15-20 minutes until deeply golden. This yields a truly fresh-baked result in half the time.
For fresh element additions, prepare your roasted garlic and chopped rosemary ahead of time. Store the roasted garlic cloves in a small airtight container in the refrigerator for up to 5 days. Keep the chopped rosemary wrapped in a damp paper towel inside a bag in the fridge for 2-3 days. Having these components ready streamlines the process, allowing you to mix the dough in just minutes whenever the baking inspiration strikes.
Scaling Instructions
Halving the recipe is simple for a smaller loaf. Precisely halve all ingredients by weight. Use a smaller (3-4 quart) Dutch oven if you have one, or the standard 5-6 quart will still work. The bake time may reduce by 5-10 minutes, so start checking for doneness a little earlier. The fermentation times will remain largely the same, as yeast activity is relative to dough mass and temperature.
Doubling or tripling the recipe requires careful consideration. You can mix a double batch in one very large bowl, but for tripling, consider mixing two separate batches for easier handling. You must divide the dough for shaping—each loaf should be the original recipe’s weight. You will need to bake them one at a time unless you have multiple Dutch ovens. Allow the shaped loaves to proof while the first one bakes. The active prep time increases, but the hands-off rise time does not.
Equipment adjustments are necessary when scaling. For larger batches, ensure your mixing bowl is big enough—the dough will nearly triple in volume during the rise. Have multiple proofing baskets or bowls lined with towels ready if making multiple loaves. Most importantly, remember that a standard home oven can typically only accommodate one Dutch oven at a time due to heat circulation. Plan your baking schedule accordingly, allowing the oven to reheat fully between loaves.
Timing modifications are minimal when scaling up. The bulk fermentation time for a double batch in one bowl may be slightly longer, as the center of a larger dough mass will stay cooler. Watch the dough, not the clock. Look for it to double in size and be covered in bubbles. For shaped proofing, the time should be consistent regardless of batch size, as each loaf is individually shaped. Always use the finger-dent test to check if proofing is complete before baking.
Nutritional Deep Dive
A macro breakdown of this bread reveals it is primarily a source of complex carbohydrates, providing sustained energy. One average slice contains approximately 150-180 calories, with about 30g of carbohydrates, 5g of protein from the bread flour, and 1-2g of fat, mostly from the olive oil used in roasting the garlic. It is naturally low in sugar and contains a modest amount of dietary fiber, especially if you use a high-quality bread flour with a higher extraction rate.
The micronutrient profile includes B vitamins like thiamine and niacin from the enriched flour, which are essential for energy metabolism. Rosemary contributes antioxidants like rosmarinic acid, which have anti-inflammatory properties. Garlic is renowned for allicin, a compound with potential cardiovascular benefits. While not a significant source of vitamins and minerals on its own, this bread acts as a vehicle for these beneficial plant compounds from the herbs and garlic, enhancing the nutritional value of your meal.
Health benefits stem from its whole-food ingredients and preparation method. The long fermentation may help break down phytic acid, improving mineral absorption. Homemade bread avoids the preservatives, added sugars, and unhealthy fats found in many commercial loaves. When consumed as part of a balanced meal with proteins, healthy fats, and vegetables, it contributes to satiety and meal satisfaction. The act of baking it yourself also promotes mindful eating and a connection to your food.
For dietary considerations, this recipe is vegetarian and can be made vegan by ensuring no dairy-based add-ins are used. It is not suitable for a gluten-free or low-carb diet in its standard form. For portion control, one medium slice is a standard serving. Because the flavor is so robust, you may find yourself satisfied with less than you would eat of a bland, store-bought bread. Pairing it with protein and fat, like cheese or olive oil, helps balance the meal and manage blood sugar response.
Dietary Adaptations
A gluten-free adaptation requires a complete flour swap. Use a premium gluten-free bread flour blend that contains binders like xanthan gum. You may need to add an extra teaspoon of xanthan gum if your blend is light on it. The hydration might need slight adjustment—start with the recipe’s amount and add more water tablespoon by tablespoon until the dough resembles a thick, scoopable batter rather than a kneadable dough. The texture will be more cake-like but still delicious.
For a dairy-free version, the standard recipe is already compliant. Just ensure that any added fats or garnishes are plant-based. Use olive oil for roasting the garlic instead of butter. When serving, offer vegan butter or olive oil for spreading. This makes the loaf suitable for those with lactose intolerance or following a vegan lifestyle without any modification to the core dough recipe.
A vegan adaptation is identical to the dairy-free version. The ingredients—flour, water, yeast, salt, rosemary, garlic, oil—are all plant-based. The key is to check your yeast; some brands are processed using lactose as a carrier, but most standard instant yeasts are vegan. This rustic no knead rosemary garlic bread is naturally vegan, making it an excellent, impressive option for mixed-diet gatherings where you need one recipe to please everyone.
Low-carb and keto adaptations are challenging for a bread recipe. You could experiment with a base of almond flour and psyllium husk, but the texture and rise will be fundamentally different. It would become a dense, moist loaf more akin to a quick bread. For a true keto version, consider this more of a flavor inspiration for a fathead dough or a keto-friendly focaccia recipe that uses the same rosemary and garlic flavor profile instead of a direct substitution.
Troubleshooting Guide
If your bread is too dense, the most common culprit is over-measuring the flour. Always use a scale. Other causes include water that was too cold, slowing yeast activity, or not allowing the dough to rise long enough. Ensure your kitchen is warm enough (70-75°F is ideal). Also, check your yeast’s expiration date. A dense loaf can also result from handling the dough too roughly after the final rise, which deflates the precious gas bubbles.
If the crust is pale and soft, your oven likely wasn’t hot enough, or the Dutch oven wasn’t preheated sufficiently. Use an oven thermometer to verify temperature. Ensure you bake with the lid on for the full first 30 minutes to trap steam. Also, baking time with the lid off may need to be extended if your loaf is larger. The crust should be a deep, rich brown. A pale crust often indicates under-baking.
If the bread spreads flat instead of rising up, the dough was likely over-proofed. During the final proof, the gluten structure can over-extend and weaken. Use the finger-dent test: if you gently poke the dough and the indentation remains and doesn’t spring back, it’s over-proofed. Next time, shorten the final proofing time. Also, ensure you created enough surface tension during shaping to help the loaf hold its upright structure.
If the garlic burns or tastes bitter, the pieces were likely too small or not roasted first. Always roast whole cloves until soft and sweet before incorporating. If chopping roasted garlic, make the pieces a moderate size. Burnt, bitter garlic can also happen if some pieces are exposed on the surface of the dough during baking. Try to encase all add-ins within the dough during the final folds to protect them from direct oven heat.
Recipe Success Stories
Community feedback on this recipe consistently highlights its transformative effect on baking confidence. Many home cooks report that this was the first bread they ever baked successfully, leading them to explore more complex sourdoughs and enriched doughs. A common theme is the pride of presenting the loaf to skeptical family members who then request it regularly. The aroma alone, wafting through the house, is frequently cited as a major success—turning an ordinary day into a special occasion.
Variation successes are widely shared. One baker added crispy pancetta and grated Gruyère for a savory twist that became a hit at book club. Another successfully adapted it for a gluten-free friend using a 1:1 blend, reporting that while different, it was still the best gluten-free bread they’d tasted. A third used the dough to make individual rolls in a muffin tin for a dinner party, perfect for portion control and presentation. These stories show the recipe’s fantastic adaptability.
Reader suggestions have improved the recipe over time. Many recommend using a mix of white and whole wheat flour (up to 30% whole wheat) for a nuttier flavor and more fiber. Others suggest adding the rosemary in two stages: half mixed into the dough and half pressed onto the top after scoring for a stronger visual and aromatic punch. The tip
Print
Rustic No Knead Rosemary Garlic Bread
Description
A simple, aromatic bread with a crispy crust and soft interior, infused with fresh rosemary and roasted garlic, requiring no kneading.
Ingredients
For the Crust:
- 3 cups all-purpose flour
- 1 1/2 teaspoons salt
- 1/2 teaspoon active dry yeast
- 1 1/2 cups warm water
- 2 tablespoons fresh rosemary, chopped
- 4 cloves garlic, minced and lightly sautéed
- 1 tablespoon olive oil
Instructions
1. Prepare the Crust:
- In a large bowl, mix flour, salt, and yeast. Add warm water, rosemary, and sautéed garlic, stirring until a shaggy dough forms.
- Cover the bowl with plastic wrap and let it rise at room temperature for 12-18 hours until doubled in size and bubbly.
- Preheat oven to 450°F (230°C) with a Dutch oven inside for 30 minutes. Shape dough into a round, place on parchment, and transfer to the hot Dutch oven. Bake covered for 30 minutes, then uncovered for 15 minutes until golden brown.
Notes
You can customize the seasonings to taste.
I’m Shaykee—born in Morocco, seasoned across continents. From airplane galleys to home kitchens, I share the flavors and stories that shaped my journey.