Spinach & Artichoke Puff Pastry Squares: The Ultimate Party Appetizer
Imagine the creamy, cheesy goodness of your favorite spinach and artichoke dip, but nestled inside a golden, flaky puff pastry crust. These Spinach & Artichoke Puff Pastry Squares are the ultimate party appetizer, transforming a classic dip into a handheld, elegant treat. They are incredibly easy to make, requiring just a handful of ingredients and minimal prep work. Consequently, you can whip up a batch for unexpected guests or a planned gathering with equal ease.
The magic of this recipe lies in its perfect balance of textures and flavors. You get the rich, savory filling of spinach, artichokes, and melted cheese, all encased in a buttery, crisp pastry shell. Every bite delivers a satisfying crunch followed by a warm, gooey center. Furthermore, these squares are a guaranteed crowd-pleaser, appealing to both kids and adults alike. They are the perfect finger food for game day, holiday parties, or any festive occasion.
This recipe for Spinach & Artichoke Puff Pastry Squares simplifies a traditionally messy dip into a neat, portable format. You will love how the puff pastry bakes into a beautiful, golden-brown vessel that holds the flavorful filling perfectly. Moreover, the combination of creamy cheeses, tender vegetables, and aromatic seasonings creates a sophisticated flavor profile that tastes far more complex than the effort required. Ultimately, this dish is a testament to how simple ingredients can create something truly spectacular for your table.
Quick Recipe Highlights
- Flavor Profile: These squares offer a rich, savory taste with tangy notes from the artichokes and Parmesan cheese, balanced by the creamy, mild flavors of cream cheese and mozzarella. The garlic and onion powder add a subtle, aromatic depth that enhances the overall experience without overpowering the main ingredients.
- Texture: The texture is a delightful contrast between the incredibly flaky, shatteringly crisp puff pastry exterior and the luxuriously creamy, thick filling inside. The chopped artichoke hearts provide a slight, pleasant chewiness, while the spinach melts seamlessly into the cheese base.
- Aroma: As these Spinach & Artichoke Puff Pastry Squares bake, your kitchen will fill with the warm, comforting scent of baking pastry and melted cheese. The garlic and onion powder release their fragrant oils, creating an irresistible aroma that promises a delicious treat.
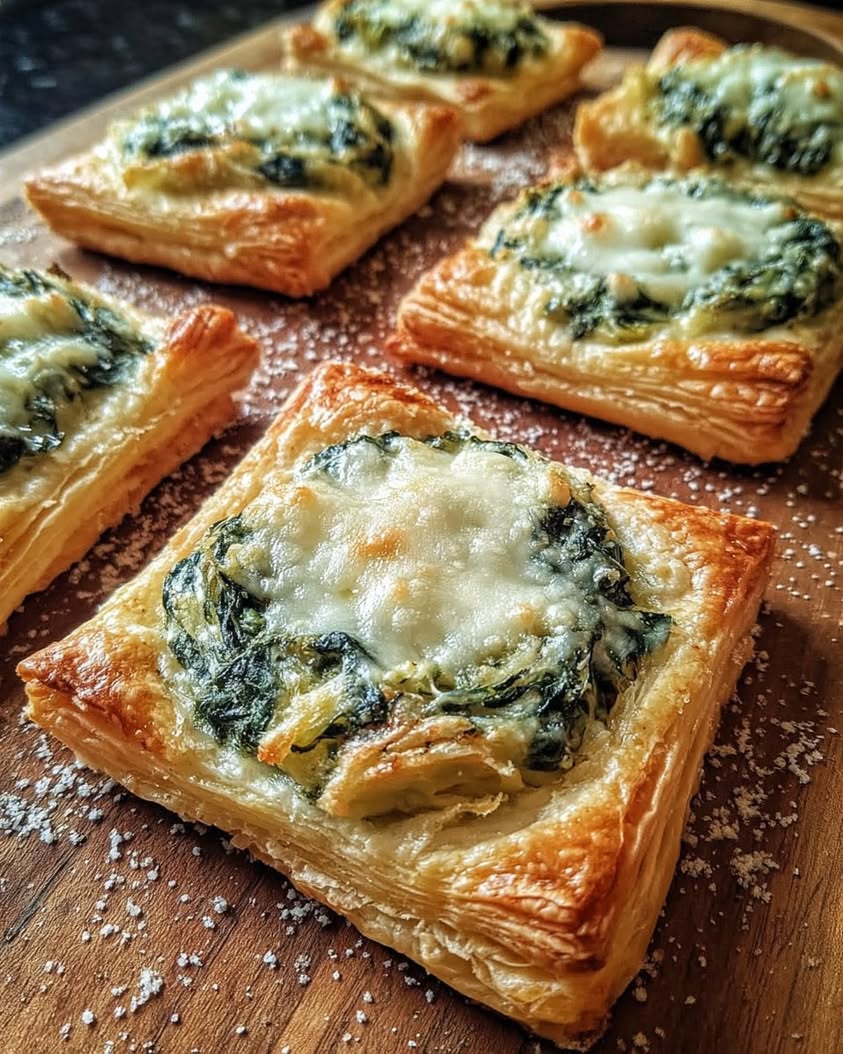
- Visual Appeal: The finished squares are a feast for the eyes, with beautifully puffed, golden-brown pastry that looks professional. When you break one open, the vibrant green spinach and light-colored artichokes peek through the stretchy, melted cheese, making them incredibly inviting.
- Skill Level Needed: This is a beginner-friendly recipe designed for home cooks of all levels. The most complex technique involved is thawing and handling puff pastry, which is a straightforward process. Therefore, even a novice can achieve impressive, restaurant-quality results.
- Special Equipment: You need only basic kitchen tools: a baking sheet, a mixing bowl, a spoon, and a knife for scoring the pastry. Parchment paper is highly recommended for easy cleanup and to prevent sticking, but it is not absolutely essential.
Recipe Overview
- Difficulty Level: This recipe is rated easy because it utilizes store-bought puff pastry, which does all the hard work of creating flaky layers. The filling is a simple mix-and-combine situation with no cooking required beforehand. Additionally, the assembly process is intuitive and quick, making it nearly impossible to mess up. The short ingredient list and clear steps ensure success for everyone.
- Category: These squares fall squarely into the appetizer and snack category, perfect for parties and gatherings. They can also serve as a delightful light lunch or brunch item when paired with a simple side salad. Their versatility makes them suitable for multiple meal occasions.
- Cuisine: While spinach and artichoke dip has roots in American cuisine, often linked to chain restaurant menus, the use of puff pastry gives it a French-inspired twist. This fusion creates a modern, elevated take on a classic comfort food that feels both familiar and sophisticated.
- Cost: This is a very cost-effective recipe, especially when you consider the impressive yield. Store-bought puff pastry, frozen spinach, and canned artichokes are budget-friendly staples. The cheeses are the primary cost, but they are used in moderate amounts, keeping the overall price per serving quite low.
- Season: These appetizers are fantastic year-round but truly shine during the holiday season and fall and winter months when warm, comforting foods are most desired. They are also a perfect fit for summer potlucks and picnics, as they are easy to transport and serve at room temperature.
- Occasion: Ideal for virtually any social event, including Super Bowl parties, holiday cocktail hours, bridal or baby showers, and casual get-togethers. They are also a great option for a fancy movie night at home or as a pre-dinner snack when hosting guests.
Why You’ll Love This Recipe
The taste and texture appeal of these Spinach & Artichoke Puff Pastry Squares is immediate and undeniable. Your first bite delivers a satisfying auditory crunch from the perfectly baked pastry, which then gives way to a warm, savory, and incredibly creamy center. The flavors are rich and complex, with the tangy artichoke and salty Parmesan cutting through the richness of the cream cheese and mozzarella. Furthermore, the subtle garlic and onion notes tie everything together, creating a harmonious and deeply satisfying flavor experience that keeps you reaching for just one more square.
From a convenience standpoint, this recipe is an absolute dream. The preparation is remarkably straightforward, with a total hands-on time of just fifteen minutes. You can assemble the entire dish ahead of time and keep it in the refrigerator until you are ready to bake. This make-ahead capability is a game-changer for stress-free entertaining. Moreover, the ingredients are simple and readily available at any standard grocery store, meaning you do not need to make a special trip to hunt down obscure items.
Nutritionally, these appetizers offer some definite advantages over other party foods. Spinach is a powerhouse vegetable, packed with iron, vitamins A, C, and K, and several beneficial antioxidants. Artichokes are an excellent source of fiber and also contain vitamins and minerals. While the cheese and pastry add richness, you are still incorporating a solid serving of vegetables into a delicious format. Consequently, you can feel good about serving these to your family and friends.
The social and entertaining value of this dish cannot be overstated. A platter of these golden, cheesy squares disappears quickly at any party, acting as a fantastic conversation starter. They are elegant enough for a formal gathering yet approachable enough for a casual game day spread. Because they are handheld and not messy, guests can easily mingle and eat without the need for a plate and fork, which significantly enhances the flow of your event.
Finally, the cost-effectiveness and accessibility of this recipe make it a perennial winner. You can feed a crowd of twelve people for a fraction of the cost of ordering similar appetizers from a restaurant or caterer. The ingredients are not only affordable but also have a long shelf life, especially the frozen and canned components. This accessibility means you can always be prepared to whip up an impressive snack without breaking the bank or making a last-minute grocery run.
Historical Background and Cultural Significance
The origin story of spinach and artichoke dip is somewhat murky, but it firmly planted its roots in American culinary culture during the mid-20th century. Many food historians point to California in the 1950s as a likely birthplace, a time and place known for embracing convenience foods and creating innovative party dishes. The dip gained monumental popularity in the 1990s, becoming a staple on the menus of chain restaurants like T.G.I. Friday’s and Applebee’s. These establishments marketed it as a shareable, indulgent starter, cementing its status as a go-to group appetizer.
The cultural importance of this dish lies in its role as a quintessential American party food. It symbolizes comfort, sharing, and casual entertaining. The combination of its creamy texture, savory flavor, and communal serving style made it a fixture at everything from Super Bowl parties to potlucks and family gatherings. Its popularity reflects a broader trend in American dining towards hearty, flavorful, and shareable dishes that encourage a sense of community and relaxed enjoyment around the table.
The evolution of the recipe from a dip to a puff pastry square is a natural progression in the world of modern home cooking. As home cooks sought ways to elevate classic dishes and make them more portable and less messy, the concept of encasing the dip in pastry was a brilliant innovation. This adaptation leverages the French technique of using pâte feuilletée, or puff pastry, to create a vessel that is both elegant and functional. This fusion represents the global influences that now characterize contemporary American cuisine.
Regional variations of the core dip abound, which in turn inspires different adaptations for pastry squares. In the American South, you might find a version with added jalapeños for a spicy kick. On the West Coast, sun-dried tomatoes and basil might be incorporated for a Mediterranean flair. Some variations swap the cream cheese for Greek yogurt or Alfredo sauce, while others add crab meat or bacon. This versatility demonstrates the recipe’s incredible adaptability to local tastes and ingredient availability.
Ingredient Deep Dive
Puff pastry is the architectural marvel of the baking world, a laminated dough with hundreds of alternating layers of butter and dough. When baked, the water in the butter and dough creates steam, causing the layers to separate and puff up dramatically. Historically, this labor-intensive technique was perfected by French pastry chefs. For this recipe, using a high-quality, all-butter store-bought puff pastry will yield the best flavor and the most consistent, flaky layers. Keep it cold until the moment you need it for optimal results.
Spinach, the recipe’s namesake, is a leafy green with a history dating back to ancient Persia. It was introduced to Europe in the 11th century and has since become a global staple. Nutritionally, it is loaded with iron, calcium, magnesium, and vitamins A, C, and K. For this recipe, frozen chopped spinach is ideal because it is pre-cooked, has most of the water squeezed out, and incorporates seamlessly into the filling. Be sure to thaw it completely and wring it out in a clean kitchen towel to remove every bit of excess moisture.
Artichoke hearts bring a distinctive, slightly tangy and nutty flavor to the dish. The globe artichoke itself is a type of thistle, cultivated for centuries in the Mediterranean region. They are a good source of fiber, vitamin C, folate, and various minerals. Canned or jarred artichoke hearts packed in water are the most convenient option for this recipe. Be sure to drain them thoroughly and give them a rough chop to ensure they distribute evenly throughout the filling without creating overly large chunks.
The cheese blend is the soul of the creamy filling. Cream cheese provides a rich, tangy base and thick consistency. Mozzarella cheese is responsible for the beloved stretchy, melty quality. Parmesan cheese introduces a sharp, salty, umami depth that elevates the entire flavor profile. Using freshly grated Parmesan, rather than the pre-shredded kind which contains anti-caking agents, will result in a smoother melt and superior flavor. This combination creates a perfect trifecta of creaminess, melt, and savory punch.
Common Mistakes to Avoid
- Not thoroughly thawing the puff pastry. If you try to unroll it while frozen, it will crack and break. Follow the package directions for thawing, usually about 30-40 minutes at room temperature, until it is pliable but still cold to the touch.
- Failing to squeeze all the water out of the spinach. Excess moisture is the enemy of both a crisp pastry shell and a thick, non-watery filling. Use your hands or a clean kitchen towel to wring the thawed spinach until it is as dry as possible.
- Overfilling the pastry squares. Using too much filling can cause it to spill out during baking, creating a mess on your baking sheet and potentially causing the pastry to become soggy. A heaping tablespoon per square is the perfect amount.
- Neglecting to score a border. The border you score with a knife acts as a wall that contains the filling and allows the edges to puff up high and beautiful. Without it, the filling can spread and inhibit the pastry’s rise.
- Forgetting to egg wash the pastry. The egg wash is crucial for achieving that deep, glossy, golden-brown color on the baked pastry. It also helps the edges seal together and adds a subtle richness to the flavor.
- Using warm filling on cold pastry. If your filling is too warm when you assemble the squares, it can start to melt the butter in the pastry, compromising its ability to puff up. Ensure both components are cool before assembly.
- Baking on an unlined baking sheet. The cheese can bubble over and stick fiercely to a bare pan. Always use parchment paper or a silicone baking mat for effortless cleanup and to prevent the bottoms from over-browning.
- Under-baking the squares. The pastry should be a deep golden brown and look dry and crisp. Removing them too early will result in a pale, soggy bottom where the filling has steamed the dough instead of allowing it to crisp up.
Essential Techniques
Handling puff pastry correctly is the most critical technique for this recipe. The key is to keep the pastry cold. The layers of butter must remain solid until they hit the hot oven, where they will then melt and create steam, leading to the signature puff. Work quickly once the pastry is rolled out. If it becomes too soft and warm, the butter will start to melt, and the layers will fuse together, resulting in a dense, greasy pastry instead of a light, flaky one. If the pastry does get too warm, simply slide it onto a baking sheet and chill it in the refrigerator for 10-15 minutes before proceeding.
Creating a proper filling consistency is another essential skill. The goal is a thick, cohesive mixture that will not leak or make the pastry soggy. The single most important step is thoroughly draining the spinach and artichokes. After thawing the spinach, take the time to squeeze it in a clean kitchen towel or with your hands over the sink until no more water drips out. Similarly, drain the artichoke hearts well and pat them dry with a paper towel. A dry filling ensures the cheeses bind properly and the pastry bakes up crisp.
Scoring the pastry border is a simple but transformative technique. Using a sharp knife, you score a line about half an inch from the edge, being careful not to cut all the way through the dough. This scored inner rectangle becomes the “well” for your filling. More importantly, it creates a guided path for the edges of the pastry to rise upward, forming a beautiful, puffy frame around the filling. This technique not only looks professional but also functionally contains the filling, preventing it from spreading across the entire surface.
The application of an egg wash is non-negotiable for a perfect finish. An egg wash, made by beating an egg with a tablespoon of water or milk, serves multiple purposes. Firstly, it acts as an edible glue, helping the pastry layers stick together at the edges and promoting an even rise. Secondly, it gives the baked pastry a deep, appetizing, golden-brown color and a slight sheen. For the best adhesion and color, brush it on evenly just before baking, being careful not to let it pool in the corners, which can weigh down the pastry.
Pro Tips for Perfect Spinach & Artichoke Puff Pastry Squares
- Grate your own cheese. Pre-shredded bagged cheese is coated with potato starch or cellulose to prevent clumping, which can inhibit melting and create a grainy texture. Freshly grated mozzarella and Parmesan will melt more smoothly and evenly into the filling.
- Chill the assembled squares before baking. After you have filled and folded your pastry squares, place the entire baking sheet in the refrigerator for 15-20 minutes. This re-chills the butter in the pastry, guaranteeing a higher rise and flakier texture in the oven.
- Use a pizza cutter for quick, clean cuts. A sharp pizza wheel makes light work of dividing the puff pastry sheet into even squares. It glides through the dough without dragging or deforming the layers, ensuring uniform appetizers.
- Rotate the baking sheet halfway through. Ovens often have hot spots. To ensure even browning on all sides, rotate your baking sheet front to back about 10 minutes into the baking time. This simple step leads to a perfectly golden result.
- Let them rest before serving. As tempting as it is to eat them straight from the oven, allow the squares to cool on the baking sheet for at least 5 minutes. This allows the filling to set slightly, preventing molten cheese burns and making them easier to handle.
- Season your filling thoughtfully. Taste the filling mixture before you spoon it onto the pastry. Because Parmesan is salty, you may not need extra salt, but a crack of black pepper or a pinch of red pepper flakes can add a wonderful dimension.
Variations and Adaptations
For regional variations, consider adding a Southern twist with chopped cooked bacon and a dash of hot sauce mixed into the filling. A Mediterranean version could include chopped Kalamata olives, sun-dried tomatoes, and a sprinkle of dried oregano. For a taste of the Pacific Northwest, fold in some flaked, cooked salmon and fresh dill. These adaptations show how easily the base recipe can be customized to reflect different culinary traditions and local flavors.
Seasonal adaptations are simple and effective. In the spring, add fresh chopped chives or asparagus tips to the filling for a bright, fresh flavor. During the summer, incorporate fresh basil and chopped roasted red peppers. For a cozy autumn version, a pinch of nutmeg in the filling complements the spinach beautifully, and you could even add some finely chopped, sautéed mushrooms. In winter, a touch of truffle oil drizzled over the baked squares feels incredibly festive.
Dietary modifications are straightforward. For a gluten-free version, use a certified gluten-free puff pastry. To make it dairy-free, substitute the cream cheese with a vegan cream cheese alternative, use a plant-based mozzarella shred, and opt for a vegan Parmesan. For a lower-carb option, you can forgo the pastry and spoon the filling into hollowed-out mushroom caps or bell pepper halves and bake until bubbly.
Flavor variations can take this recipe in exciting new directions. Add a teaspoon of lemon zest to the filling for a bright, citrusy note. For a smoky flavor, use smoked mozzarella or Gouda. A tablespoon of pesto swirled into the cheese mixture introduces a wonderful herbal complexity. For a richer, more decadent version, stir in a quarter cup of crumbled feta or goat cheese along with the other cheeses.
Texture modifications can cater to different preferences. If you enjoy more bite, use artichoke quarters instead of chopped hearts. For a completely smooth and ultra-creamy filling, you can pulse the mixture a few times in a food processor before assembling. Alternatively, for added crunch, sprinkle the tops with panko breadcrumbs mixed with a little melted butter before baking.
Presentation alternatives offer a creative outlet. Instead of squares, you can cut the pastry into circles using a biscuit cutter to create elegant tartlets. Another option is to spread the filling over one entire sheet of pastry, leaving a border, then place the second sheet on top, seal the edges, and bake it as one large pie to be sliced after baking. You can also create braided breadsticks by cutting the filled pastry into strips and twisting them.
Serving and Presentation Guide
Plating techniques can elevate these humble squares to restaurant-quality status. Arrange them on a large, elegant wooden board or a pristine white platter for maximum visual contrast. Do not crowd the squares; give them space to be appreciated individually. You can place a small ramekin of warm marinara sauce or a creamy garlic aioli in the center of the platter for dipping. Alternatively, drizzle a balsamic glaze in an artistic pattern on the plate before placing the squares on top.
Garnishing ideas add the final touch of freshness and color. A light sprinkle of finely chopped fresh parsley or chives immediately before serving adds a pop of green and a fresh flavor. For a more sophisticated look, microgreens make a beautiful garnish. A light dusting of paprika or a few flakes of Maldon sea salt on top just after baking enhances both the look and the taste.
Traditional accompaniments for spinach and artichoke flavors are fairly simple. A side of crisp, raw vegetable sticks like celery and carrots provides a refreshing, crunchy contrast to the rich, warm squares. For a more substantial offering, they pair wonderfully with a light, citrus-based salad that cuts through the richness of the cheese and pastry.
Modern serving suggestions might include pairing them with other small bites for a varied appetizer spread. They go beautifully with other finger foods like crispy chicken wings, shrimp cocktail, or a charcuterie board. For a brunch setting, serve them alongside a frittata and fresh fruit. Their versatility makes them a perfect component in a multi-course tasting menu for a dinner party.
Temperature considerations are important for the best experience. These squares are truly at their peak when served warm, shortly after coming out of the oven, when the pastry is at its crispiest and the cheese is wonderfully molten. However, they are also perfectly acceptable at room temperature, which makes them excellent for buffets or picnics where keeping them warm is not feasible. Avoid serving them cold from the refrigerator, as the pastry will lose its crispness.
Portion control tips are helpful for planning. The recipe yields twelve generous squares, which is ideal for a party of 6-8 people as a primary appetizer. If you are serving them as part of a larger spread with many other dishes, you can cut each sheet into 16 smaller squares for a more bite-sized option. This scaling allows you to stretch the recipe to feed more guests without increasing the ingredient quantities.
Wine and Beverage Pairing
Wine pairings for these rich, cheesy squares should focus on cutting through the fat and complementing the savory flavors. A crisp, high-acid white wine like Sauvignon Blanc is an excellent choice, as its citrus notes contrast beautifully with the richness. Alternatively, a dry sparkling wine like Prosecco or Cava cleanses the palate with its bubbles. For red wine lovers, a light-bodied, low-tannin red such as Pinot Noir won’t overpower the dish and pairs nicely with the earthy notes of the spinach and artichoke.
Non-alcoholic alternatives can be just as sophisticated. A sparkling water with a squeeze of lemon or lime provides a refreshing, palate-cleansing effervescence. For something more complex, a tart cherry juice spritzer made with club soda offers a sweet-and-sour balance that stands up to the savory flavors. Iced herbal teas, like peppermint or lemon verbena, are also delightful, non-caffeinated options that won’t compete with the food.
Coffee and tea pairings work surprisingly well, especially if serving these squares for brunch. A medium-roast coffee with low acidity complements the creamy, savory notes without introducing bitterness. For tea, an Earl Grey is a fantastic choice; the bergamot orange flavor in the tea provides a bright, aromatic counterpoint to the rich, cheesy filling. A simple green tea also works well, offering a clean, slightly astringent finish that resets the palate.
Temperature considerations for beverages are key. Chilled white wines, sparkling wines, and non-alcoholic spritzers should be served well-chilled, between 45-50°F, to provide a refreshing contrast to the warm appetizers. Red wines should be served slightly cooler than room temperature, around 55-60°F, to keep them tasting fresh. Iced drinks should be cold but not diluted; use large ice cubes to prevent watering them down too quickly.
Serving suggestions for your beverage pairings enhance the overall experience. Offer a variety of options to cater to different guest preferences. Clearly label non-alcoholic choices so all guests feel included. Present drinks in attractive glassware that matches the occasion, and consider having a dedicated drink station away from the food to encourage mingling and flow throughout your party space.
Storage and Shelf Life
Storage methods for leftovers are straightforward but important for maintaining quality. Allow the squares to cool completely to room temperature after baking. Do not leave them out for more than two hours. Once cool, transfer them to an airtight container. You can separate layers with parchment paper to prevent them from sticking together. Store the container in the refrigerator, where the squares will keep for up to 3 days. The pastry will soften in the fridge, but reheating will help restore some crispness.
Temperature requirements are critical for food safety. The danger zone for bacterial growth is between 40°F and 140°F. Therefore, you must get the baked squares into the refrigerator within two hours of taking them out of the oven. When reheating, ensure they reach an internal temperature of at least 165°F to be safe for consumption. Always use a food thermometer if you are unsure.
Container recommendations focus on preventing moisture buildup, which is the enemy of crisp pastry. A shallow, wide airtight container is better than a deep one, as it minimizes stacking and pressure on the squares. A glass container is ideal as it does not absorb odors. If you must stack them, place a sheet of parchment or wax paper between each layer to protect the surfaces and absorb any minimal condensation.
Signs of spoilage are usually easy to detect. Visually, look for any unusual mold growth, which can appear as fuzzy spots in white, green, or black. Olfactorily, if the squares develop a sour or “off” smell, they should be discarded. If the texture becomes excessively slimy or the pastry uncharacteristically tough, these are also indicators that the squares are past their prime and should not be eaten.
Reheating instructions are essential for restoring texture. The best method is to use an oven or toaster oven. Preheat to 350°F and place the squares on a baking sheet. Heat for 5-10 minutes, or until warm and the pastry is crisp again. A microwave can be used for speed, but it will make the pastry soft and soggy. If you must microwave, do so for only 15-20 seconds and then consider finishing in a hot, dry skillet for a minute to crisp the bottom.
Freezing guidelines allow you to make these squares far in advance. They freeze exceptionally well either before or after baking. For unbaked squares, assemble them completely, then freeze solid on the baking sheet before transferring to a freezer bag. Bake from frozen, adding a few extra minutes to the cooking time. For baked squares, cool completely, freeze on a tray, then bag. Reheat frozen baked squares in a 375°F oven for 10-15 minutes. They will keep for up to 2 months in the freezer.
Make Ahead Strategies
Prep timeline for stress-free entertaining can be spread over several days. You can prepare the filling up to 2 days in advance. Simply mix all the filling ingredients together, store them in an airtight container in the refrigerator, and give it a good stir before using. The puff pastry itself can be thawed in the refrigerator overnight, which is actually the preferred method as it keeps it cold and manageable. This advance prep means on party day, your assembly time is cut down to just 10 minutes.
Storage between steps is simple with proper planning. If you make the filling ahead, ensure your container is truly airtight to prevent it from absorbing other refrigerator odors. The rolled-out and scored pastry can be prepared, placed on a parchment-lined baking sheet, covered tightly with plastic wrap, and refrigerated for several hours before you add the filling and bake. This chilling period is beneficial for the pastry’s final texture.
Quality impact assessment of make-ahead steps is generally positive. The filling’s flavor often improves after a day in the refrigerator, as the ingredients have time to meld. The pastry suffers no ill effects from being prepped and chilled. The only minor trade-off is that the spinach may release a tiny bit more liquid upon standing, so if you see any pooling in your pre-made filling, simply drain it off or stir it back in before using.
Assembly tips for pre-made components are straightforward. When you are ready to assemble, take your pre-rolled pastry and pre-made filling straight from the refrigerator. Work quickly to spoon the cold filling onto the cold pastry. The cold-on-cold assembly is ideal for preserving the pastry’s structure. If at any point the pastry feels like it’s getting too soft and warm, pause and pop the entire baking sheet back into the fridge for 10 minutes.
Reheating guidelines for fully pre-baked squares are important if you choose to bake them ahead. To reheat a whole batch, place them on a baking sheet in a 350°F oven for 8-10 minutes until warm and crisp. For a single serving, a toaster oven does a fantastic job. Avoid the microwave for reheating, as it will turn the flaky pastry soft and chewy. The goal is to re-crisp the exterior while warming the interior.
Fresh element additions can be incorporated even with a make-ahead strategy. If you want to add a garnish like fresh herbs, do so after reheating, not before storing. This ensures the herbs stay vibrant and fresh-looking. A final sprinkle of flaky sea salt or a drizzle of high-quality olive oil just before serving can also make a pre-made dish taste freshly prepared and elevate its presentation.
Scaling Instructions
Halving the recipe is simple and practical for smaller gatherings. Use one sheet of puff pastry instead of two. For the filling, simply divide all the ingredient quantities in half. A standard 10-ounce box of frozen spinach is easily halved by thawing the entire block, squeezing it dry, and then dividing it visually into two equal portions. You can mix the full filling recipe and use half, storing the remainder for another batch, or mix a half-batch from the start. The baking time may be slightly reduced, so start checking for doneness around the 15-minute mark.
Doubling or tripling the recipe is ideal for large parties. You can work in batches to avoid overcrowding your counter space. Use multiple baking sheets and rotate them in the oven halfway through baking to ensure even cooking. When mixing a large batch of filling, ensure your bowl is large enough to combine everything thoroughly without spilling. It is often easier to mix the filling in two separate batches to ensure even distribution of ingredients. Keep unused pastry sheets in the refrigerator until you are ready for them to prevent them from becoming too warm.
Equipment adjustments are necessary when scaling up. If you are doubling the recipe, you will likely need two standard baking sheets. Ensure your oven can accommodate two sheets with proper air circulation; if not, bake them one after the other, keeping the unbaked squares chilled while they wait. For a tripled recipe, you may need to use the oven’s convection setting if it has one, which promotes more even baking and browning when the oven is full.
Timing modifications are minimal when scaling. Whether you are baking one sheet or two, the baking time remains roughly the same, as it depends on the thickness of the pastry and filling, not the quantity on the pan. However, when baking multiple sheets at once, you absolutely must rotate them from top to bottom and front to back halfway through the baking time to account for hot spots in your oven. This ensures every square is perfectly golden.
Storage considerations change with volume. A large batch of leftovers will take longer to cool down, which is a food safety concern. To cool them quickly and safely, spread the baked squares out on a clean baking sheet in a single layer at room temperature for no more than an hour before transferring them to the refrigerator. For freezing, ensure you have enough freezer space and use freezer-safe bags or containers, clearly labeled with the date and contents.
Nutritional Deep Dive
Macro breakdown of these squares reflects their status as a indulgent appetizer. Each square provides a balance of carbohydrates from the pastry, protein from the cheese and spinach, and fats from the cheese and butter in the pastry. The exact numbers will vary based on specific brands, but expect a moderate amount of calories per square, primarily from the fats and carbohydrates. While not a low-calorie food, when consumed in moderation as part of a balanced diet, they can fit into most nutritional plans.
Micronutrient analysis reveals some surprising benefits, largely thanks to the vegetable components. Spinach is a powerhouse, providing significant amounts of Vitamin K for bone health, Vitamin A for vision and immunity, and folate for cell growth. Artichokes contribute dietary fiber, which aids digestion, and vitamin C, an antioxidant. The cheeses provide calcium for strong bones and teeth. So, while this is a treat, it does deliver valuable nutrients alongside its indulgent qualities.
Health benefits are tied to its whole-food ingredients. The spinach and artichokes offer antioxidants that help combat oxidative stress in the body. The calcium from the dairy supports bone density. Furthermore, the satisfaction derived from a flavorful, well-balanced food like this can contribute to mindful eating practices, preventing overconsumption of less nutritious options. Enjoying rich foods in a social, celebratory context also has positive benefits for mental well-being.
Dietary considerations are important for those with specific needs. This recipe is vegetarian, as written. It is not suitable for gluten-free diets unless you use a gluten-free puff pastry. Those with lactose intolerance may experience discomfort due to the high dairy content, though using aged cheeses like Parmesan, which are lower in lactose, can help. For low-sodium diets, be mindful that cheese and canned artichokes can be high in salt, so seeking low-sodium versions is advisable.
Portion analysis is key to enjoying this dish healthfully. One square is a satisfying serving size that allows you to enjoy the flavors and experience without overindulging. When served as part of a spread with other lighter options like fresh vegetables and lean proteins, it becomes part of a balanced meal. Being aware of portion control helps manage calorie intake while still allowing you to participate in the social and culinary enjoyment of the food.
Weight management tips involve strategic incorporation. If you are watching your weight, you can still enjoy these squares by planning for them. Consider them a occasional treat rather than a everyday food. Balance your intake by having a lighter meal earlier in the day if you know you’ll be enjoying
Print
Spinach & Artichoke Puff Pastry Squares
Description
A savory and flaky appetizer featuring creamy spinach, artichokes, and melted cheese baked in golden puff pastry.
Ingredients
For the Crust:
- 1 sheet frozen puff pastry, thawed
- 1 cup frozen spinach, thawed and squeezed dry
- 1 cup canned artichoke hearts, drained and chopped
- 4 oz cream cheese, softened
- 1/2 cup grated Parmesan cheese
- 1/2 cup shredded mozzarella cheese
- 1/4 cup mayonnaise
- 1 clove garlic, minced
- 1/2 tsp onion powder
- Salt and black pepper to taste
- 1 egg, beaten (for egg wash)
Instructions
1. Prepare the Crust:
- Preheat oven to 400°F (200°C). Line a baking sheet with parchment paper.
- In a medium bowl, combine spinach, artichokes, cream cheese, Parmesan, mozzarella, mayonnaise, garlic, onion powder, salt, and pepper. Mix until well combined.
- Roll out the puff pastry sheet on a lightly floured surface. Cut into 9 equal squares and place on the prepared baking sheet.
- Spoon a generous tablespoon of the spinach-artichoke mixture onto the center of each puff pastry square.
- Brush the edges of each square with the beaten egg. Fold the corners of each square toward the center, slightly overlapping, and press gently to seal.
- Bake for 18-20 minutes, or until the pastry is puffed and golden brown. Serve warm.
Notes
You can customize the seasonings to taste.
I’m Shaykee—born in Morocco, seasoned across continents. From airplane galleys to home kitchens, I share the flavors and stories that shaped my journey.