Freshly Baked Cheese Danish: Flaky, Buttery Pastry with Creamy Cheese Filling
Imagine pulling a tray of golden, flaky pastries from your own oven, the aroma of butter and sweet cheese filling your kitchen. This recipe for a freshly baked cheese danish delivers exactly that experience. Consequently, you can create a bakery-worthy breakfast or brunch centerpiece without any professional training. Moreover, the process is surprisingly straightforward, using simple ingredients to achieve an impressive result.
The magic of this homemade cheese danish lies in its contrasting textures and harmonious flavors. Firstly, you get a crisp, shatteringly flaky pastry that yields to a soft, tangy, and sweet cream cheese filling. Secondly, a glossy apricot jam glaze and a dusting of powdered sugar add the perfect finishing touches. Ultimately, this treat is impossible to resist, especially when served warm with a cup of coffee.
Furthermore, mastering this recipe gives you the confidence to explore other pastry creations. For instance, you can adapt the creamy cheese filling with different flavors or use the same dough technique for fruit-filled pastries. Therefore, this cheese danish is not just a delicious recipe but also a foundational baking lesson. In the end, you will have a stunning, flaky, buttery pastry with creamy cheese filling that will earn you rave reviews from family and friends.
Quick Recipe Highlights
- Flavor Profile: This homemade cheese danish features a perfect balance of rich, buttery pastry and a sweet-tangy cream cheese filling. Additionally, a hint of vanilla and lemon zest brightens the flavor, while an apricot glaze adds a subtle fruity sweetness.
- Texture: Expect a beautifully layered, shatteringly flaky exterior that contrasts delightfully with the dense, creamy, and smooth cheese filling. The pastry should be crisp yet tender, creating a satisfying mouthfeel with every bite.
- Aroma: As it bakes, the kitchen fills with the warm, comforting scent of melting butter and caramelizing pastry. Meanwhile, the sweet aroma of vanilla and cream cheese becomes utterly irresistible, signaling that your bakery treat is almost ready.
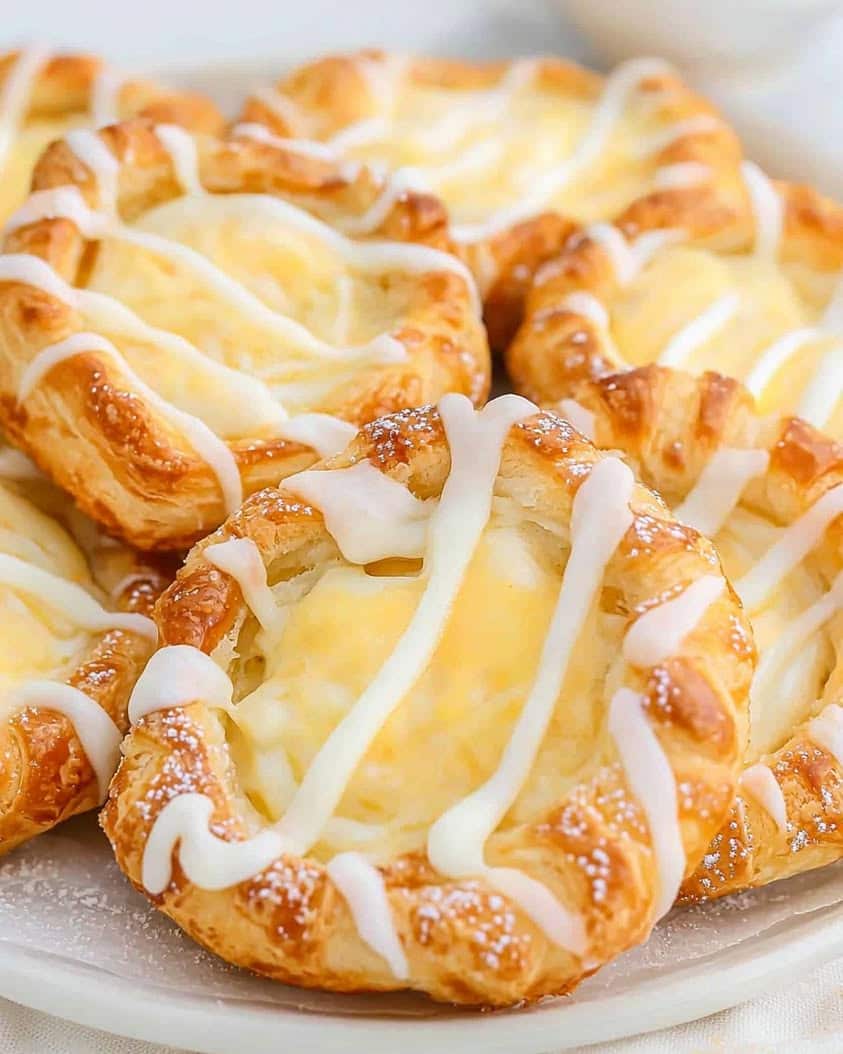
- Visual Appeal: These danishes boast a gorgeous golden-brown, laminated crust with visible, puffy layers. The creamy white filling peeks from the center, often topped with a shiny, amber-colored glaze for a professional, glossy finish.
- Skill Level Needed: This recipe is ideal for bakers with some experience working with pastry dough, particularly puff pastry or laminated doughs. However, by following the detailed instructions, even motivated beginners can achieve excellent results with careful attention to technique.
- Special Equipment: You will need a rolling pin, parchment paper, and a baking sheet. A stand mixer or hand mixer simplifies making the filling, while a pastry brush is helpful for applying the egg wash and glaze.
Recipe Overview
- Difficulty Level: We rate this cheese danish recipe as intermediate due to the handling of puff pastry, which requires keeping it cold. The process is simple, but success depends on precision with temperature and folding. Consequently, patience is more important than advanced skill.
- Category: This recipe falls squarely into the categories of breakfast pastries, brunch items, and sweet baked goods. It is also perfect for a weekend baking project or a special occasion treat that feels indulgent yet homemade.
- Cuisine: The cheese danish has its roots in Austrian and Danish pastry traditions, known collectively as Viennese or Danish pastry. This version is an American-style adaptation, often found in coffee shops and bakeries across the United States.
- Cost: Making these danishes at home is significantly more cost-effective than buying them from a bakery. A batch of eight uses relatively inexpensive staples like cream cheese, butter, and flour, costing a fraction per pastry compared to store-bought versions.
- Season: This treat is wonderful year-round but feels particularly special during holiday brunches or cozy weekend mornings in fall and winter. Conversely, it is also a lovely addition to a spring or summer patio breakfast with fresh fruit on the side.
- Occasion: Serve these for impressive weekend brunches, holiday breakfasts like Christmas or Mother’s Day, or as a thoughtful homemade gift for neighbors. They are also perfect for book clubs, casual coffee gatherings, or simply as a well-deserved personal treat.
Why You’ll Love This Recipe
First and foremost, the taste and texture of this homemade cheese danish are truly exceptional. The flaky, buttery pastry with creamy cheese filling offers a symphony of contrasts that is deeply satisfying. Each bite delivers a crisp shatter followed by the lush, tangy-sweet cream cheese center. Furthermore, the warm, fresh-from-the-oven experience is far superior to anything you can buy pre-packaged. The aroma alone is worth the effort, transforming your kitchen into a personal bakery filled with inviting scents.
Another significant advantage is the sheer convenience and preparation benefits. Surprisingly, this recipe comes together in about forty minutes of active time. By using quality store-bought puff pastry, you skip the most labor-intensive step of making laminated dough from scratch. Therefore, you achieve a professional-looking result with a manageable time investment. Moreover, you control all the ingredients, ensuring there are no unwanted preservatives or artificial flavors. You can even prepare components ahead of time for an easy morning assembly.
From a nutritional perspective, homemade baking allows for mindful adjustments. While this is undoubtedly a treat, you can choose full-fat or reduced-fat cream cheese based on your preference. Additionally, you can adjust the sugar level in the filling or opt for a fruit-based glaze without added sugars. Consequently, you create a pastry tailored to your dietary goals without sacrificing the essential pleasure of a flaky, buttery pastry with creamy cheese filling. You also avoid the high-fructose corn syrup and stabilizers common in commercial versions.
The social and entertaining value of this recipe is immense. Presenting a tray of freshly baked, golden danishes instantly elevates any gathering. They signal care and effort, making guests feel special. Whether for a family breakfast or a festive brunch party, these pastries become the centerpiece of conversation. Furthermore, baking them can be a fun family activity, with tasks like brushing on egg wash or sprinkling powdered sugar perfect for helpers of all ages.
Finally, the cost-effectiveness and accessibility are major wins. The ingredients are basic pantry and refrigerator staples. A single batch yields eight substantial pastries for the price of two or three from a coffee shop. This makes it an economical way to enjoy a luxurious bakery treat regularly. Moreover, the recipe is highly adaptable to what you have on hand, allowing for successful improvisation. Ultimately, this cheese danish recipe empowers you to create stunning, delicious food without a professional kitchen or a large budget.
Historical Background and Cultural Significance
The origin story of the danish pastry is a fascinating tale of culinary migration and adaptation. Interestingly, what Americans call a “danish” is known in Denmark as “wienerbrød,” or “Viennese bread.” This name points directly to its origins. In the mid-19th century, Danish bakery owners went on strike, and bakery owners hired pastry chefs from Vienna to fill the labor gap. These Viennese bakers brought their techniques for laminated, buttery doughs, which were then embraced and refined by Danish bakers. Consequently, the pastry became a national specialty before eventually traveling to America with immigrants.
The cultural importance of the cheese danish, specifically, grew as it became a staple of American bakery culture in the 20th century. It symbolized a convenient yet slightly indulgent breakfast or coffee break treat. The combination of rich dough and sweet cheese filling proved universally appealing. Moreover, its presence in glass bakery cases and coffee shops made it an iconic part of the urban American landscape. For many, it evokes memories of weekend errands with parents or a special treat after school.
The evolution of the recipe has seen significant changes, particularly in its journey to American home kitchens. Traditional Danish versions might use remonce, a butter and sugar paste, or a custard-like filling. The American cheese danish, however, almost universally features a cream cheese-based filling, a testament to the popularity and availability of cream cheese in the United States. Furthermore, the use of pre-made puff pastry has democratized the recipe, making the flaky, buttery pastry with creamy cheese filling accessible to home bakers without requiring days of labor.
Regional variations of the cheese danish abound, showcasing local tastes and ingredients. In some parts of the United States, you might find danishes topped with a crumb streusel. In others, a fruit compote is swirled into the cheese filling. Some bakeries shape them into pockets or braids, while others favor the classic pinwheel or rectangular envelope shape. Internationally, similar pastries exist, like the Polish “serownik” or Jewish “rugelach,” though their dough and specific fillings differ. This global family of pastries highlights the universal love for the combination of sweet dough and cheese.
Ingredient Deep Dive
Puff Pastry forms the essential foundation for our flaky, buttery pastry with creamy cheese filling. This laminated dough consists of hundreds of thin layers of dough and butter. When baked, the water in the butter turns to steam, pushing the layers apart to create that signature airy, crisp texture. For best results, always use all-butter puff pastry, which provides superior flavor compared to those made with shortening. Keep it chilled until the moment you need to work with it, as warm butter will melt into the dough and ruin the layered structure. If you cannot find it pre-made, you can make rough puff pastry at home with a bit more effort.
Cream Cheese is the star of the filling, providing the characteristic tangy richness. This fresh cheese was invented in New York in the late 19th century and became central to American baking. It is high in fat, which gives the filling its luxurious, creamy body and helps it set beautifully during baking. For the smoothest filling, ensure your cream cheese is fully softened to room temperature before mixing. Full-fat varieties will yield the best flavor and texture, but reduced-fat versions can work in a pinch. Never use whipped or tub-style cream cheese, as they contain stabilizers that can make the filling runny.
Granulated Sugar sweetens the cheese filling and balances its tang. In the filling, it dissolves into the cream cheese, preventing graininess. A small amount of sugar can also be sprinkled on the pastry before baking to encourage caramelization and add extra crunch. When selecting sugar, standard white granulated sugar is perfect. For a deeper flavor note, you could substitute a small portion with light brown sugar, which will add a subtle molasses flavor. The sugar quantity in this recipe is calibrated to be pleasantly sweet without overpowering the other flavors, allowing the butter and cheese to shine.
Eggs serve multiple crucial functions in this recipe. An egg yolk enriches the cheese filling, helping it bind and set with a custard-like consistency. A whole egg, lightly beaten, is used as an egg wash brushed over the pastry before baking. This wash is vital for achieving that beautiful, deep golden-brown color and glossy finish. It also acts as a glue for any sprinkled sugar. Always use large eggs at room temperature for easier incorporation into the filling. The proteins in the egg wash coagulate in the oven, creating a thin, shiny seal on the pastry surface.
Vanilla Extract and Lemon Zest are the flavor enhancers that elevate the filling from simple to sublime. Pure vanilla extract adds a warm, sweet aroma that complements the dairy notes perfectly. Meanwhile, freshly grated lemon zest provides a bright, citrusy top note that cuts through the richness and prevents the danish from tasting overly heavy. Always use real vanilla extract, not imitation, for the best flavor. For the lemon zest, use only the yellow outer skin, avoiding the bitter white pith underneath. These two ingredients in combination create a complex, bakery-quality flavor profile in your creamy cheese filling.
Common Mistakes to Avoid
- Using Warm Puff Pastry: This is the most critical error. If the pastry becomes too warm, the butter layers will melt and merge with the dough. Consequently, you will lose the flaky layers and end up with a greasy, dense pastry. Always work quickly and return the dough to the fridge if it feels soft.
- Overmixing the Filling: When combining the cream cheese filling, mix just until smooth and incorporated. Overmixing, especially with a electric mixer, can incorporate too much air. This can cause the filling to puff up and then collapse or crack during baking, rather than baking into a dense, creamy pocket.
- Skimping on the Egg Wash: The egg wash is not optional. It provides essential color and sheen. If you forget it, your danishes will bake up pale and dull-looking, lacking that professional golden-brown appeal. For the best color, use a whole egg beaten with a teaspoon of water or milk.
- Overfilling the Pastry: It is tempting to add extra filling, but this leads to leaks. The filling can bubble over during baking, burning on the baking sheet and making the pastries difficult to remove. Furthermore, too much weight in the center can prevent the surrounding pastry from puffing up properly.
- Not Preheating the Oven: A properly hot oven is necessary to create the initial steam burst that lifts the pastry layers. If you put the danishes in a cooler oven, the butter will melt out before the structure sets, resulting in a soggy bottom and poor rise. Always allow your oven to fully preheat.
- Using Cold Filling: Your cream cheese filling should be at room temperature for easy spreading. If it is too cold, it will be stiff and difficult to portion neatly. Moreover, trying to spread cold filling can tear the delicate, cold pastry dough, compromising its structure.
- Baking on the Wrong Pan: Always use a light-colored, heavy-duty baking sheet. Dark pans absorb more heat and can cause the bottoms to burn before the tops are golden. For insurance, line your sheet with parchment paper, which also prevents sticking and makes cleanup effortless.
- Skipping the Cooling Time: You must let the danishes cool for at least 10-15 minutes after baking. The filling is molten hot straight from the oven and needs time to set. Cutting into them too soon will cause the filling to gush out, and the pastry layers will be soggy from trapped steam.
Essential Techniques
Keeping Pastry Cold is the single most important technique for a flaky result. The butter must remain in distinct, solid layers between the dough until it hits the oven’s heat. To master this, work in a cool kitchen and handle the dough as little as possible with your warm hands. Use the refrigerator liberally; if the dough becomes soft or sticky during shaping, simply slide the entire baking sheet into the fridge for 10 minutes to firm it up. The visual cue for success is being able to see solid pieces of butter in the dough when you roll it out.
Creating a Pastry Border is crucial for containing the filling. After cutting your pastry squares, you make shallow cuts about half an inch from the edge, being careful not to cut all the way through. This inner square will become the base that holds the filling, while the outer border puffs up dramatically around it to form a beautiful, rustic wall. The common pitfall is cutting too deep, which severs the connection between the base and the border, causing structural failure. When done correctly, this technique ensures your creamy cheese filling stays neatly in the center.
Applying Egg Wash requires a gentle touch. Beat one egg with a teaspoon of water or milk until completely homogenous. Using a pastry brush, apply a thin, even coat to all visible pastry surfaces, especially the raised borders. Avoid letting pools of egg wash collect in the corners, as this can glue layers together and inhibit rise. The egg wash provides the beautiful color and shine, and it also helps any sprinkled sugar adhere. For a deeper golden brown, you can apply a second, light coat just before baking.
Knowing When It’s Done relies on visual and aromatic cues. The danishes are ready when the pastry is puffed and has turned a deep, golden brown color. The borders should feel firm and crisp to the touch. Additionally, the filling should be set and just beginning to show the faintest hint of golden brown on its surface. If you see the filling browning too quickly, you can tent the pastries loosely with foil. Underbaking will leave the bottom layers soggy, while overbaking can dry out the filling and burn the delicate pastry edges.
Pro Tips for Perfect Cheese Danish
For maximum flakiness, place your baking sheet with the assembled, unbaked danishes in the freezer for 10 minutes before baking. This extra-chill step ensures the butter is perfectly solid, leading to a better oven spring and more defined layers.
If your filling seems too soft after mixing, chill it in the refrigerator for 15-20 minutes before portioning. This makes it easier to scoop and place neatly in the center of each pastry without spreading.
Use a sharp pizza wheel or bench scraper to cut your puff pastry. Clean, swift cuts are less likely to drag and seal the layers at the edges, which can inhibit rising.
Add a tablespoon of cornstarch to your cream cheese filling. This helps absorb excess moisture and stabilizes the filling, preventing it from becoming runny or weeping during and after baking.
Rotate your baking sheet halfway through the baking time. Most ovens have hot spots, and rotating ensures even browning on all your pastries for a uniformly beautiful tray.
For an extra flavor boost, add a pinch of cardamom or nutmeg to the cream cheese filling. These warm spices pair beautifully with the butter and cheese, adding a subtle, complex note.
If you do not have apricot jam for the glaze, simply dust the cooled danishes generously with powdered sugar. It looks beautiful, adds sweetness, and requires no extra cooking.
Always bake on the middle oven rack. Positioning the tray too high can cause the tops to brown too fast, while a low position may leave the bottom pale and undercooked.
Variations and Adaptations
Regional variations offer a world of inspiration. For a New York-style touch, add a streusel topping made from flour, brown sugar, and cold butter rubbed together before baking. A Midwest variation might include a spoonful of cherry or blueberry pie filling in the center with the cheese. For a European flair, brush the baked pastries with a clear vanilla sugar syrup instead of fruit glaze for a crisp, shiny finish.
Seasonal adaptations keep this recipe exciting all year. In summer, top the cheese filling with fresh raspberries or sliced peaches before baking. For fall, mix a tablespoon of pumpkin puree and pumpkin pie spice into the filling. During the winter holidays, add a teaspoon of orange zest and a dash of cinnamon to the cheese mixture. In spring, a swirl of lemon curd in the filling or a topping of fresh strawberries after baking is delightful.
Dietary modifications are straightforward. For a gluten-free version, use a certified gluten-free puff pastry. To make it dairy-free, seek out plant-based cream cheese and butter-style puff pastry, though the texture may vary slightly. For a lower-sugar option, reduce the granulated sugar in the filling by half and use a sugar-free jam or simply omit the glaze.
Flavor variations are endless. Add mini chocolate chips or a drizzle of Nutella to the cheese filling. Incorporate a tablespoon of instant espresso powder for a mocha twist. Mix in crumbled cooked bacon for a sweet-salty profile. Alternatively, replace the vanilla with almond extract and top the filled pastries with sliced almonds before baking.
Texture modifications can cater to different preferences. For a crunchier top, sprinkle coarse sugar or sliced almonds on the egg-washed borders. For a softer, cake-like base, you can use a sweet yeast dough instead of puff pastry, though the preparation time will increase significantly.
Presentation alternatives change the visual appeal. Instead of squares, cut the pastry into circles and fold the edges over to form a rustic galette. You can also create braids by cutting strips along the sides of a rectangle of pastry and folding them over a line of filling. For individual servings, use muffin tins to create cup-shaped danishes with high, crisp walls.
Serving and Presentation Guide
Plating techniques start with temperature. Serve these danishes warm or at room temperature; never serve them cold from the refrigerator, as the pastry will lose its flaky texture. Place them on a simple, elegant platter or a wooden board to highlight their homemade beauty. Space them out so each pastry is showcased individually, rather than crowding them together.
Garnishing ideas add the final professional touch. A light dusting of powdered sugar just before serving is classic. Alternatively, a drizzle of thin vanilla icing or melted chocolate looks beautiful. For a fresh element, place a few edible flowers, a mint sprig, or a handful of fresh berries alongside the pastries on the serving platter.
Traditional accompaniments focus on beverages. A freshly brewed pot of coffee or a pot of tea is non-negotiable. For a brunch spread, pair with fresh fruit salad, crispy bacon, or scrambled eggs to balance the sweetness. A glass of cold milk is also a perfect, nostalgic pairing for this treat.
Modern serving suggestions might include a side of fruit compote or coulis for dipping. For a dessert presentation, add a scoop of vanilla ice cream or a dollop of lightly sweetened whipped cream alongside a warm danish. You can also deconstruct it by serving the baked pastry “cups” with the cheese filling piped in tableside.
Temperature considerations are key. If you have made them ahead, reheat in a 300°F oven for 5-8 minutes to restore crispness. Avoid the microwave, as it will make the pastry soggy. The filling is best when not piping hot, so let reheated danishes sit for a minute or two before serving.
Portion control tips are simple given their richness. One danish per person is typically sufficient as part of a larger meal. If serving as the main breakfast item with only coffee, one to two pastries is appropriate. You can also slice them in half for a lighter option or for buffets where guests may want to sample multiple items.
Wine and Beverage Pairing
Wine pairings should complement the richness and slight tang of the cheese filling. A late-harvest Riesling or a Moscato d’Asti, with their bright acidity and honeyed sweetness, are excellent choices. They cut through the butteriness and mirror the fruit notes of the glaze. Alternatively, a sparkling wine like Prosecco or Cava provides a refreshing contrast with its bubbles and crisp finish, cleansing the palate between bites of the flaky pastry.
Non-alcoholic alternatives are just as important. A high-quality, lightly sweetened iced tea or a sparkling lemonade pairs wonderfully. For a cozy option, a chai latte or a steamy cup of hot chocolate makes a decadent partner. The spices in chai or the richness of cocoa both stand up well to the dense, creamy cheese filling.
Coffee and tea pairings are the classic and most logical choices. For coffee, a medium-roast brew with low acidity and notes of caramel or nut is ideal. Espresso or a cappuccino also work beautifully. With tea, choose a black tea like English Breakfast or Earl Grey. The bergamot in Earl Grey, in particular, complements the citrus zest in the filling. Herbal teas like chamomile or peppermint can be too light, but a rooibos tea with its natural sweetness is a great option.
Temperature considerations for beverages depend on the danish. If serving the danish warm, a hot beverage is perfect. If serving at room temperature, iced coffee or cold brew can be very refreshing. Always offer both hot and cold options at a brunch gathering to cater to all preferences.
Serving suggestions for a pairing experience are simple. Present the coffee in a carafe or a French press for guests to serve themselves. For wine, a small pour in a dessert wine glass is sufficient. Provide sugar, milk, and lemon slices on the side so everyone can customize their drink to their taste alongside their homemade pastry.
Storage and Shelf Life
Storage methods depend on how soon you plan to eat them. For optimal freshness, store completely cooled danishes in a single layer in an airtight container at room temperature for up to 24 hours. Do not stack them, as the weight will crush the delicate layers. If you need to store them longer, the refrigerator is necessary, though it will soften the pastry.
Temperature requirements are specific. Room temperature storage is best for short-term, preserving the pastry’s texture. The refrigerator (below 40°F) extends shelf life but introduces moisture that makes the pastry lose its crispness. The freezer is for long-term storage, effectively pausing the clock on freshness for up to two months.
Container recommendations include airtight cake carriers or storage containers with a flat base. You can also store them on a plate tightly wrapped with plastic wrap. If using the refrigerator, place a paper towel underneath the pastries in the container to absorb any excess moisture that might condense.
Signs of spoilage are usually visible or olfactory. Discard any danishes that develop mold, an off smell, or an excessively soggy or slimy texture. The cream cheese filling is perishable, so err on the side of caution if they have been at room temperature for more than two days.
Reheating instructions are crucial for restoring texture. To recrisp, place refrigerated danishes on a baking sheet in a 350°F oven for 5-7 minutes. This will warm the filling and re-crisp the pastry. The microwave is not recommended, as it steams the pastry and makes it tough and chewy.
Freezing guidelines are simple for make-ahead ease. Freeze unbaked, assembled danishes on a parchment-lined sheet until solid, then transfer to a freezer bag. Bake from frozen, adding 3-5 minutes to the baking time. You can also freeze baked and cooled danishes; thaw at room temperature and then reheat in the oven as described.
Make Ahead Strategies
Prep timeline can be stretched over two days for convenience. Day One: Prepare the cream cheese filling, cover tightly, and refrigerate. Thaw the puff pastry in the refrigerator overnight. Day Two: In the morning, roll, cut, fill, and bake. This split schedule makes fresh danishes achievable for a special breakfast with minimal morning effort.
Storage between steps is straightforward. The chilled filling will keep for up to two days in the fridge. Let it sit at room temperature for 20-30 minutes before using to soften slightly for easy scooping. The thawed puff pastry dough can be kept refrigerated in its original packaging for up to 48 hours before it may begin to over-proof.
Quality impact assessment shows that make-ahead is highly effective. The filling benefits from the flavors melding overnight. The key is keeping all components very cold until baking. The final baked product from a make-ahead assembly is virtually indistinguishable from one made completely fresh in a single session.
Assembly tips for make-ahead: Assemble the danishes completely on a parchment-lined baking sheet. Instead of immediately baking, place the entire sheet, uncovered, in the freezer for one hour until solid. Once frozen, you can transfer them to a container or bag. This “flash freeze” prevents them from sticking together and allows for baking straight from the freezer.
Reheating guidelines for pre-baked danishes are simple. If you baked them a day ahead, store at room temperature covered loosely. Reheat in a 325°F oven for 5-8 minutes to refresh. The glaze or powdered sugar should be applied after reheating, not before storage, to maintain its appearance.
Fresh element additions should always be done last. If using fresh fruit as a topping, add it after reheating or just before serving. Any liquid-based glaze should also be applied after the pastries have been reheated and have cooled slightly, so it sets nicely on the warm surface.
Scaling Instructions
Halving the recipe is simple for smaller households. Use half a sheet of puff pastry (about 8 ounces) and simply halve all the filling ingredients. The baking time may reduce by 1-2 minutes, so watch closely. All other techniques and temperatures remain the same. This yields four perfect danishes, ideal for a weekend treat for two with leftovers.
Doubling or tripling is easy for a crowd. Work in batches to keep the pastry cold. Roll and cut one sheet of pastry at a time, returning the unused sheets to the fridge. You may need to bake in multiple batches or on multiple oven racks; if so, rotate the sheets top-to-bottom and front-to-back halfway through baking for even results.
Equipment adjustments for scaling up are minimal. Ensure you have enough baking sheets; if you only have two, you can bake in successive batches. Keep the unbaked pastries for the second batch chilled in the fridge while the first bakes. A larger mixing bowl will be needed for a double or triple batch of filling.
Timing modifications are minor when scaling. A double batch will not take double the active prep time, as mixing a larger quantity of filling is only slightly longer. The main consideration is oven space and potential batch baking, which adds to the total clock time but not your hands-on work.
Storage considerations for large batches are important. If making a big batch for an event, it is often best to bake them the same day for peak freshness. However, you can freeze the unbaked, assembled pastries as described and bake only the number you need, ensuring fresh danishes on multiple occasions.
Nutritional Deep Dive
Macro breakdown for one cheese danish is typical of a rich pastry. It will be moderately high in carbohydrates from the pastry and sugar, high in fat from the butter, cream cheese, and egg, and provide a modest amount of protein from the cheese and egg. The exact numbers depend on specific brands and any modifications, but it is an energy-dense food best enjoyed as an occasional treat within a balanced diet.
Micronutrient analysis reveals some benefits amidst the indulgence. Cream cheese provides calcium and vitamin A. Eggs contribute choline and selenium. Using all-butter pastry provides vitamin K2 and conjugated linoleic acid (CLA), which are associated with certain health benefits in moderation. However, this is not a significant source of fiber or a wide range of vitamins and minerals.
Health benefits are more about enjoyment and mental well-being than physical nutrition. The pleasure of eating a beautifully made, homemade treat can be part of a healthy relationship with food. Controlling the ingredients allows you to avoid trans fats and excessive additives found in some commercial versions.
Dietary considerations are important for those with restrictions. This recipe contains gluten, dairy, eggs, and refined sugar. It is not suitable for vegan, paleo, or keto diets in its standard form. However, as outlined in the adaptations section, modifications can be made to accommodate some of these needs with varying degrees of success in replicating the original texture.
Portion analysis is key to enjoyment. One danish is a satisfying serving. Its richness means you are unlikely to need a second, which helps with natural portion control. Serving it as part of a meal with protein and fiber, like eggs and fruit, can help balance the glycemic impact and keep you feeling satisfied longer.
Weight management tips involve mindful eating. Savor one danish slowly with a cup of coffee, focusing on the flavors and textures. This practice increases satisfaction and can prevent overindulgence. If you are baking a batch, consider giving some away or freezing individual portions to avoid having a large quantity of tempting treats readily available.
Dietary Adaptations
Gluten-free adaptation requires a reliable gluten-free puff pastry, which can be found in the freezer section of some specialty stores or made from scratch using a gluten-free flour blend. Ensure all other ingredients, like cornstarch, are certified gluten-free. The texture may be slightly less flaky but can still be delicious.
Dairy-free adaptation uses plant-based cream cheese and a vegan butter-based puff pastry. Note that the flavor will differ, and some vegan cream cheeses can be grainier when baked. Look for brands known for good melting properties. A touch of lemon juice can help mimic the tang of dairy cream cheese.
Vegan adaptation builds on the dairy-free version and also replaces the egg wash. For binding in the filling, a cornstarch slurry can help. For the wash, use plant-based milk or a mixture of maple syrup and plant-based milk to promote browning. The filling may not set as firmly without the egg yolk.
Low-carb and Keto adaptations are challenging due to the high-carb nature of flour-based pastry. A potential alternative is to use a fat-head dough or an almond flour-based pastry crust for the base. The filling can be made with full-fat cream cheese and a keto-friendly sweetener like erythritol or monk fruit.
Paleo adaptation also struggles with the grain-based pastry. A nut and seed-based crust sweetened with a small amount of honey or maple syrup could serve as a base. The filling would need to be made with a paleo-approved “cream cheese” made from cashews, though the texture will be different.
Low-FODMAP adaptation is possible with careful ingredient selection. Use lactose-free cream cheese, ensure no high-FODMAP flavors like honey or agave are added, and use only the green parts of lemon zest. The puff pastry must be checked for potential high-FODMAP additives like inulin or high-fructose corn syrup.
Troubleshooting Guide
Texture Issues: If your pastry is not flaky, the butter likely melted before baking. Ensure all ingredients and tools are cold. If the filling is runny, you may have underbaked it, or the cream cheese may have had too much liquid content; adding a tablespoon of flour or cornstarch to the filling can help. If the pastry is tough, you may have overworked the dough when rolling or cutting, which develops gluten in the puff pastry layers.
Flavor Balance: If the danish tastes bland, you may need more salt in the filling or a brighter hit of lemon zest. If it is too sweet, reduce the sugar in the filling by a quarter next time. If the butter flavor is lacking, switch to an all-butter puff pastry brand. Always use pure vanilla extract, not imitation
Print
Homemade Cheese Danish
Description
Flaky, creamy, and absolutely bakery-worthy cheese danishes made fresh from your oven.
Ingredients
For the Crust:
- 1 sheet puff pastry, thawed
- 8 oz cream cheese, softened
- 1/4 cup granulated sugar
- 1 tsp vanilla extract
- 1 egg, beaten (for egg wash)
- 2 tbsp powdered sugar (for dusting)
- 1/4 cup fruit preserves (optional, for topping)
Instructions
1. Prepare the Crust:
- Preheat oven to 400°F (200°C). Line a baking sheet with parchment paper.
- In a bowl, mix cream cheese, granulated sugar, and vanilla until smooth.
- Roll out puff pastry and cut into 4 squares. Place on baking sheet.
- Spoon cream cheese mixture onto the center of each square, leaving edges clear.
- Fold pastry corners over filling, brush with egg wash, and bake for 15-18 minutes until golden.
- Cool slightly, dust with powdered sugar, and add fruit preserves if desired.
Notes
You can customize the seasonings to taste.
I’m Shaykee—born in Morocco, seasoned across continents. From airplane galleys to home kitchens, I share the flavors and stories that shaped my journey.